Wouldn't it be great to transfer your TiVo® DVR recordings to your Mac laptop, iPhone or iPod for viewing on the road? Or save them to DVD or Blu-ray disc to build up your video library? Or copy home videos from your Mac to your TiVo DVR so you can watch them on the big screen at any time? Now you can!
All you need is Toast 10 Titanium and a compatible networked TiVo DVR (click here for instructions on networking your TiVo). You can even set up automatic transfers that work together with your Season Passes, so your favorite shows will be waiting for you on your Mac whenever you want to watch them. You can also edit out unwanted portions from the shows you transfer to save space on your portable player. Here's how:
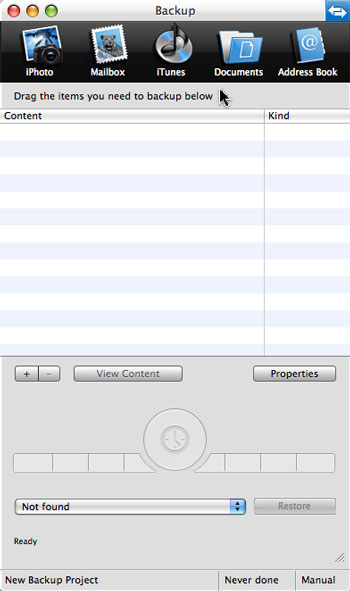
Transfer Shows from TiVo to Mac
Whether you want to send your TiVo shows to your iPhone or burn them to DVD, the first step is to transfer them to your Mac with the TiVo Transfer application. When you install Toast 10, you'll be asked if you want to enable TiVo Transfers. If you didn't check the box at first, you can enable TiVo support later by launching the Toast Setup Assistant from the Toast Help menu.
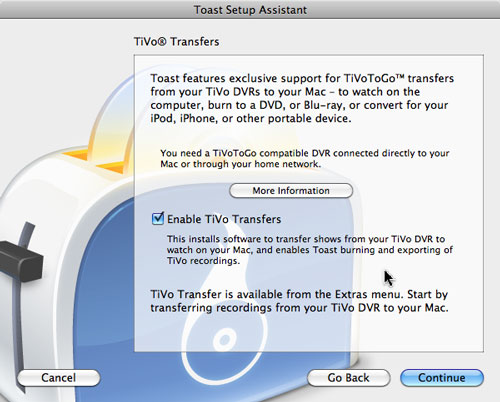
Enabling TiVo Transfers in the Toast Setup Assistant.
Now launch the TiVo Transfer application from the Toast 10 folder, or from the Extras menu in Toast. You'll be asked to enter the Media Access Key for your TiVo, which you only have to do once. To retrieve your key, go to "My TiVo" at TiVo.com, click on "My Account" and sign in. Finally, click on "View Media Access Key," copy the number, and paste it into TiVo Transfer. You can also find your Media Access Key in TiVo Central, under Messages & Settings>>Account & System Information.
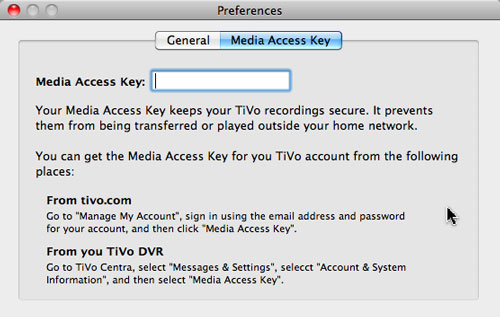
Entering the Media Access Key for your TiVo.
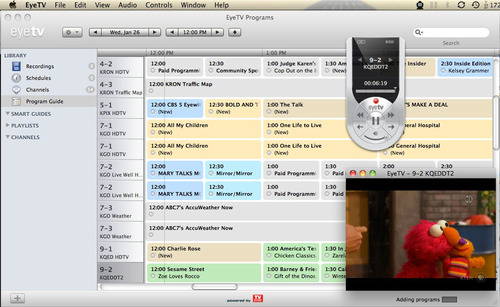
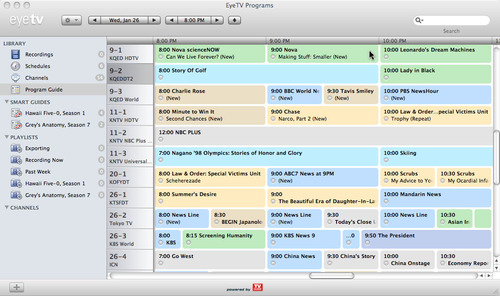
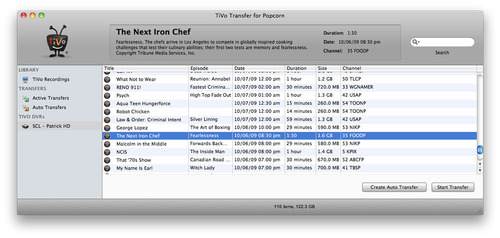
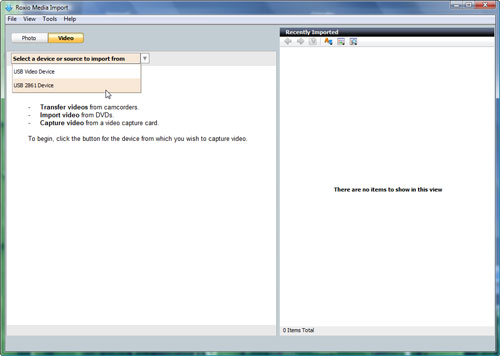
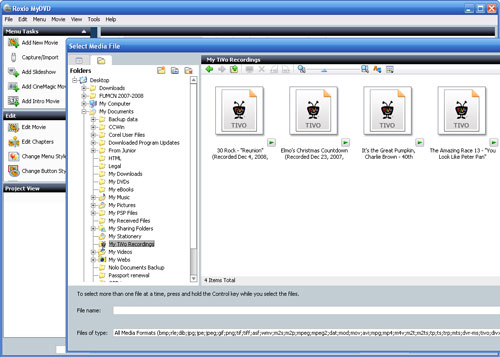
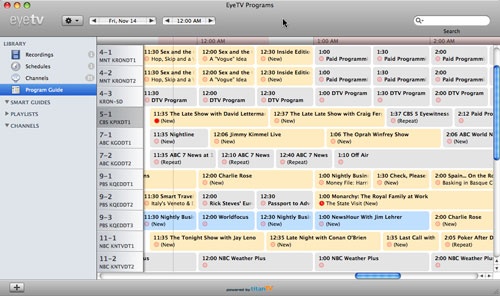
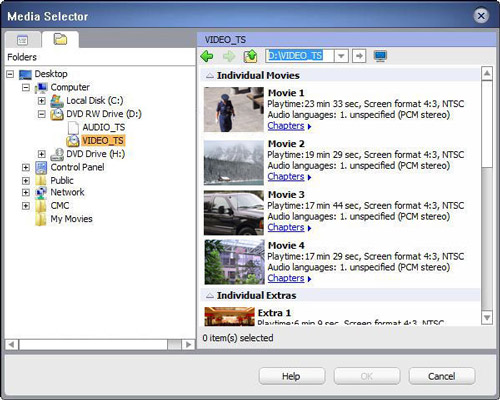
After entering your Media Access Key, you'll see the main window of TiVo Transfer. The TiVo DVRs list at bottom left displays all TiVo DVRs detected on your home network. Click on one to view all shows in the Now Playing List for that DVR.
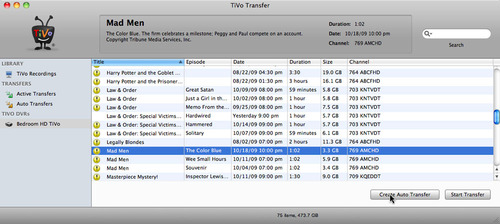
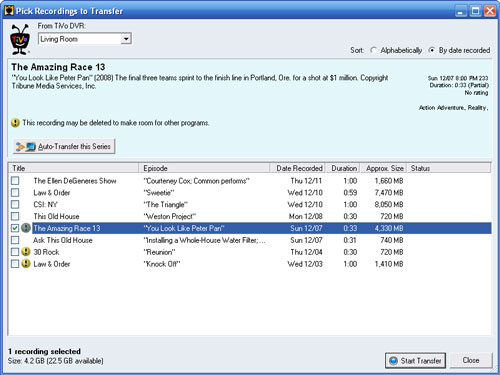
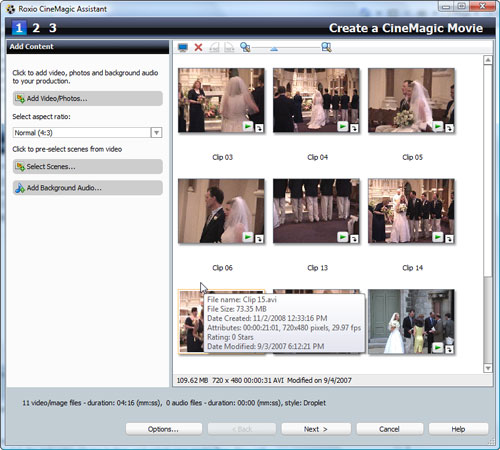
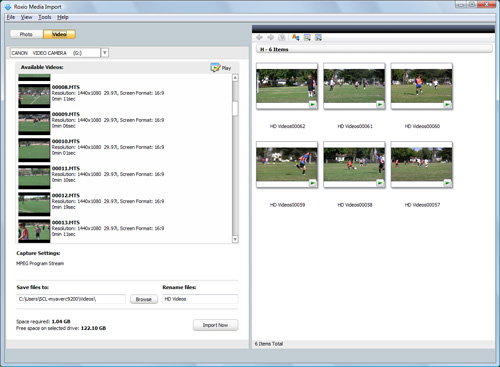
Viewing available recordings on your networked TiVo DVRs (click to enlarge).
Next, choose shows to transfer by selecting them and clicking the Start Transfer button. (Make sure you have enough hard disk space for your transfers, HD recordings can be large.) Some shows (mostly from premium movie channels) may have a red slash next to them, indicating they are copy-protected and cannot be transferred.
The shows will then appear in the Active Transfers list until they have finished copying to your Mac. Transfers happen in the background, and you can keep working on other things in the meantime.
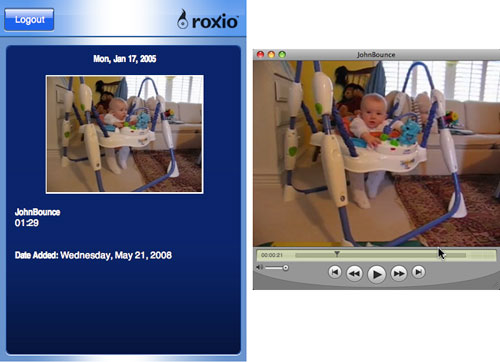
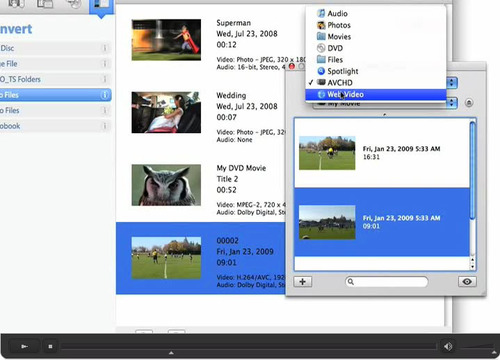
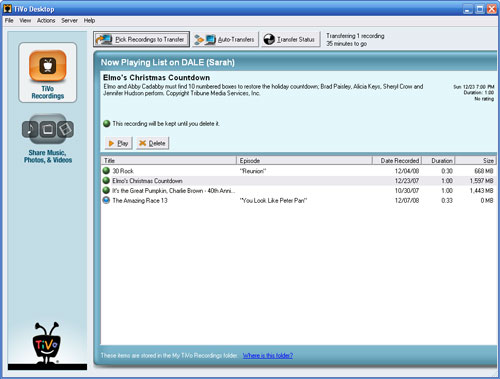
When completed, the shows will be displayed in the TiVo Recordings list. You can watch these shows on your Mac with the Toast Video Player simply by double-clicking.
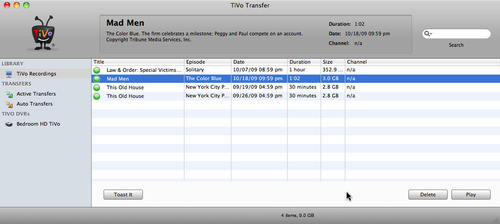
Shows in the TiVo Recordings list are on your Mac and can be used in any Toast video project (click to enlarge).
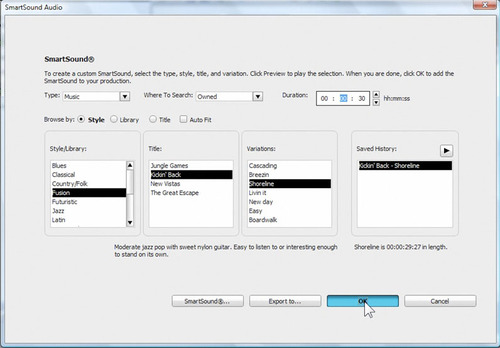
If you have Season Passes on your TiVo, also consider using the Auto Transfer feature, which copies all new recordings of a particular show to your Mac as soon as they appear. With Auto Transfer, the latest episodes of your favorite shows can be transferred and converted overnight, and all ready to view on your Mac or sync to your iPhone or iPod in the morning. Just be sure to select your default conversion format for TiVo recording under the Toast Preferences Audio & Video tab. For conversion to iPod or DVD, read on.
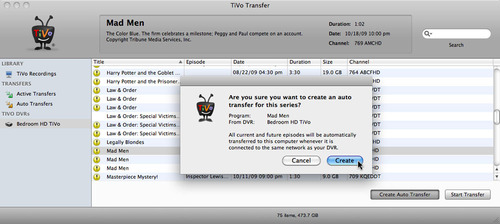
Creating an Auto Transfer for a Season Pass (click to enlarge).
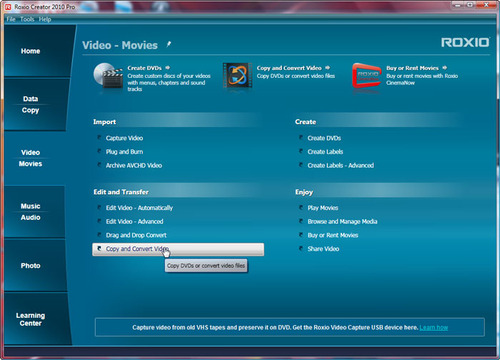
Convert Shows for iPhone or iPod
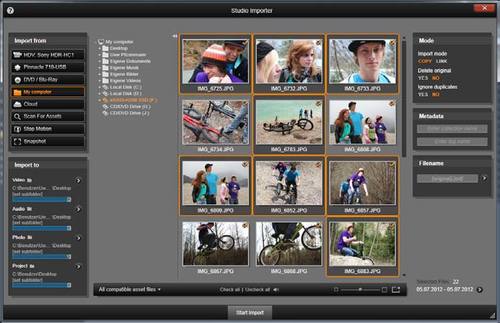
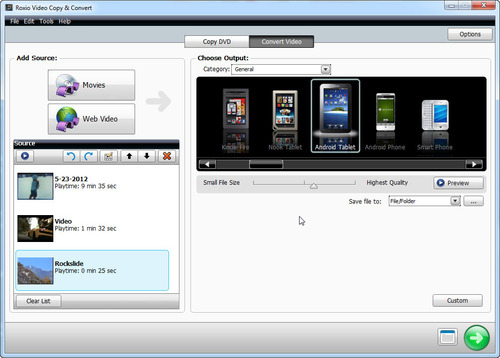
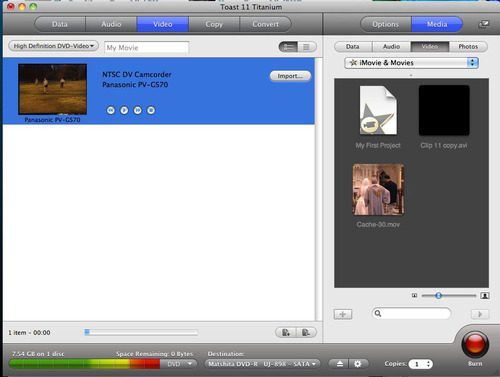
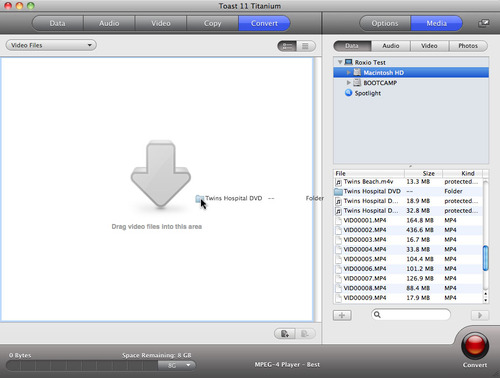
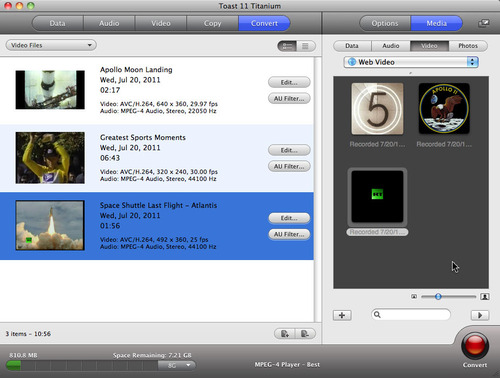
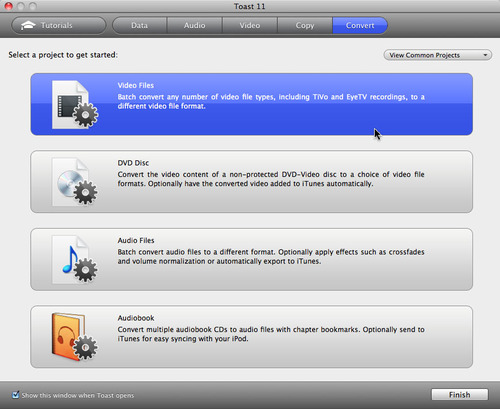
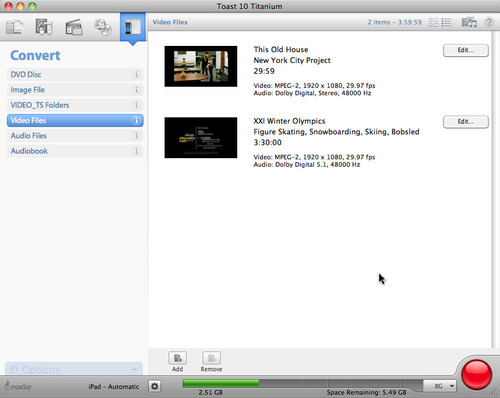
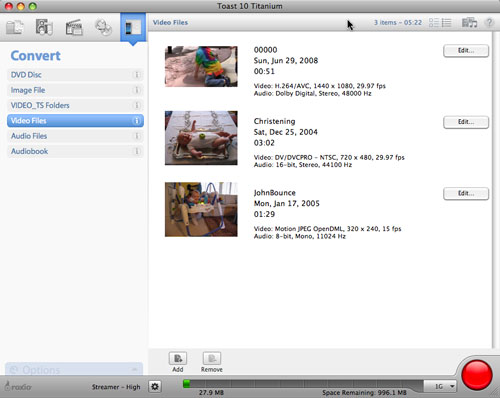
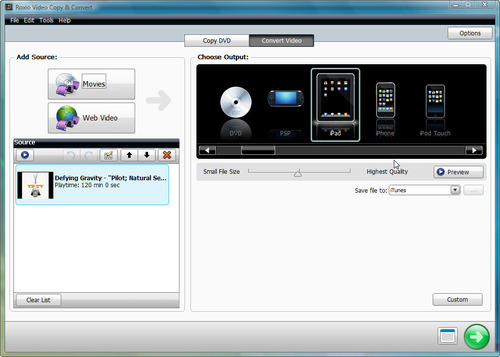
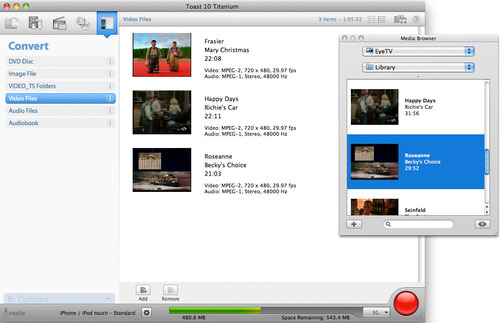
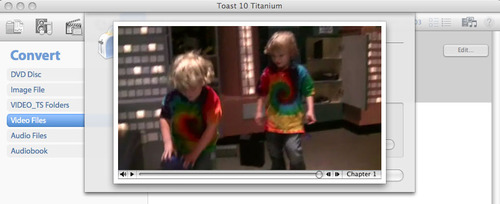
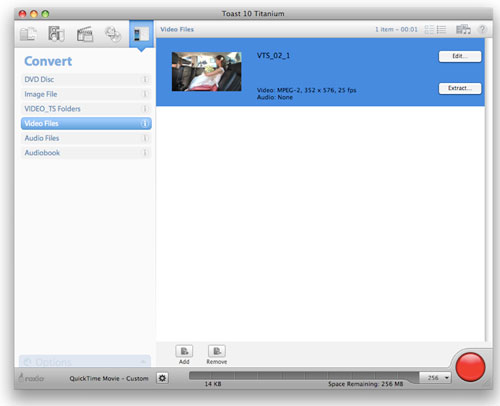
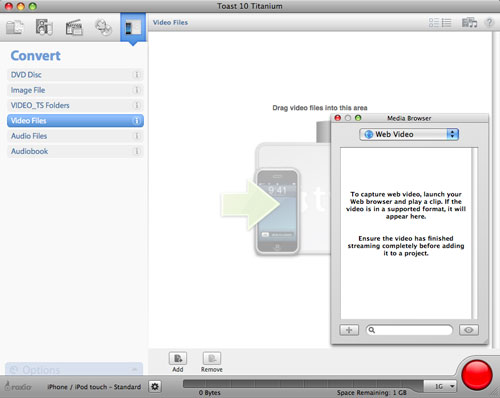
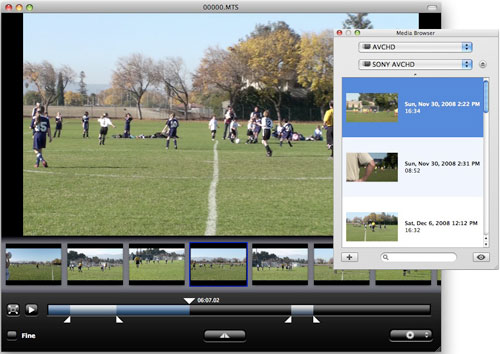
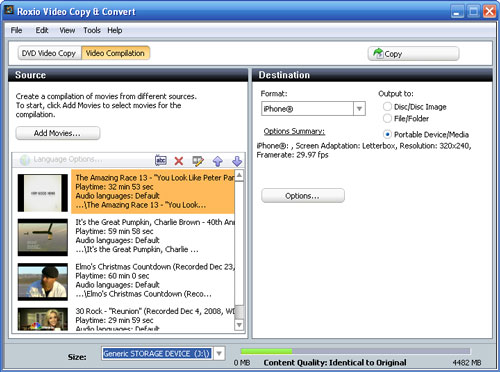
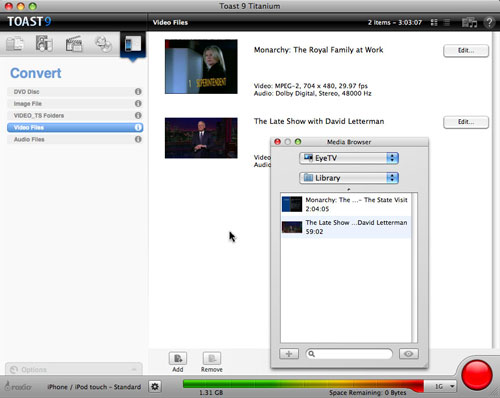
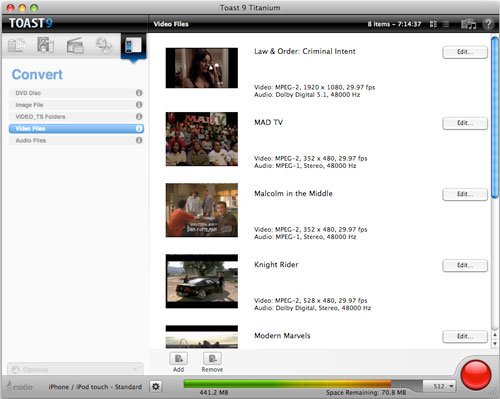
Once you've transferred shows to your Mac, you can use them in your Toast video projects. To convert them for your iPhone, iPod or or other portable video player, open Toast 10, click the Convert tab, and choose the Video Files project type. Next, open the Toast Media Browser from the Window menu, select the TiVo recordings you'd like to convert, and drag them to the Toast window.
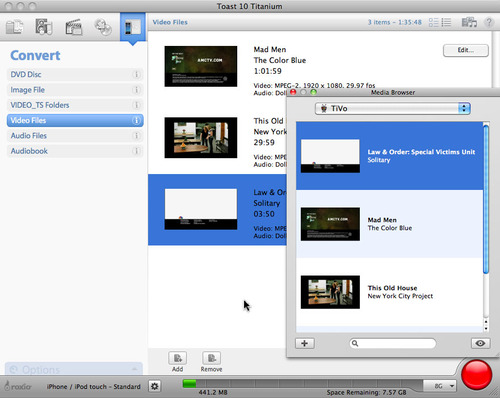
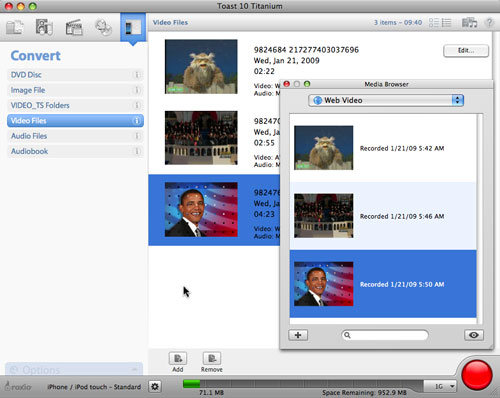
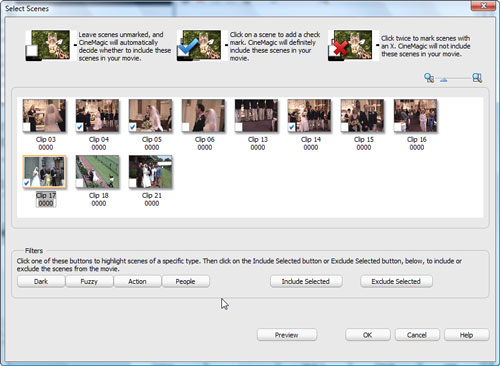
Selecting TiVo shows to convert for iPhone or iPod (click to enlarge).
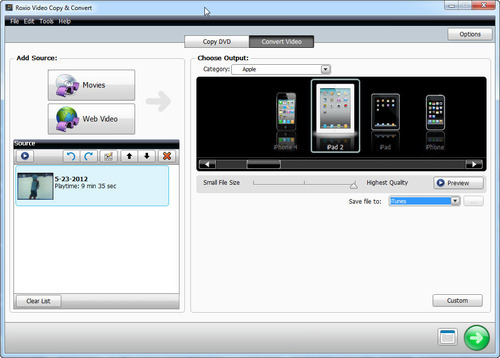
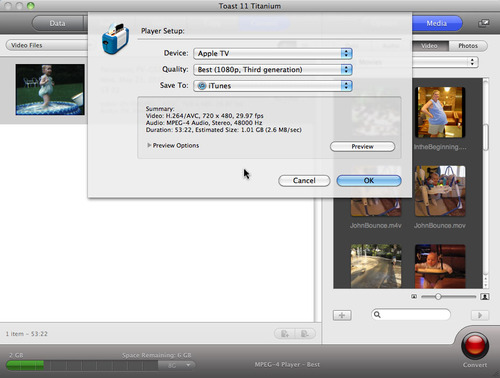
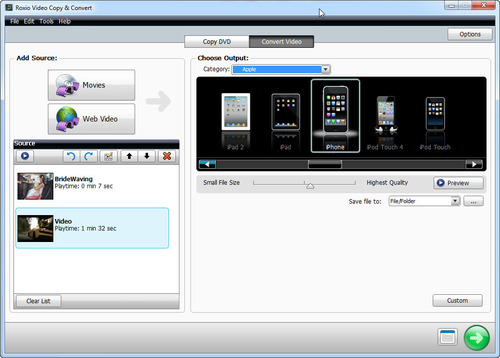
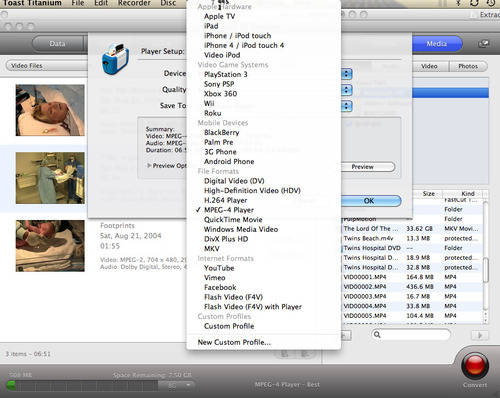
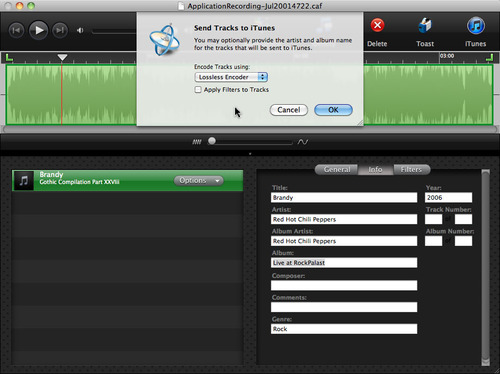
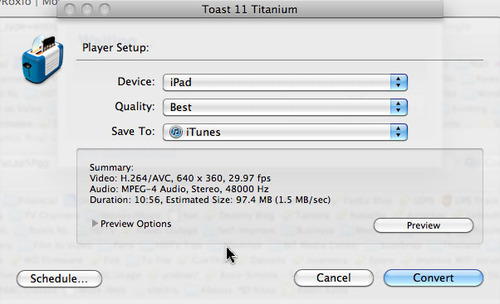
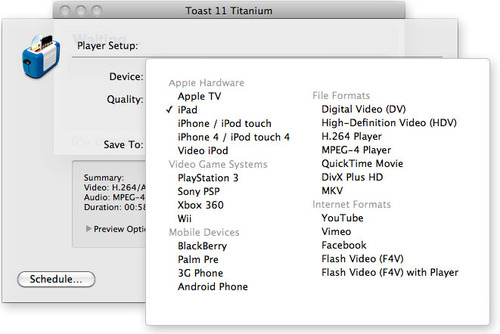
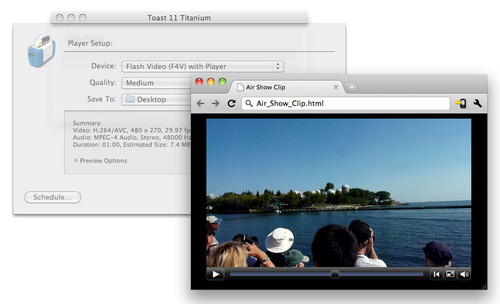
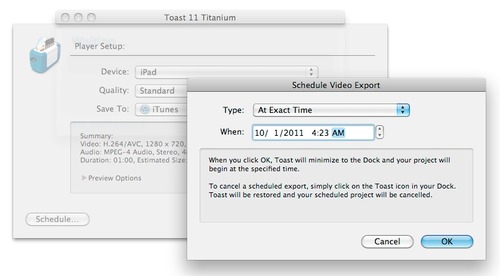
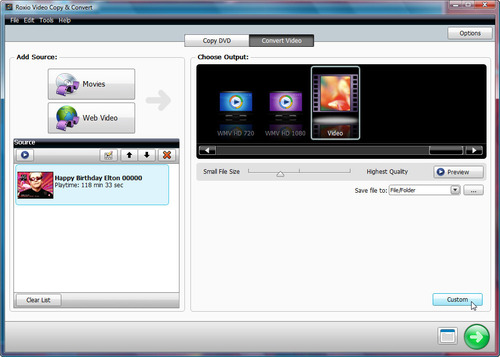
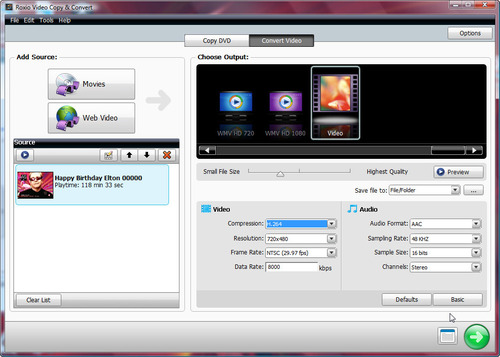
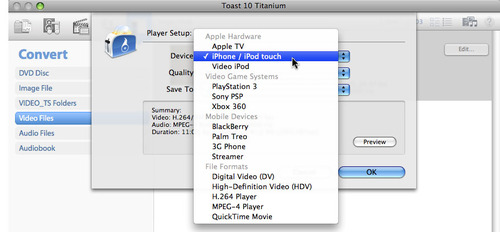
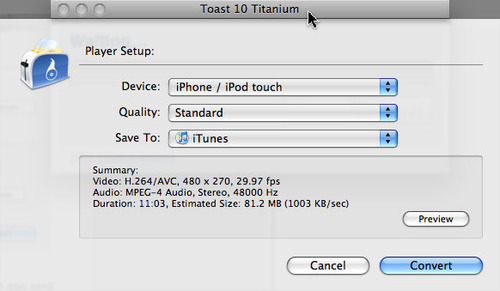
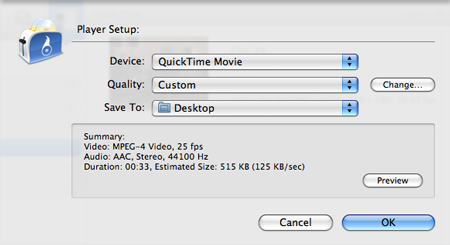
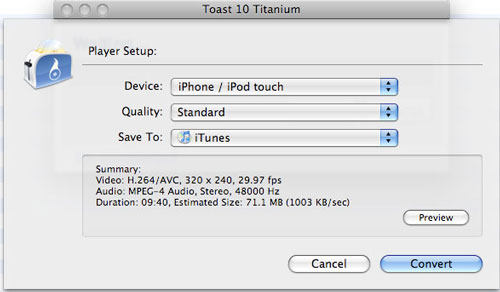
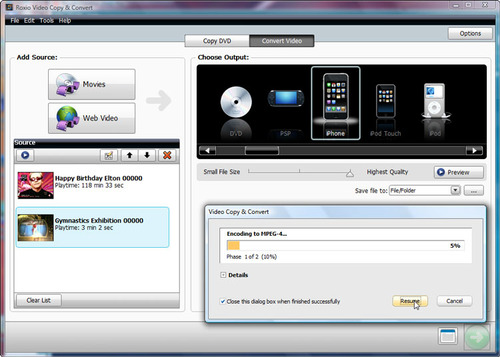
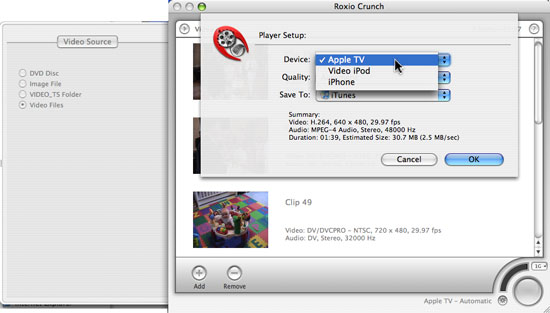
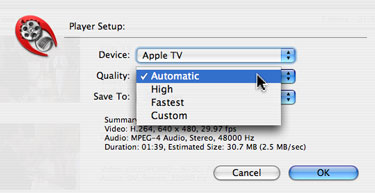
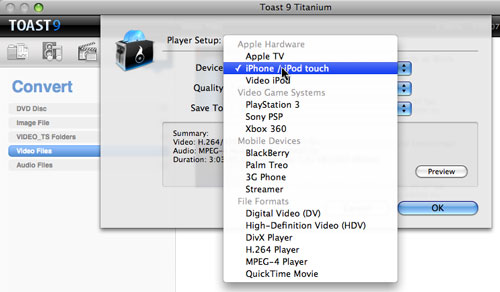
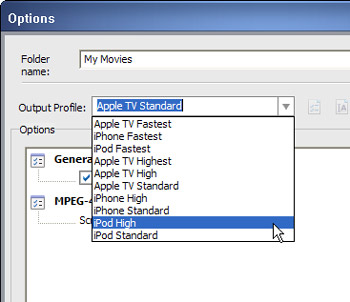
Now click the Player Setup button at bottom left and select your portable player (such as iPhone/iPod, PSP or BlackBerry) from the drop-down list that appears. Also select a quality level (higher quality takes more space) and a destination for the converted videos. Here, we've chosen to send the converted videos directly to iTunes, since we will be syncing them to an iPhone. You can also save them to any location on your hard drive, or send them directly to Roxio Streamer for remote viewing via the Web (read more about Streamer below).
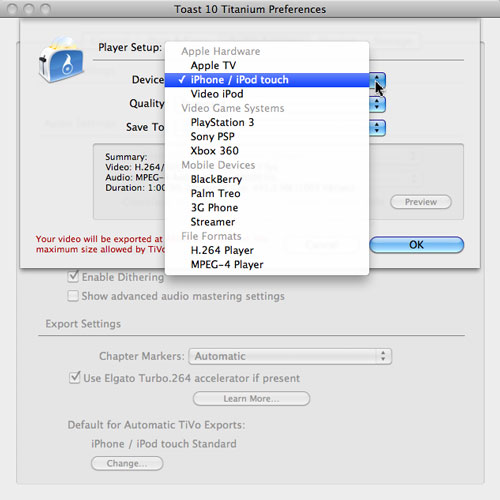
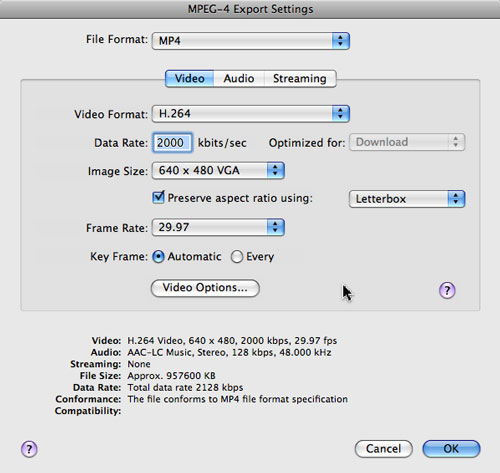
Selecting the iPhone/iPod conversion format.
At this point you can click the red Export button and start the conversion (which can be paused and resumed at any time), but you can also take a little time to trim out unwanted portions of the videos first. This has the advantage of saving space on your portable player.
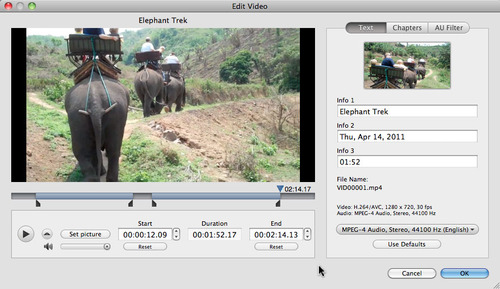
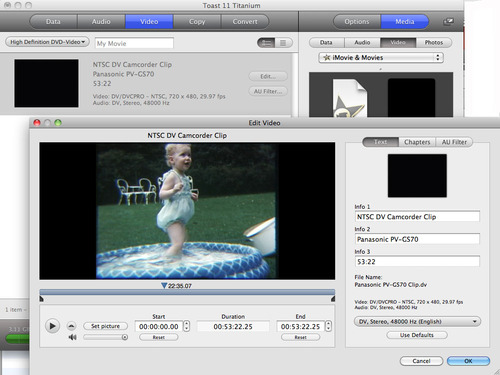
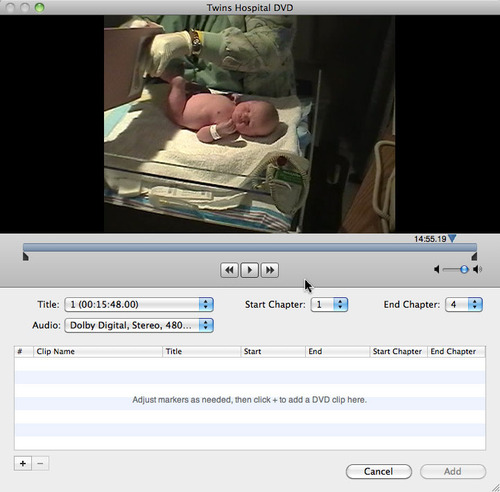
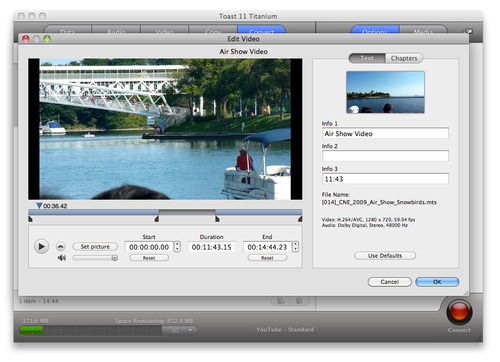
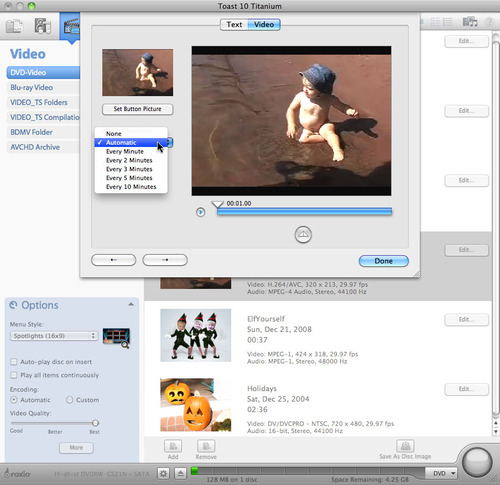
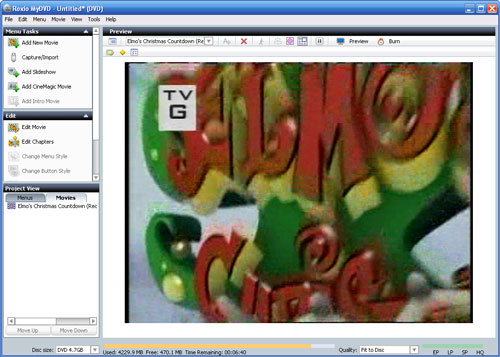
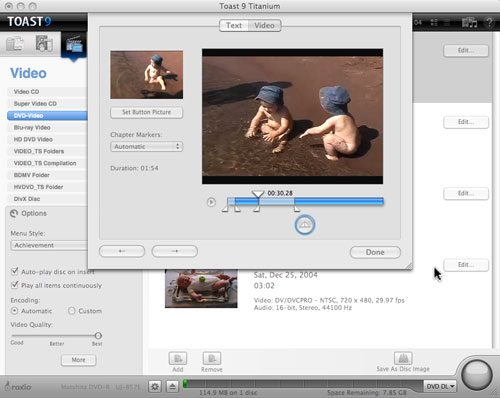
To trim a video, first click the Edit button next to it. Then click Edit again within the box that appears. This will open the editing window.
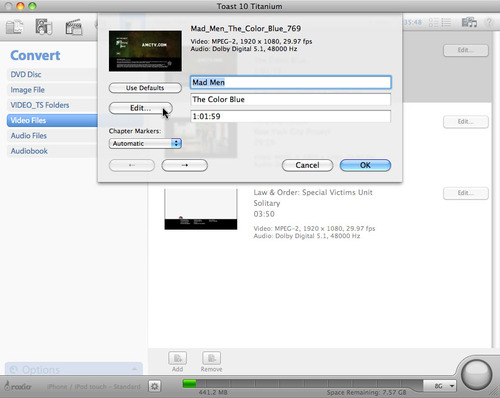
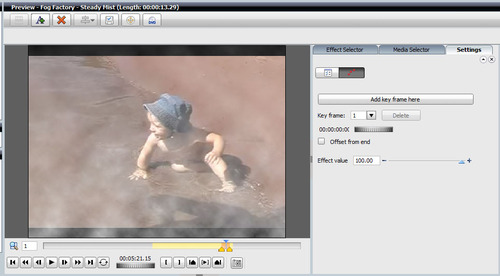
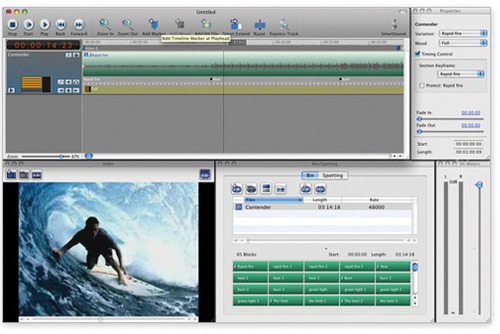
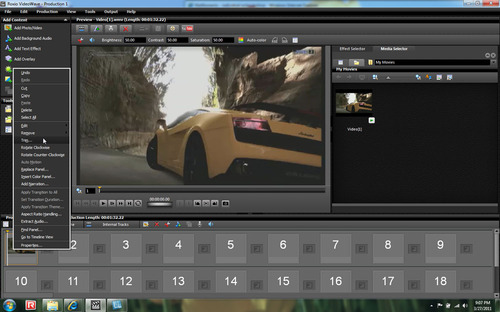
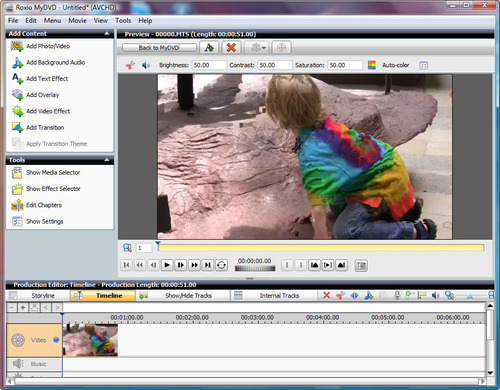
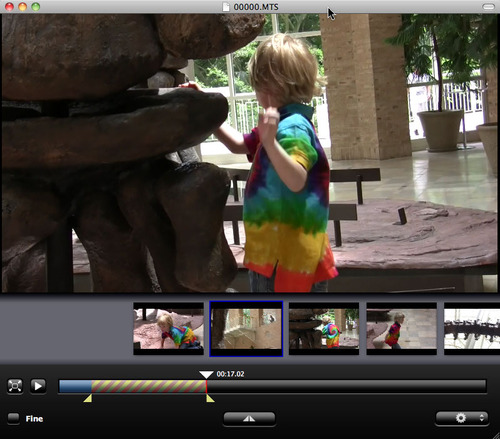
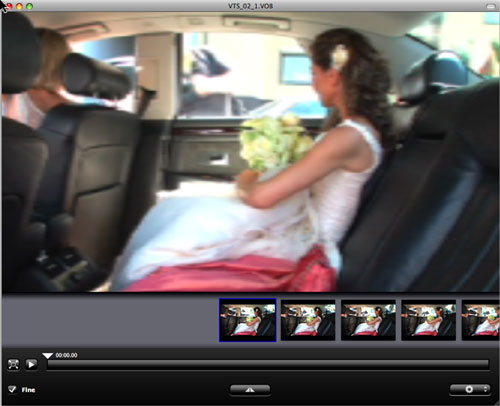
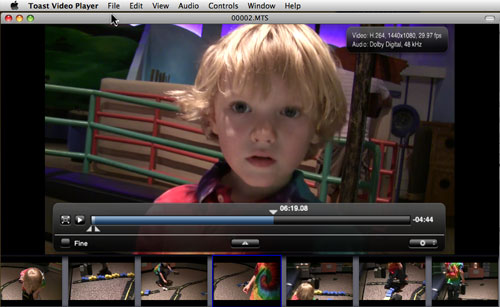
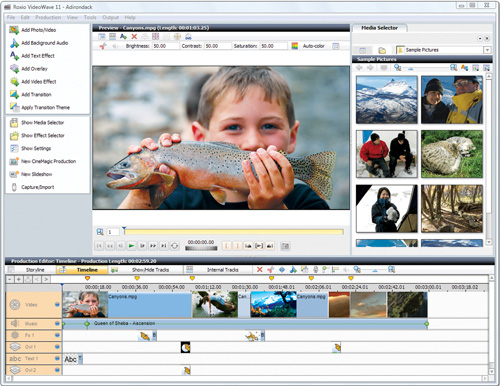
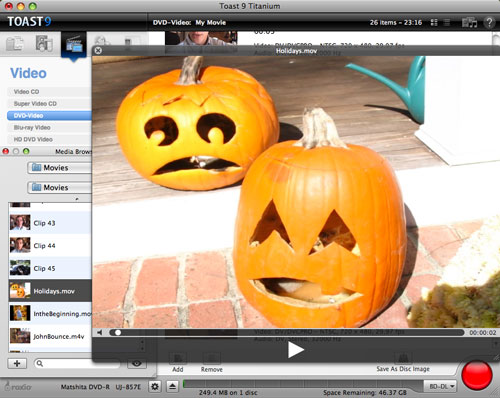
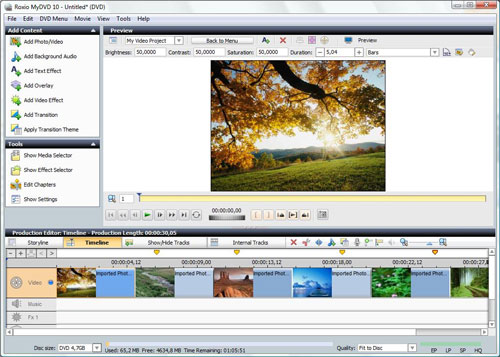
Opening the Toast video editing window (click to enlarge).
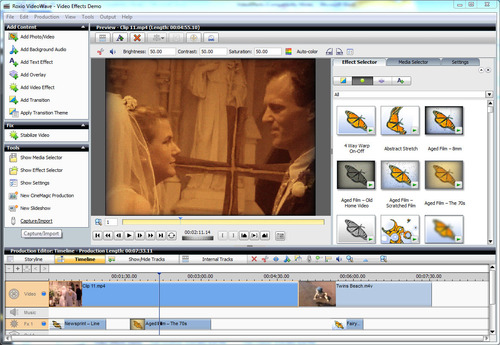
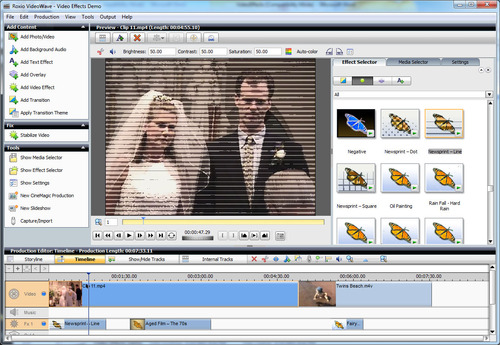
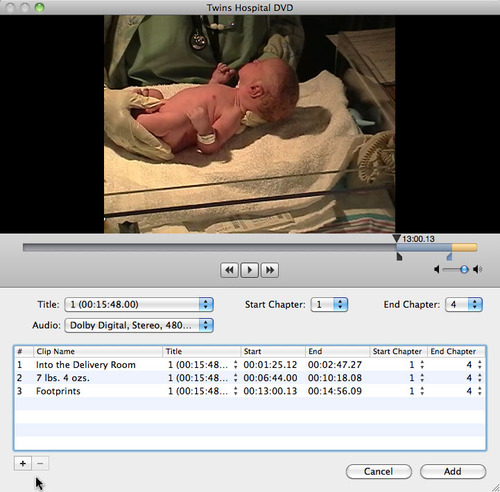
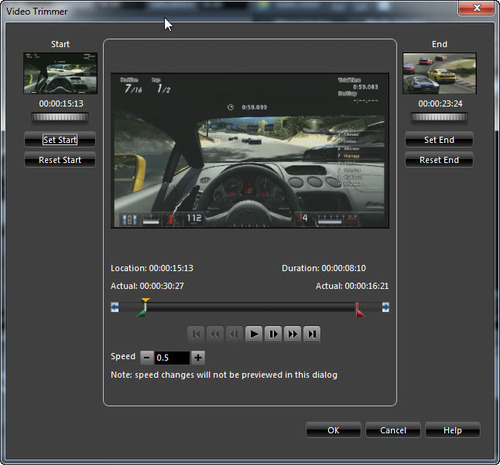
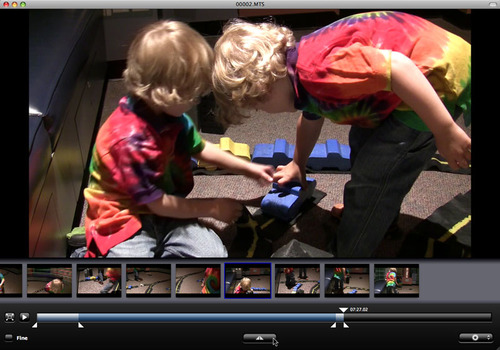
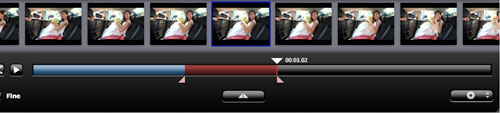
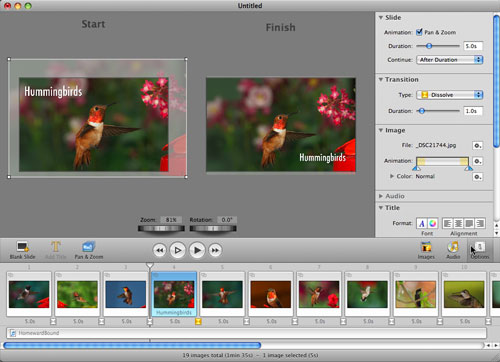
To trim out any portion, simply move the play head at the top of the timeline bar to the point at which you want to start cutting, and then click the trim button at bottom, which inserts a set of two markers at that point. Then grab the right-hand marker and move it to the place where you want to stop cutting. The video in between the two markers, represented by hash marks, will be trimmed out. Keep inserting more markers to trim out more portions. When you're finished, your video will look something like this:
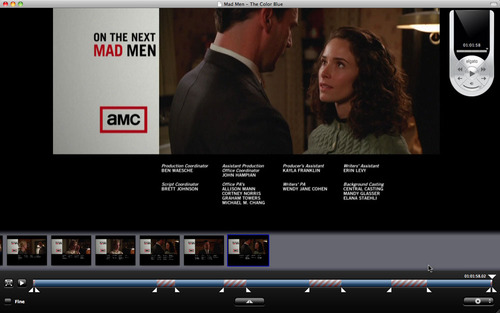
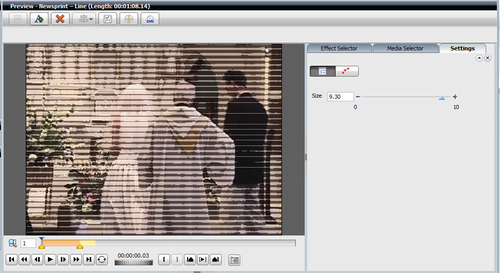
Trimming unwanted portions from a TiVo show (click to enlarge).
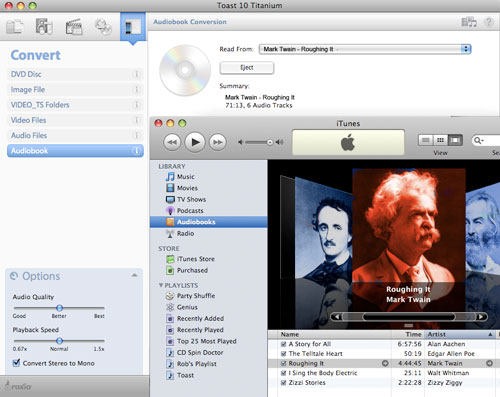
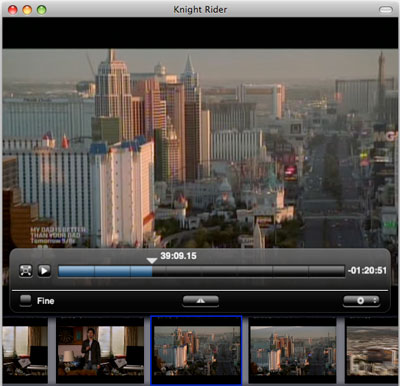
Now choose Save from the Edit menu to save your changes and close the editing window. Thanks to trimming, Mad Men has now been reduced from 1:01:59 to 47:08, a 24 percent space savings. Finally, click the red Export button to start the conversion.
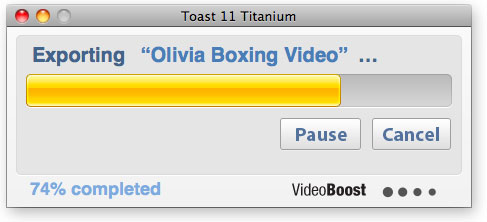
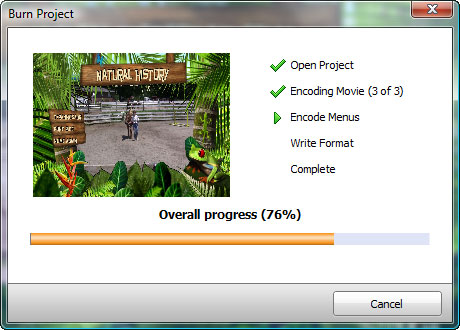
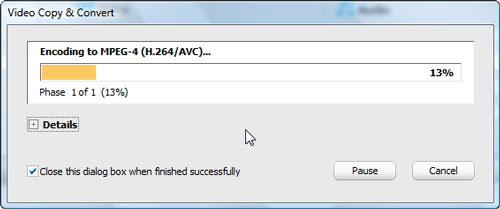
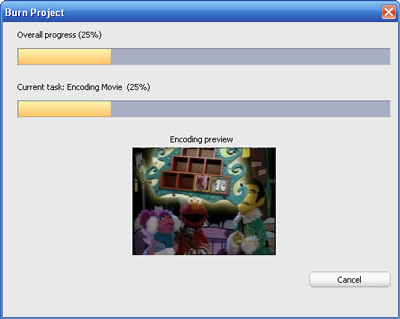
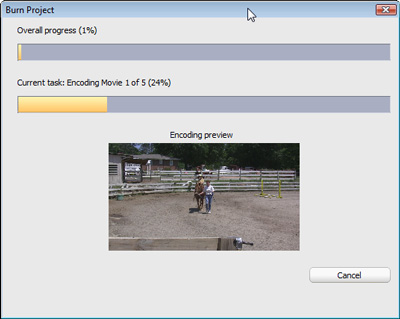
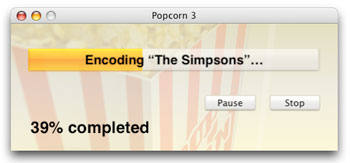
The conversion process will take a while, and you'll see an encoding progress bar. Once finished, open iTunes and check out your new videos! You can play them back within iTunes, or sync them to your iPod or iPhone next time you connect.
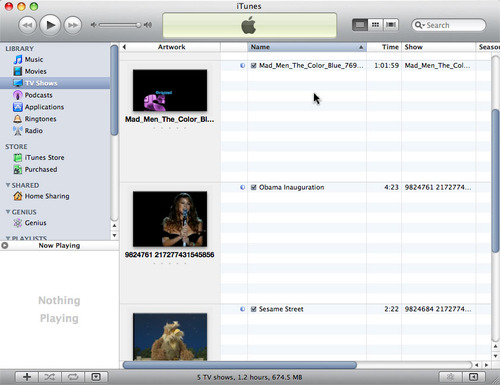
Converted TiVo shows in iTunes, ready for syncing to iPhone or iPod (click to enlarge).
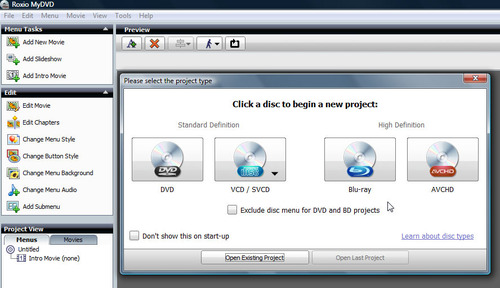
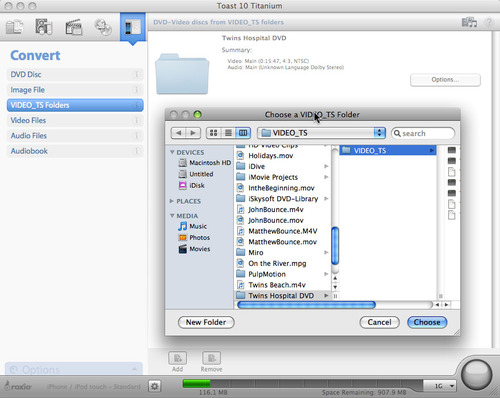
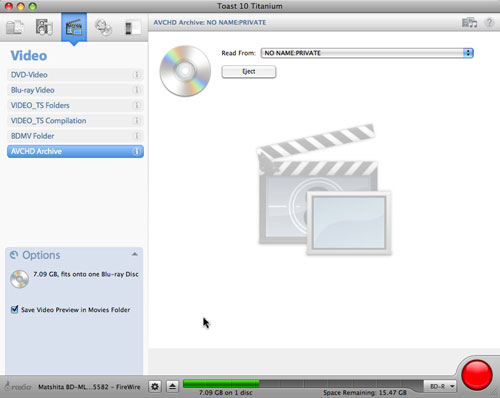
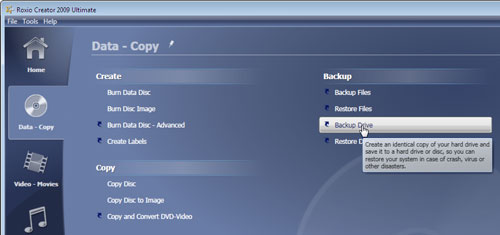
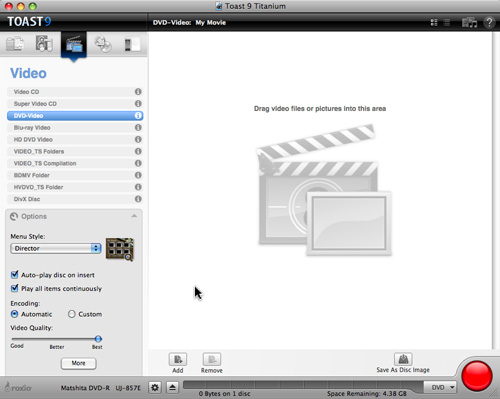
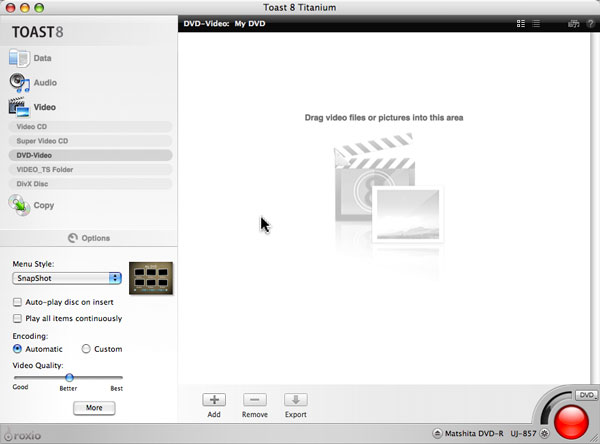
Burn Shows to DVD or Blu-ray Disc
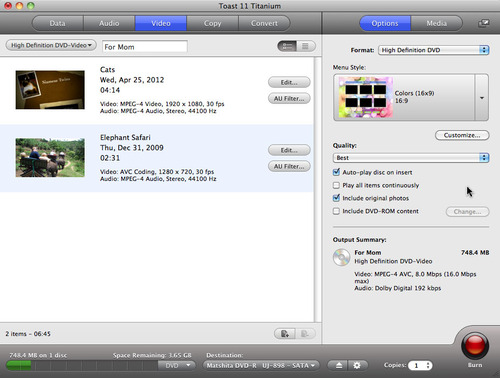
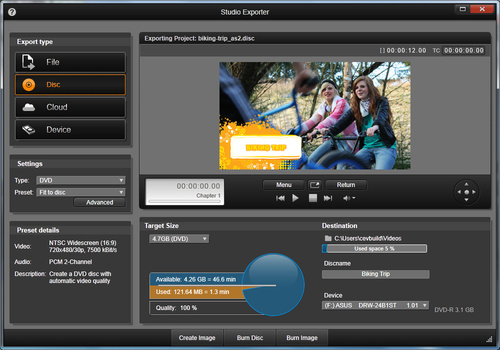
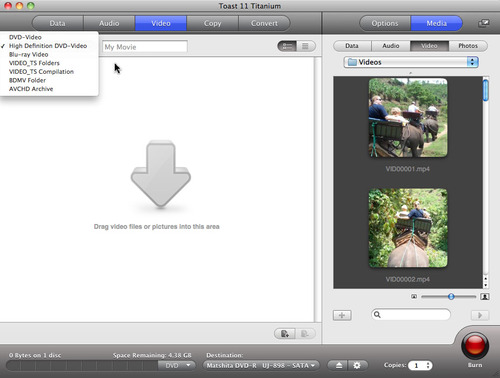
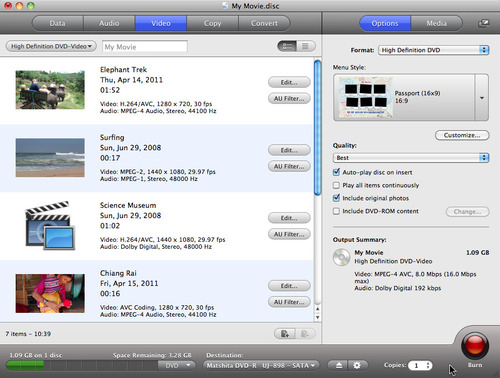
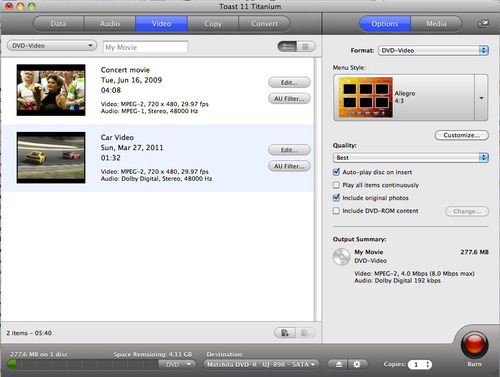
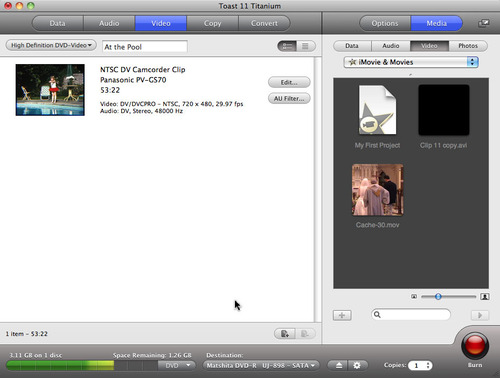
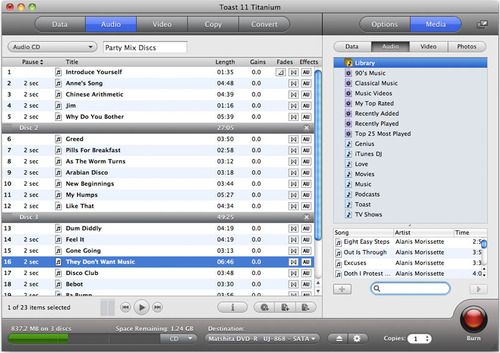
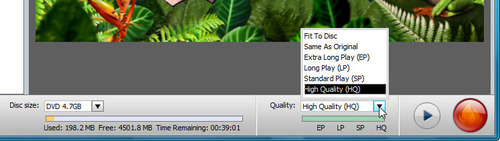
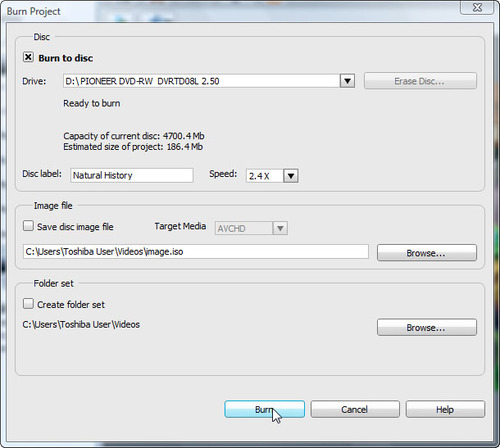
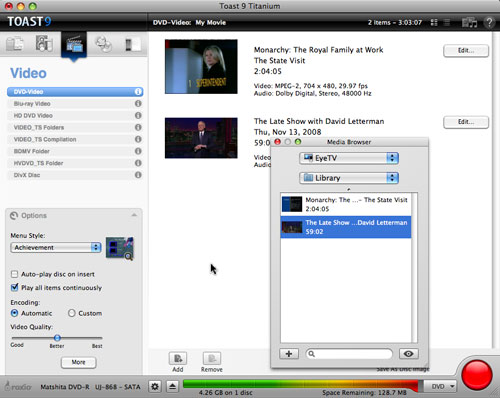
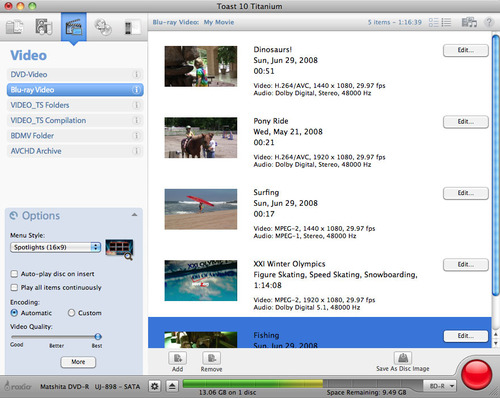
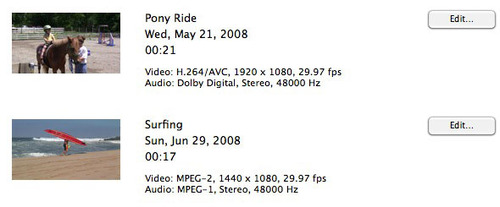
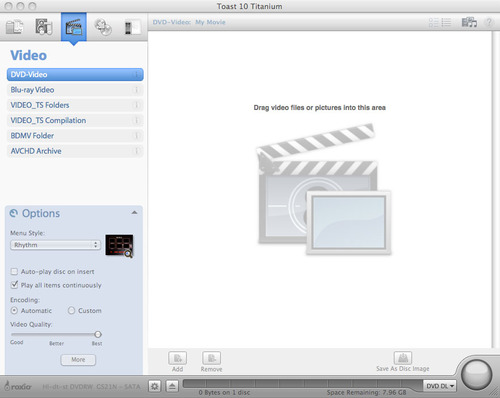
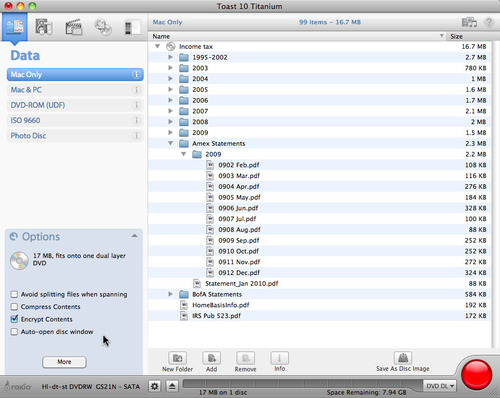
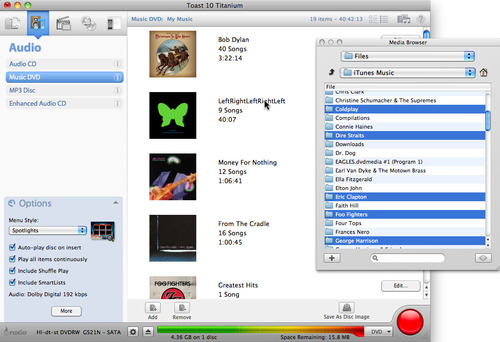
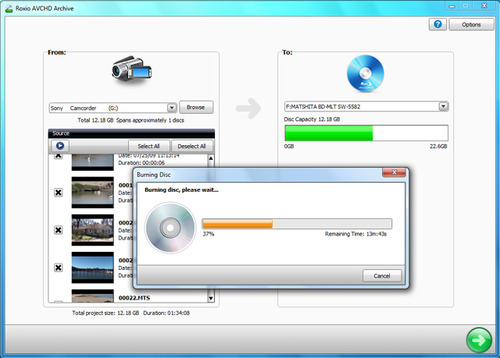
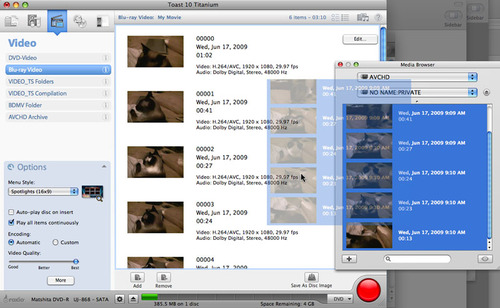
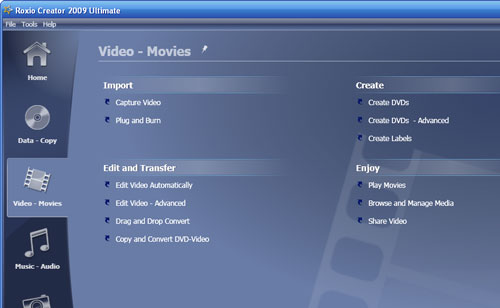
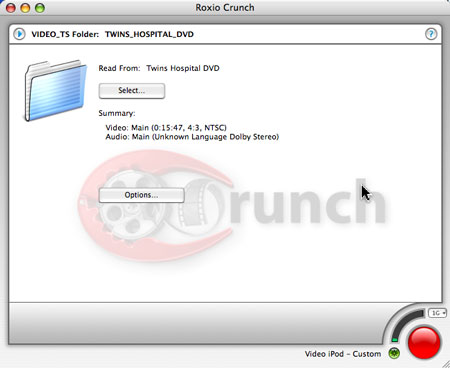
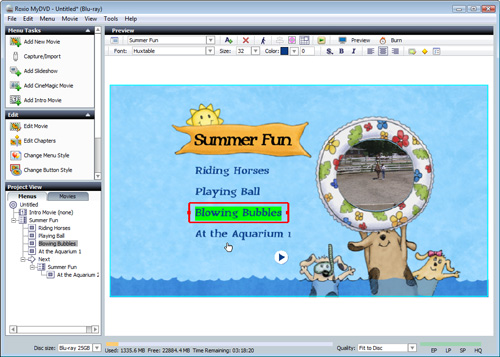
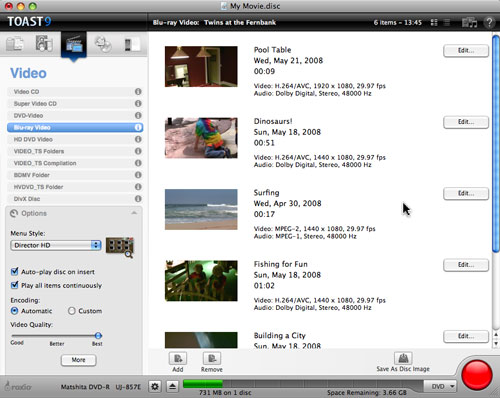
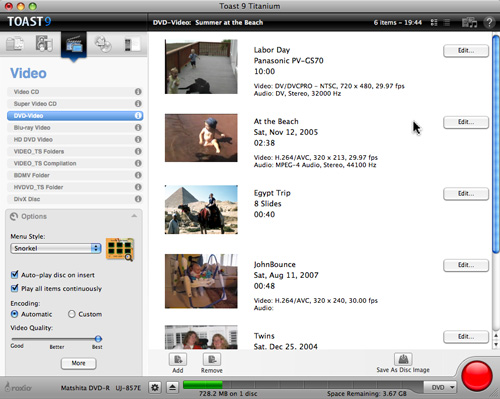
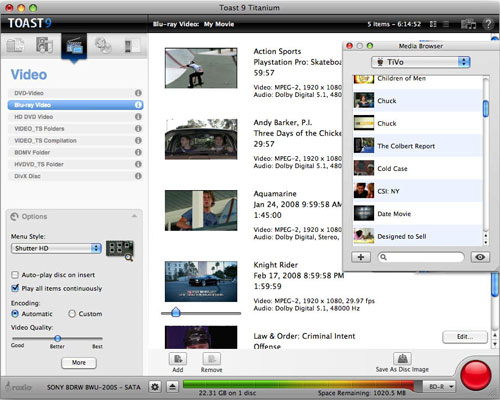
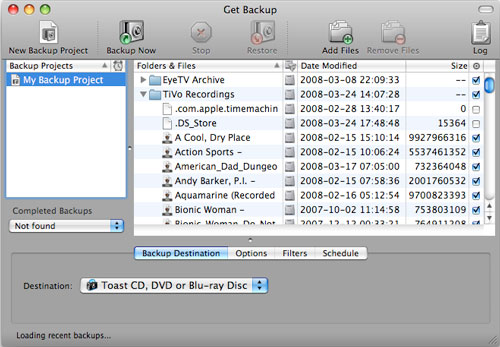
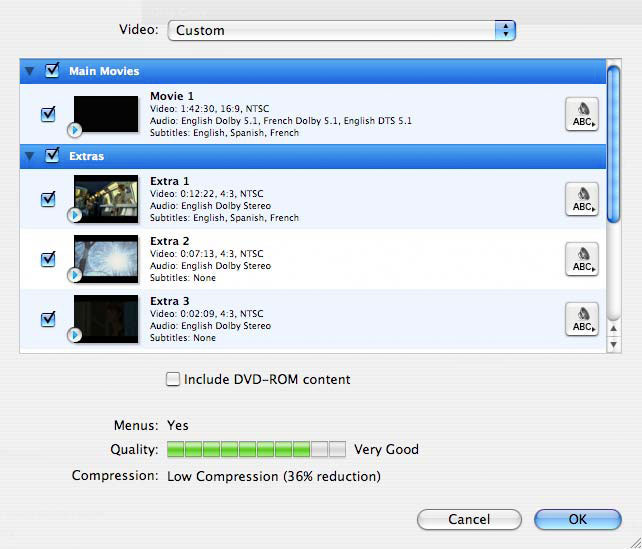
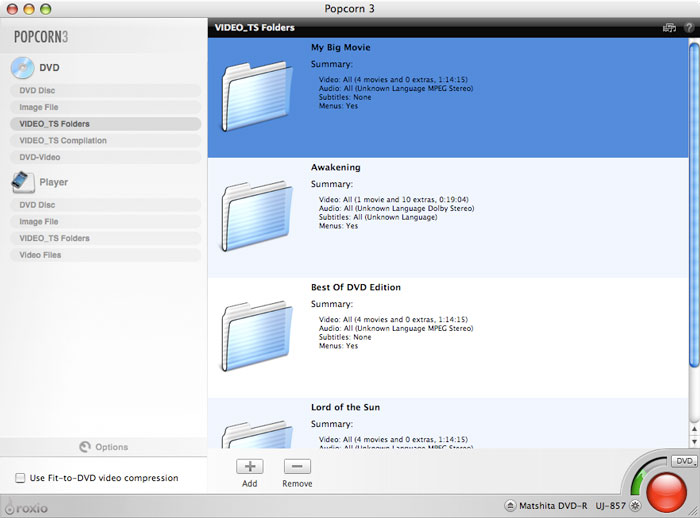
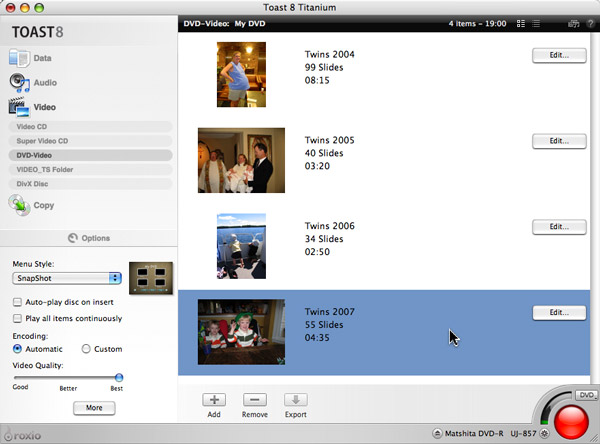
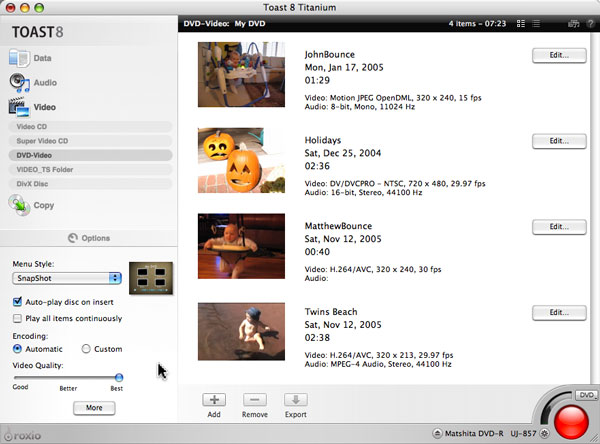
Archiving shows to DVD or Blu-ray disc is a great way to free up space on your TiVo and build up your video library. You can then play them back later on your TV or computer at any time. To archive a show, simply start a new DVD-Video or Blu-ray Video project in Toast, open the Media Browser from the Window menu, and select shows to burn from the list of TiVo recordings on your Mac (as illustrated in the previous section). The bar at the bottom will tell you how much disc space is used by your selections, and how much is still available.
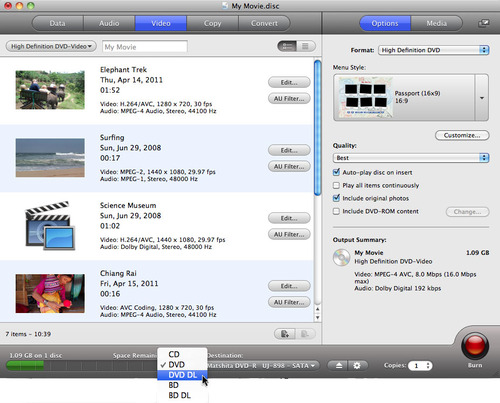
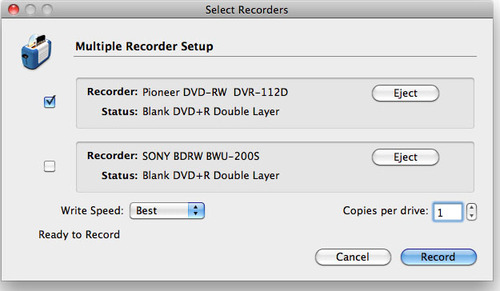
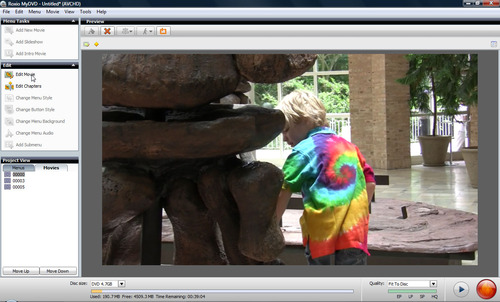
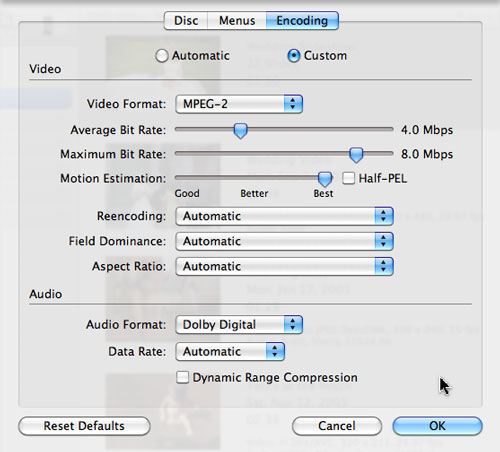
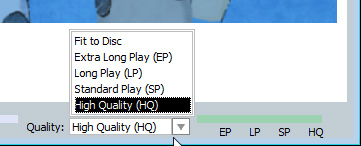
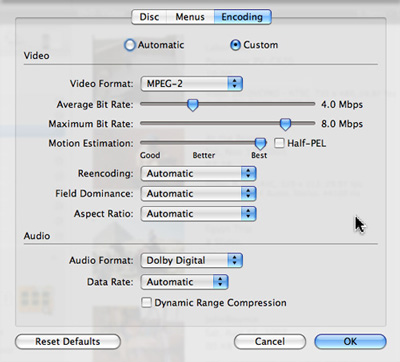
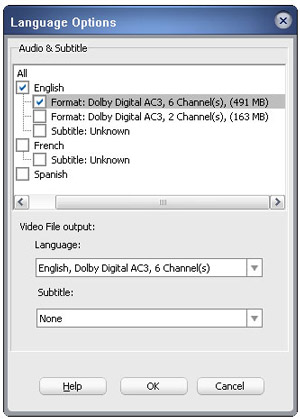
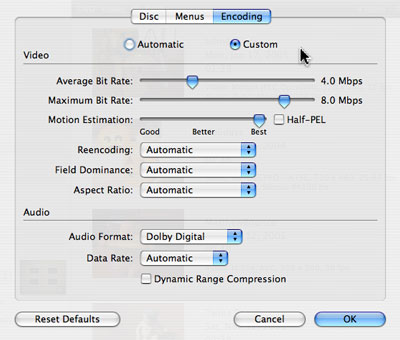
If you have a Blu-ray drive, you can fit two hours of full-quality HD video on a 25GB disc, and four hours on a 50GB disc. You can also burn HD recordings to DVD media that can be played in a set-top Blu-ray player, and they will be compressed as needed to fit on the disc. Simply choose the type of disc you want to use (such as single or dual-layer DVD or Blu-ray) from the drop-down list at lower right. Note that Blu-ray and HD recording requires the Toast HD/BD Plug-in (available separately, or included with Toast 10 Pro).
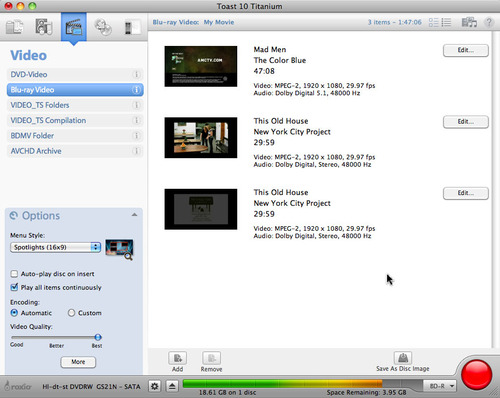
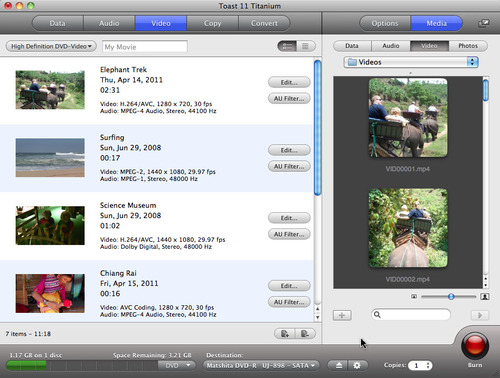
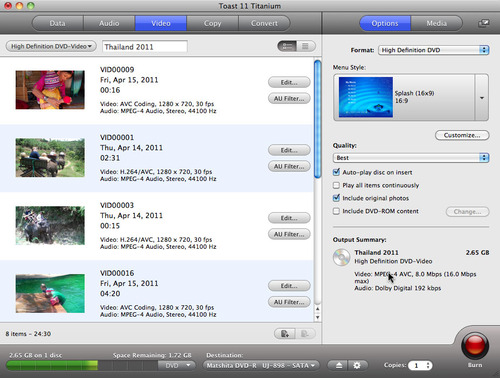
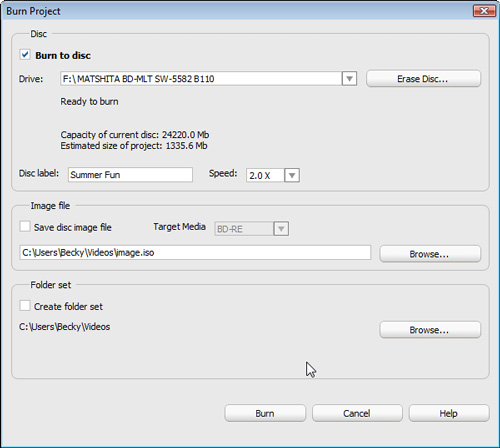
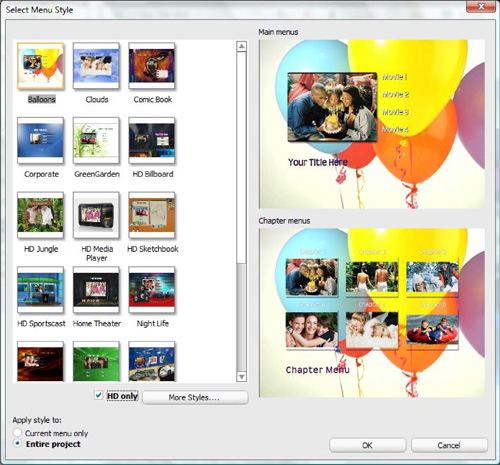
Burning high-definition TiVo shows to a Blu-ray disc (click to enlarge).
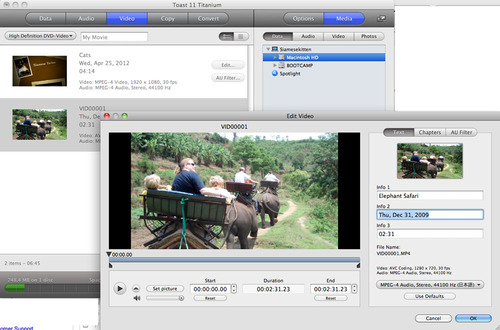
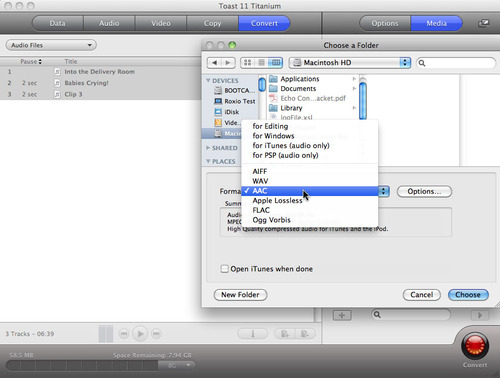
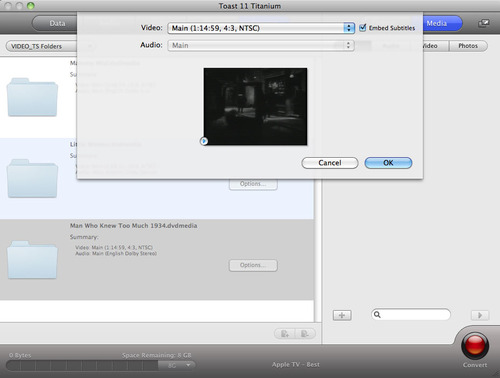
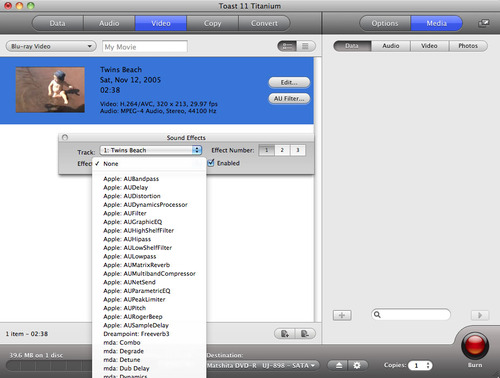
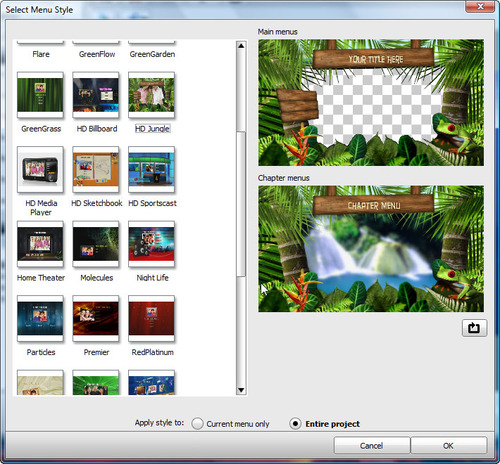
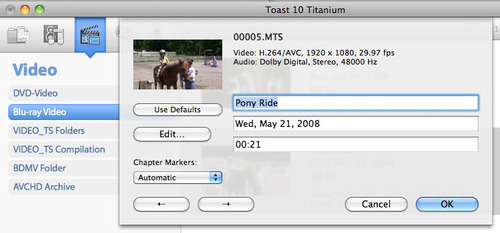
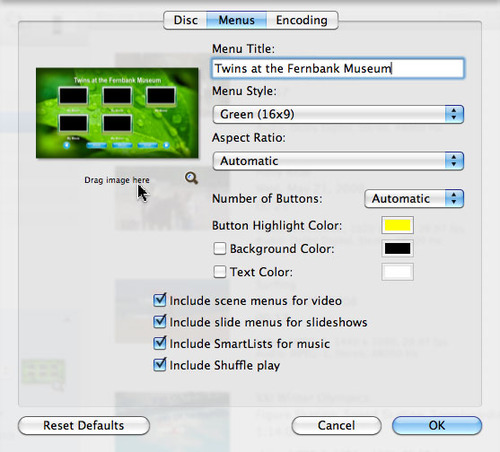
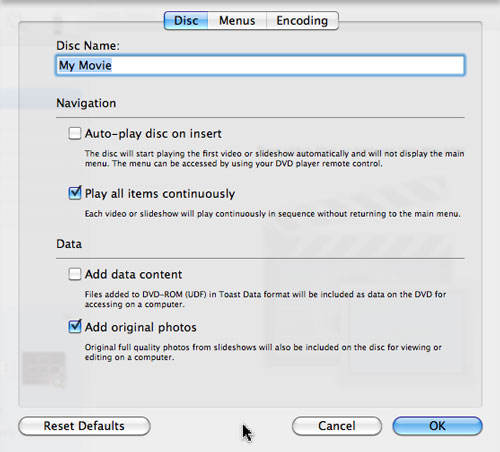
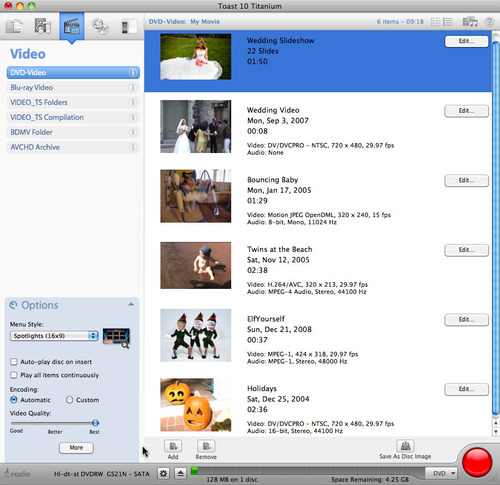
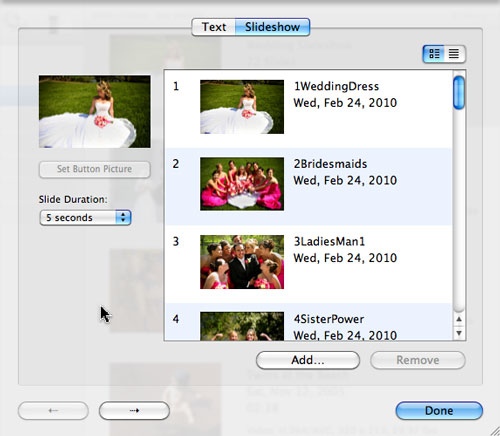
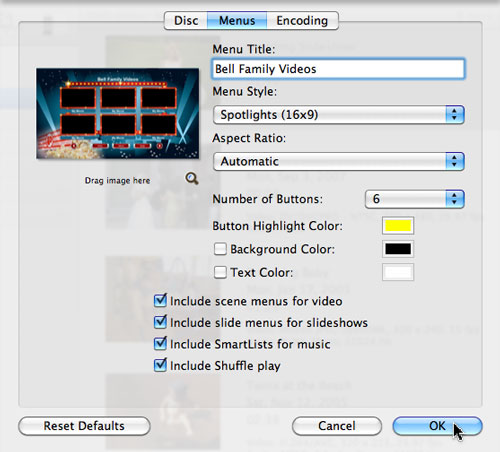
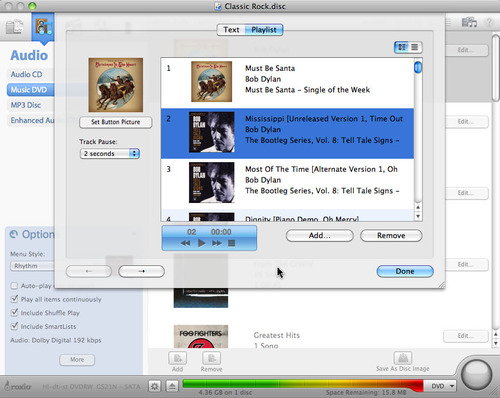
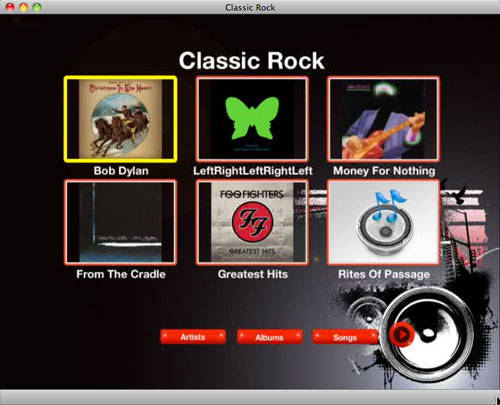
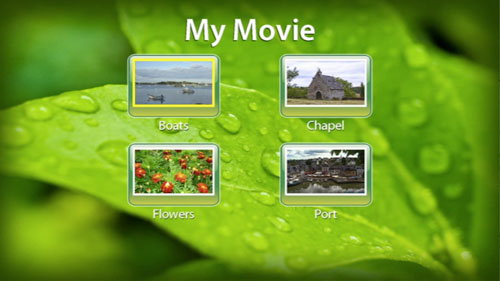
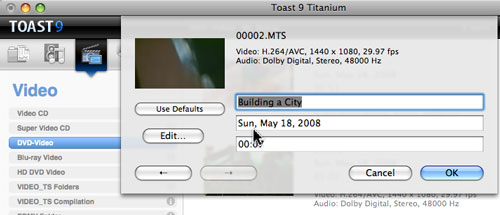
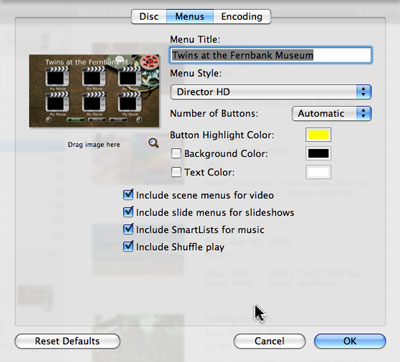
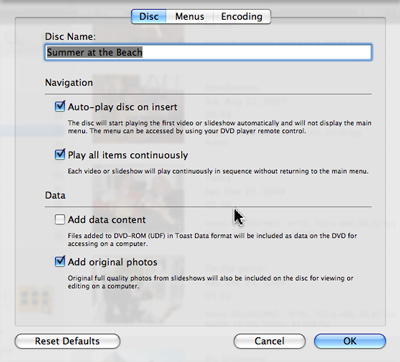
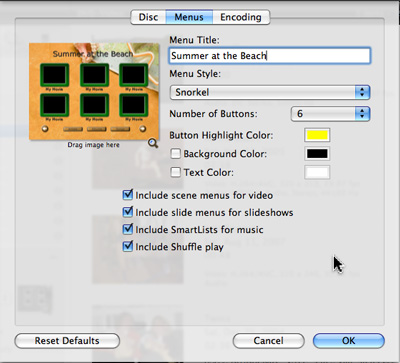
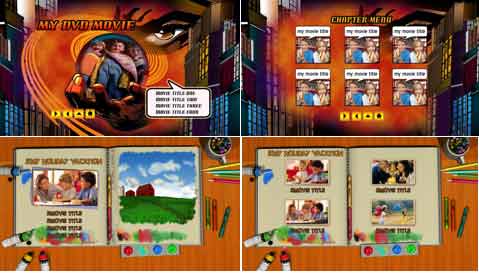
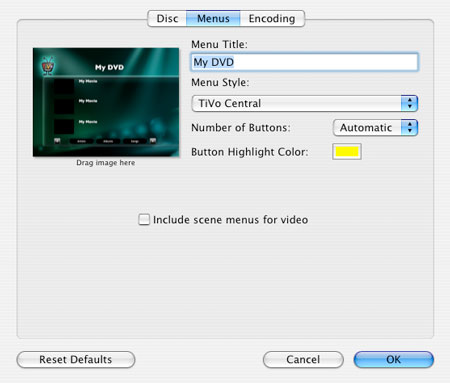
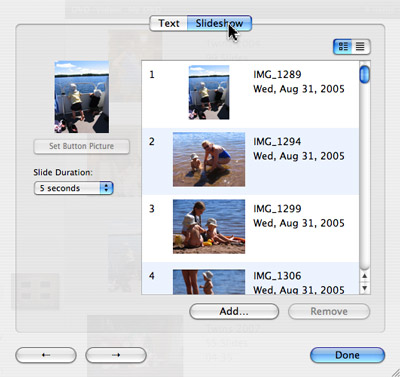
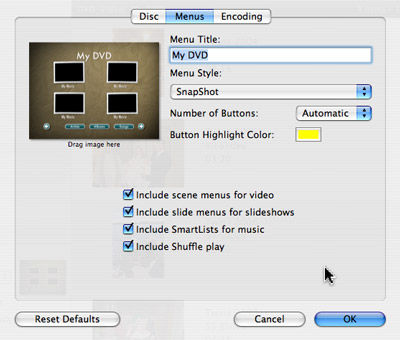
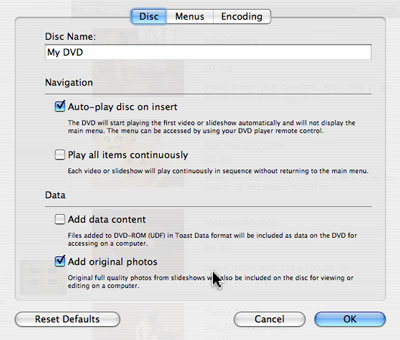
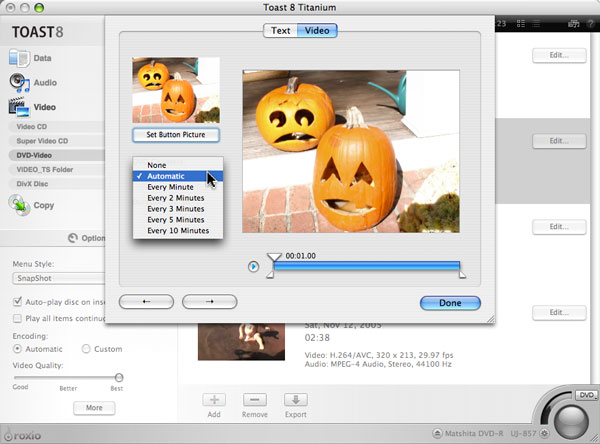
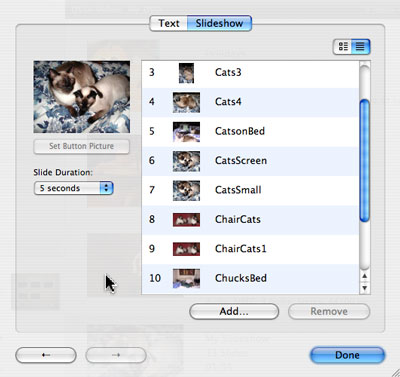
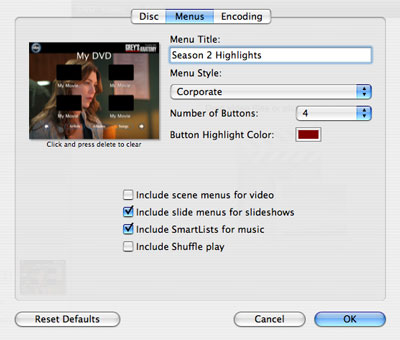
Once you've selected your shows to archive, you can customize your disc using the Options panel at lower left to choose a Menu Style and other features. You can also edit each video by clicking the button next to it. This allows you to change the title, customize chapter markers, and edit out unwanted portions (just like we did above).
Finally, click the red button at lower right, and your disc will be burned. You'll be prompted to insert a disc if you haven't already.
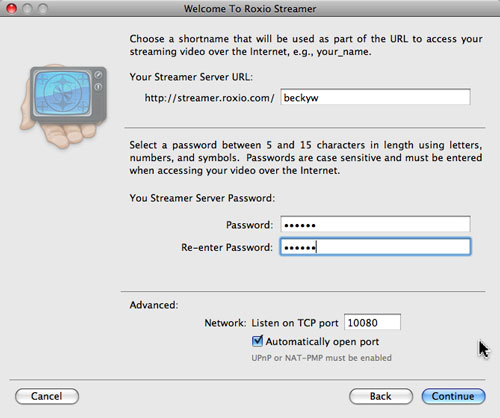
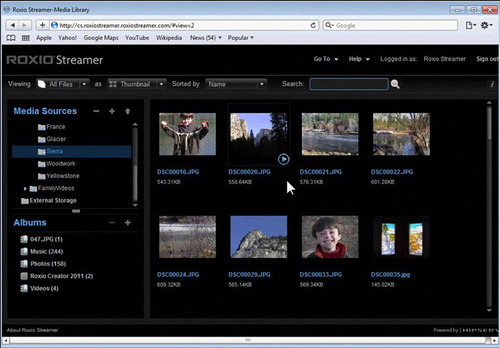
Watch TiVo Shows Remotely Using Roxio Streamer
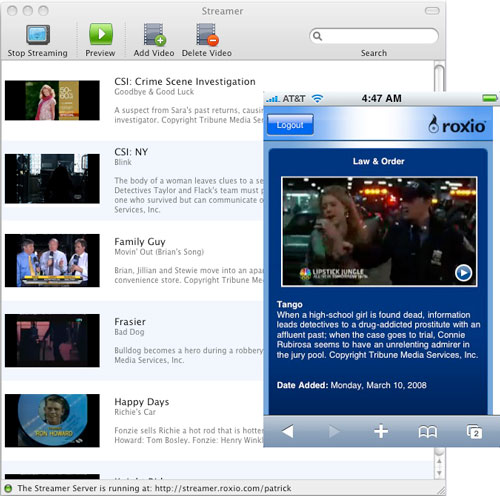
We've covered how to transfer shows to your Mac or portable player when you're at home, but how about if you're on the road when a new show is recorded to your TiVo? With the Roxio Streamer application in Toast 10, you can set up most any Mac to stream video over the Internet in H.264 format to an iPhone or iPod Touch, or to a Mac or PC Web browser. There's even a free native iPhone app!
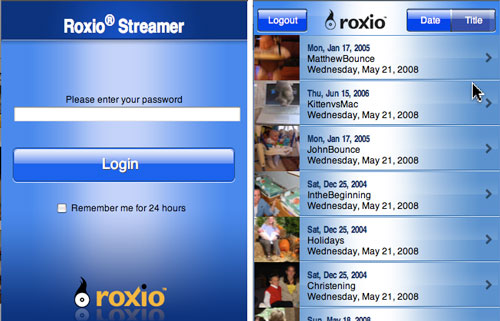
Using the Auto Transfer feature with Streamer, you can set things up so that your favorite new TiVo recordings are automatically transferred to your Mac, converted with Toast, and added to your Streamer list. You'll be able to view them from your broadband-connected computer or iPhone/iPod Touch as soon as they are in Streamer. This also frees up precious phone storage space.
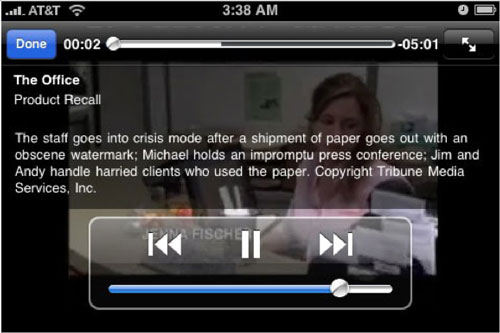
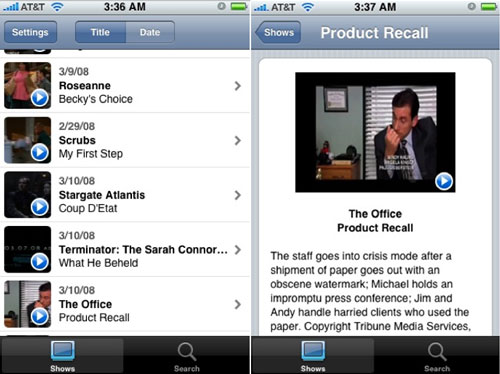
Watching shows in Roxio Streamer on an iPhone (click to enlarge).
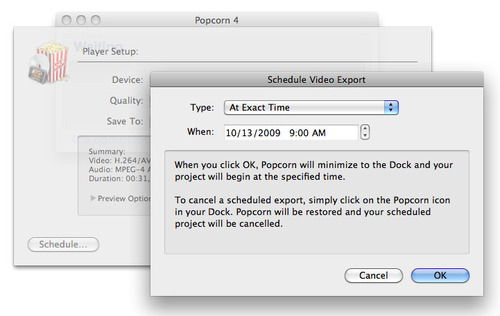
Is your favorite team in the playoffs and you can't watch the game in your hotel? Use TiVo's ability to schedule shows from the Web or iPhone, and Apple's Back to My Mac remote access capability to set up the transfer and add it to your Streamer list!
You'll need a high-speed Internet connection at both ends (such as Wi-Fi or 3G cellular), but once videos are added to the Streamer content list, they are available for remote viewing at any time. Read our complete Streamer tutorial here.
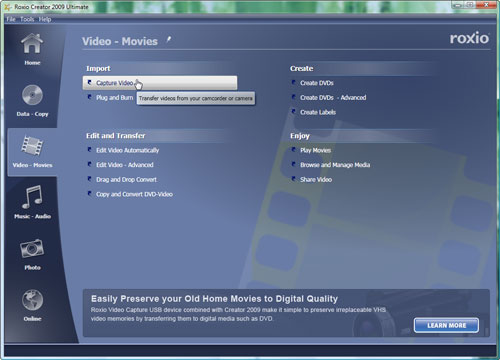
Send Videos from Mac to TiVo
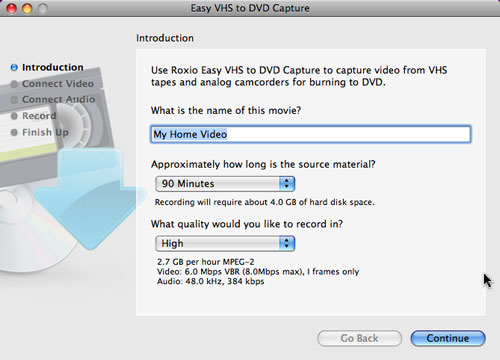
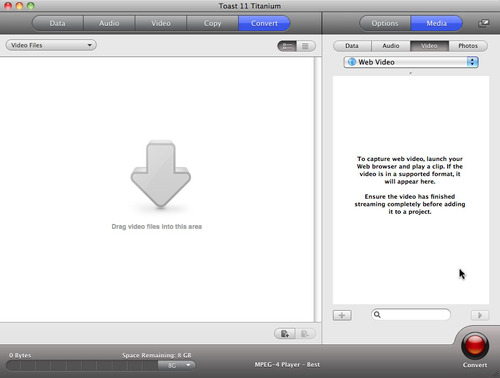
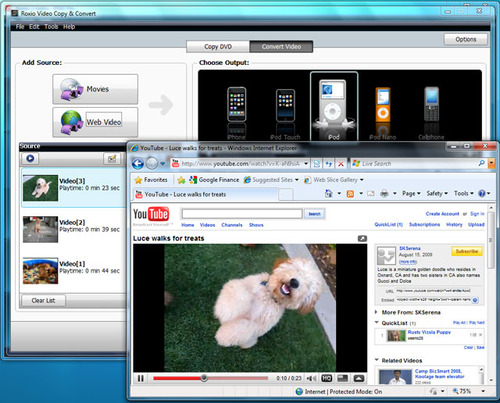
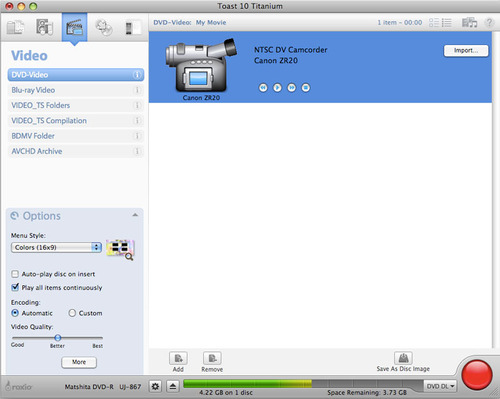
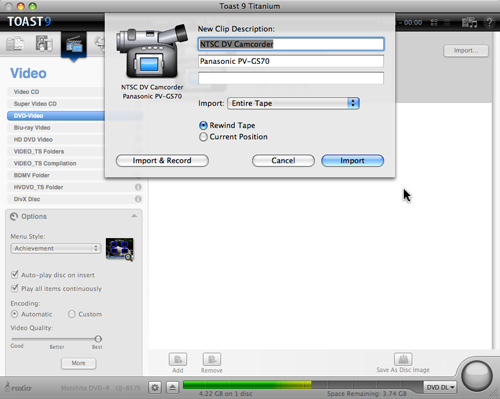
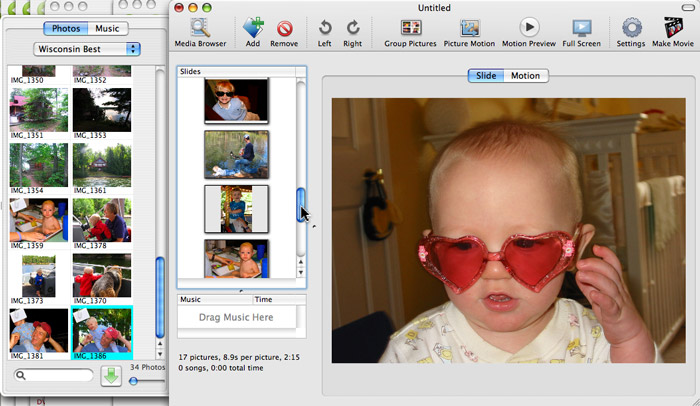
One of the hot new features in Toast 10 is the ability to copy and stream videos back from your Mac to your TiVo. This makes it easy to view those home movies from your digital camcorder on the big screen. You can transfer pretty much any video you have on your Mac, including Web videos you've captured with the Toast Web Video Capture feature. Here's how:
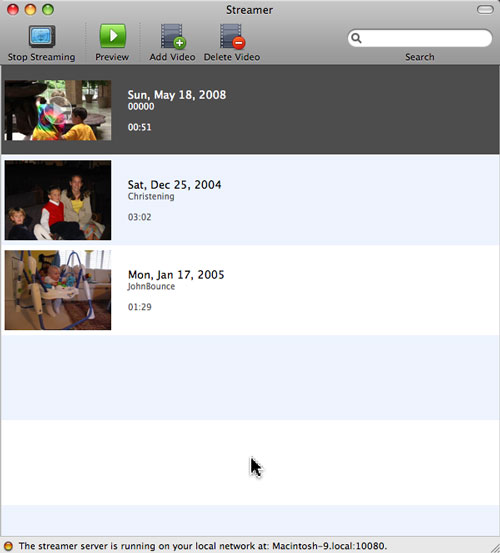
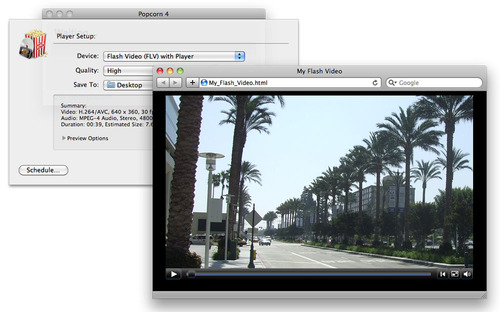
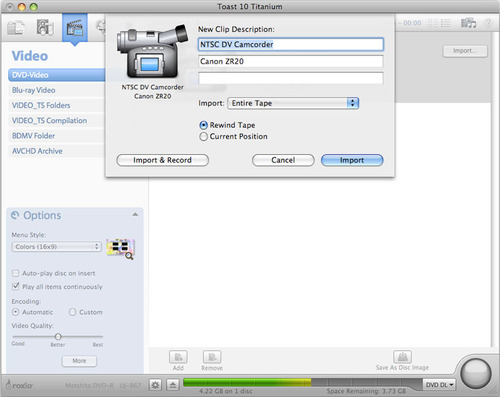
First, open Mac2TiVo in the Toast 10 applications folder. You'll be prompted to enter your TiVo Media Access Key in order to authorize file transfers. (See above for how to find your Media Access Key.) Now simply drag video folders to the Mac2TiVo window, and they will be converted to the necessary format automatically. Finally, click the "Start Server" button to send the videos to the Now Playing list on your TiVo.
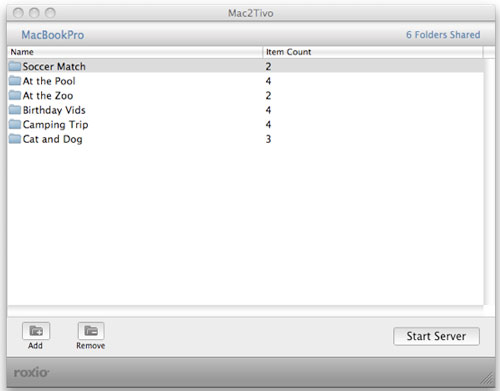
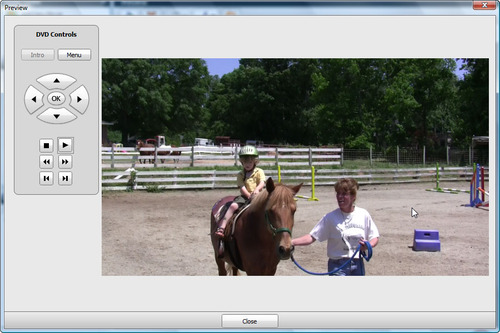
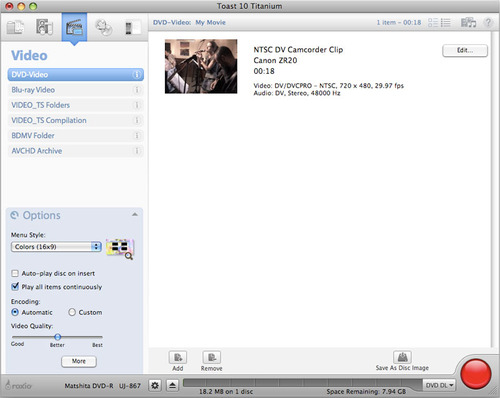
Streaming video using the Mac2TiVo application (click to enlarge).