TiVo owners are hooked on their DVRs -- most can't imagine life BT (Before TiVo). But all those high-definition season passes can quickly overflow even the most capacious hard drive. And woe betide the parents who delete their daughter's episodes of Hannah Montana to make room for Lost! What's a TiVo-loving family to do?
The answer is to use TiVo Desktop and Roxio Creator 2009 to transfer shows from your networked TiVo to your computer, DVD, or portable player, freeing up precious space on your DVR for new recordings. You can archive all your favorite shows to DVD, and even edit out unwanted portions before burning. Or you can convert your TiVo files for transfer to iPods, iPhones, PSPs and other portable players, so you can view them anywhere. Creator does the all the conversion automatically, and can sync your shows straight to iTunes or your portable device.
Even better, you can also send photos and videos back to your TiVo for playback on the big screen. This feature is perfect for home movie viewing. And it all works with both standard and high-definition video, so you can make high-def DVDs and Blu-ray Discs out of HD TiVo recordings, or send movies from your HD camcorder to your HD TiVo in full 16:9 format. (High-definition also requires the Creator 2009 High-Def/Blu-ray Disc Plug-In, available separately or as part of Creator 2009 Ultimate.)
Here's how to start making the most of your TiVo:
Transfer Shows to Your PC
The first step is to download and install TiVo Desktop, if you haven't already, and then use it to transfer shows from your networked TiVo to your PC. TiVo Desktop can be found on the TiVo site here.
Next, open up TiVo Desktop. At first, the window will be empty, since you haven't transferred any shows yet. Once you've copied shows over, they will appear in the "Now Playing" list. Below is the main TiVo Desktop window after transferring a few programs.

The TiVo Desktop "Now Playing" List. (Click to enlarge.)
To transfer a new show to your PC, simply click the "Pick Recordings to Transfer" button at top left, and then select the appropriate items from the list that appears. You can transfer multiple shows at once, and also set up automatic transfers (top middle button), a real convenience. For example, you can have specific season passes sent to your PC every week, so you can then burn them to DVD or copy them to your iPod.
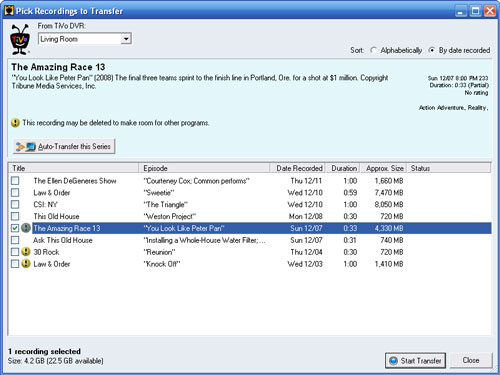
Picking TiVo recordings to transfer to PC.
Here's the Now Playing window again, this time showing a new program in the process of being transferred. Note the display of the time remaining at top right.
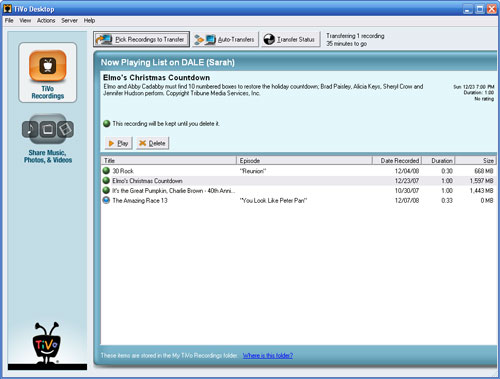
Transferring a TiVo recording. (Click to enlarge.)
Burning Shows to DVD or Blu-ray Disc
Now that you've used TiVo Desktop to transfer programs to your PC, it's time to switch over to Creator 2009 so you can edit, burn or convert them. First, we'll show you how to archive a show to DVD or Blu-ray. To start, open the Creator 2009 home screen, click the Video-Movies tab, then select "Create DVDs - Advanced" under the Create heading, which will then open the MyDVD program. You can also open MyDVD directly from the Roxio Creator Applications folder in the Programs menu.
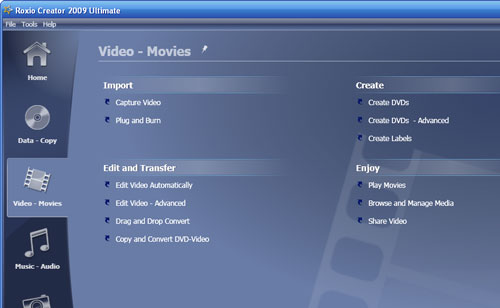
The Creator 2009 home screen.
Next, click the Add New Movie button, and navigate to the TiVo Recordings folder, which holds all the shows you've transferred to your PC. Select one or more movies to use in your DVD project.
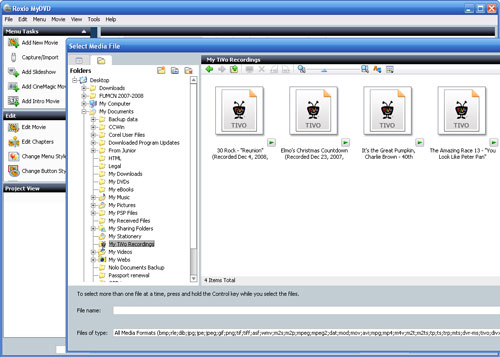
Selecting TiVo shows to burn. (Click to enlarge.)
The movie(s) will then show up in a list at the bottom left of the the MyDVD window, as shown below.
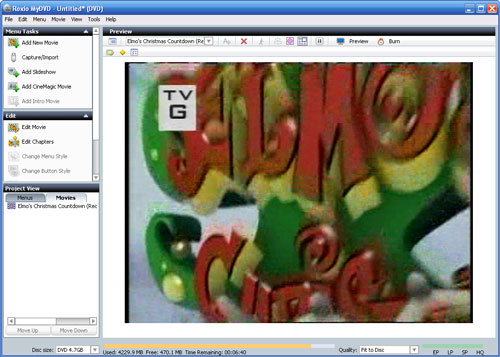
TiVo show in the MyDVD project window. (Click to enlarge.)
At this point, if you like, you can customize your DVD with menu themes and chapters, and also select the type of disc you want to burn, such as DVD or Blu-ray. We have a complete tutorial on using MyDVD here. For a simple DVD, however, you can just go ahead and press the Burn button (at top right). The show will first be encoded, and then written to disc.
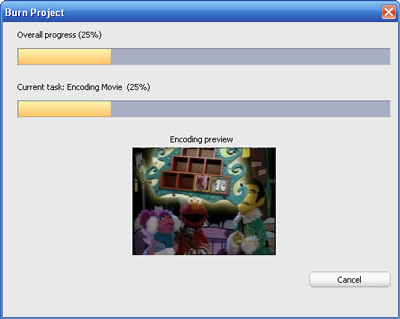
Burning the TiVo show to DVD.
Burning TiVo recordings to DVD or Blu-ray Disc is a great way to make the most of your DVR, by building up a video library you can view anywhere, and freeing up space on your TiVo's hard disk.
Sending Shows to Your Portable Player
As you may have guessed from the DVD burning tutorial above, Creator 2009 is able to work with the shows in the TiVo Recordings folder just like any other videos. This means you can also edit them with VideoWave (including cutting out unwanted segments), combine TiVo shows with other video material in your projects, and convert them for viewing on your iPod, iPhone, PSP or other portable player.
To convert shows for playback on your portable device, go back to the Creator 2009 home screen shown above, and this time select "Copy and Convert DVD-Video" under the Edit and Transfer heading. The Roxio Video Copy & Convert tool will open. Click the Video Compilation tab, then the Add Movies button. Just as in our DVD tutorial above, a media selection window will open where you can pick the TiVo recordings you want to transfer.
After you've added all the shows you want to convert to the list at bottom left, choose your output format in the box at right. We have chosen iPhone here, which automatically sets the correct encoding options for the conversion. Then click the Copy button at top, and the transfer will start. You can send your files direct to iTunes, or save them to disc for later syncing with your portable player.
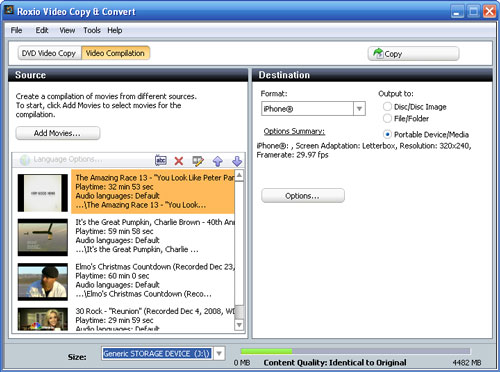
Converting TiVo shows for iPhone viewing. (Click to enlarge.)
Now that you know the basics of working with TiVo recordings in Creator, try some fancier tricks, like combining TV footage and home movies in VideoWave for fun effects, or editing home movies to upload back to your TiVo. It's fun and easy!