Let's face it, hooking up your video camera to your computer, transferring video, and using a desktop movie editor is not something you are going to do on the fly. Yet raw video is rarely good enough to post to Facebook or YouTube without a little trimming, cutting, or audio editing.
That's where Pinnacle Studio for iPad comes in. It lets you do everything from a few simple cuts and trims to full-fledged desktop-class editing, with timeline and storyboard views, transitions and effects libraries, drag-and-drop movie templates, Ken Burns-style pan-and-zoom capabilities, precision editing, and full 1080p output to your choice of destinations, including YouTube, FaceBook, Box and email.
Best of all, Pinnacle Studio makes it easy, with an intuitive touch interface using simple tap, drag and swipe gestures. Tap to preview a clip in your media library. Double-tap to add it to your storyboard. Swipe along the timeline to move the playhead, tap the razor blade icon to split your clip at that point, then pinch open the timeline for frame-by-frame trimming. It all works the way you expect and the interface is fast and responsive, since CPU-intensive effects rendering is queued up for later processing -- just tap the render gears to start it going when you're ready.
Getting Started
After downloading from the App Store, the first time you open Pinnacle Studio it will ask for permission to access your media libraries: photos, videos and audio. It then builds a database of the media on your iPad for easy access within the program. This database is automatically updated each time you open the app; you can also update manually at any time.
From then on Pinnacle Studio will open to the Project page, which is a list of editing projects you've created with the app, as well as general settings and sharing tools. There's also a complete user manual right within the program, which goes into far more detail than we have room for here. If you'd like to read it before buying, or print it for reference, it's available on the Pinnacle support site.
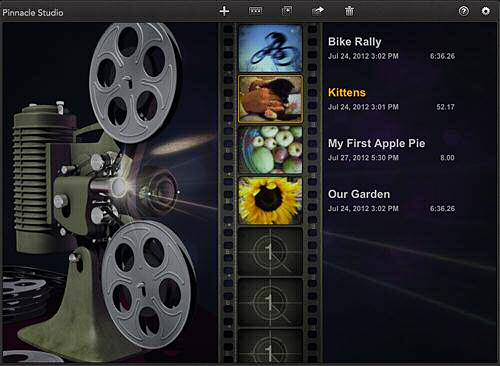
The Pinnacle Studio Projects page. Tap any project to start editing.
Tap the + button to create a new project and give it a name. You will then be taken to the main Edit page, which is divided into three areas: media and effects libraries, a preview window and the timeline/storyboard view. Placement depends on whether you are using portrait or landscape orientation.
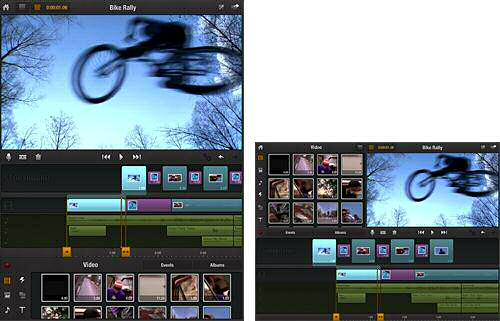
The Edit page showing the library, preview and storyboard/timeline areas in both portrait and landscape views.
Adding Media
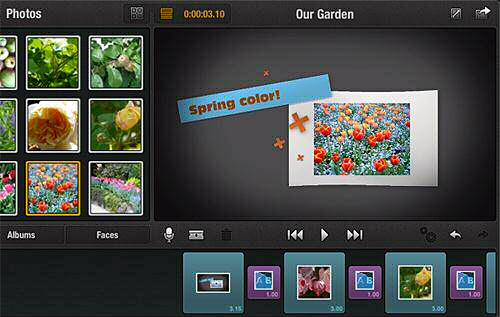
The next task is to select and add media to your storyboard. Tap the relevant section of the library: videos, photos, or audio, and then scroll through them to find the items you want to use. You can preview any clip by tapping it once, then pre-trim it in the preview window before adding it to the storyboard. To pre-trim, just move the start and end markers to the desired locations, then drag the clip straight from the preview window to the storyboard. Audio can be placed anywhere along the timeline view; if you drag an audio file on top of a video clip, the start of the audio and video files will be synced up.
Note that you can also start recording video right within Pinnacle Studio, using the red record button to bring you to the iPad Camera app. When you stop the recording it will go straight to the library. This is a great feature for creating product demos and for streamlining production on location. You can bring in non-iPad-generated media wirelessly using services like Box and iCloud/PhotoStream, or with the iPad Camera Connection Kit.
Adding Transitions, Titles and Special Effects
Now that you've got your clips pre-trimmed and added to the storyboard in order of appearance, it's time to get creative with transition, effects, titles and so on.
If you're new to Pinnacle Studio or short on time, try one of the "Montages," or templates. These are full-fledged productions with transitions, text, soundtracks and more, all you need to do is add your own media. Simply select a Montage from the library, and start scrubbing from the beginning of the movie. Each time you see an empty video, photo or text placeholder, drop in your own media. You'll be amazed at the great results you can get!
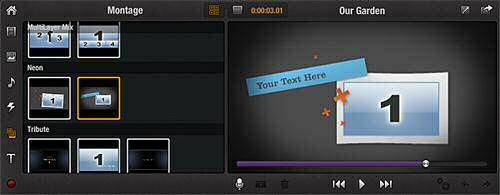
Choosing a Montage (top) and filling it with your media (bottom).
If you'd rather create your own effects and titles, just drag the elements you want alongside any clip on the storyboard. Dropping the effect thumbnail where there is an existing transition replaces it.
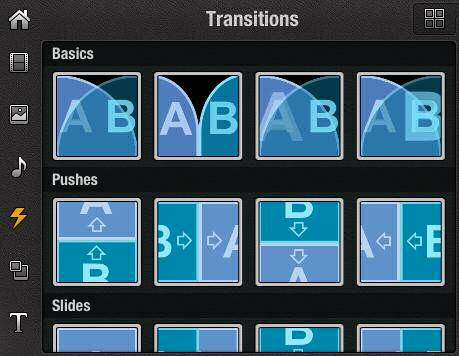
A few of the available transitions in the library.
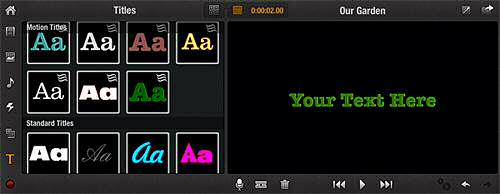
Some of the many title styles.
There are lots more cool effects and capabilities that we can't go into here, notably precision trimming and pan and zoom. And you'll need to take the time to render them before finishing up. Do check out the user guide if you want to learn more.
Sharing Your Videos
The final step is to upload your finished production to the Web or email it. Just tap the Share button and then enter your credentials for your service of choice. Pinnacle Studio does all the video heavy lifting.
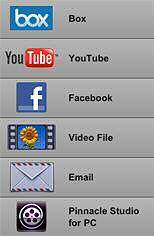
You can share your finished productions right from your iPad.