Sure, it's easy to share movies from your digital camcorder with Roxio® Toast® 11 Titanium, but what about those piles of home movies and old TV shows you have recorded on VHS tapes? It's time to preserve your precious home recordings and transfer them to digital video. With Roxio Video Capture USB for Mac you can burn them to DVD, upload them to YouTube™, Facebook®, or convert them for playback on your iPad®, iPhone® or other portable player.
Using iMovie® and Roxio Toast 11 you can also edit your recordings, add titles and transitions, and create projects combining analog footage with that from digital camcorders.
You can capture and convert almost any analog video. The video capture hardware is a small USB stick with connections for both composite and S-video sources. Simply install the software, plug in the USB stick and connect your VCR or camcorder, and you're ready to start transferring your tapes.
You can also capture non-tape sources like the output from a TV set or game console (a great way to capture game play!). Here are some common analog video sources you can capture with Easy VHS to DVD for Mac:
- VHS tapes from your VCR
- Analog camcorder output (VHS, S-VHS, 8mm or Hi-8)
- The composite or S-video output from your TV or game console (when viewing standard-definition video)
The USB capture device is also perfect for recording shows from standard-definition DVRs that don't have PC transfer capabilities. Otherwise your shows are trapped forever in the DVR. (If you have a networked TiVo, you can send shows to your Mac with TiVo Transfer, then burn them with Toast. TiVo Transfer is included with Toast 11 Titanium.)
Here's how to get started:
Step 1: Capture Video to Your Mac
After you've installed the software and plugged the USB device into your Mac, open the capture application. You'll see the following screen:
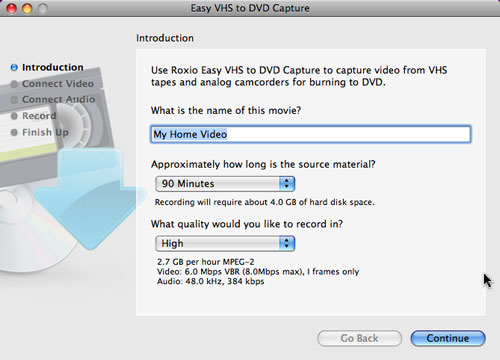
The video capture introduction window.
Here you enter some quick information about your video: name, approximate length, and desired recording quality. The approximate length is not binding -- you can start/stop your recording at any time -- it just helps to determine the disk space that will be required for your recording. For example, if you have an hour-long video, and choose 90 minutes and high quality, the program will tell you that you'll need about 4GB of hard disk space.
In the next screen, you'll select your source video (composite or S-video) and check that it is playing correctly in the preview window. If not, make sure you have connected to a set of analog output jacks on your VCR or camcorder (input jacks look the same, but will not work), and that all plugs are tight.
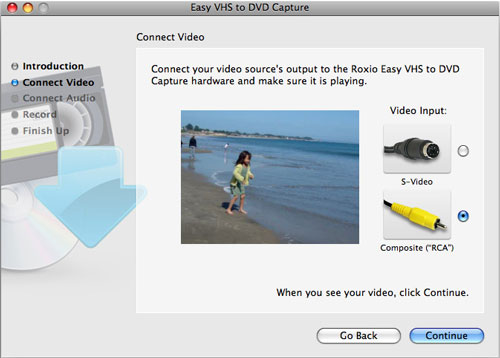
Connecting and checking your video source.
Next, check the audio. Make sure you can hear it through your Mac's speakers or headphones, and that the green lights are blinking in the preview window. If you have no audio, check that the red and white RCA cables are plugged into output jacks on your VCR or camcorder. If you'd like to mute the audio, and only capture video, you can do that too, by clicking the mute button at the upper left corner of the video window.
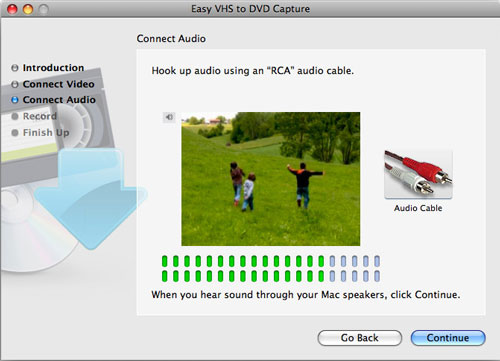
Checking your audio source.
Now it's time to start recording! Cue up your video again to the beginning, and click the red record button to start capturing. If you'd like to automatically stop recording after the amount of time you specified at the beginning (90 minutes in this example), check the box at the bottom. Leave it unchecked to stop the recording manually by pressing the button again.
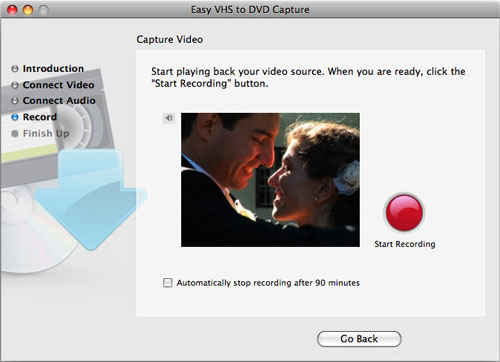
Starting the recording.
When the recording is finished, it will be saved to your Movies folder with the name you gave it at the beginning of the project, and you'll see the following output options:

Mac video capture output options.
You can burn your recording to DVD with Roxio Toast, send it to iMovie for editing, or save it in iTunes® MPEG4 video format for your iPad or iPhone. You can also go back and capture more videos. MPEG4 video output will be saved to your Movies folder, and can be dropped right into iTunes for playback on your iPad, iPhone or Apple TV®.
For YouTube and Facebook, it's even easier -- the capture files saved to your Movies folder can be uploaded directly, no additional conversion necessary. Just sign into your account in your Web browser and click the Upload button (YouTube), or the Add Photo/Video button (Facebook). Then select the desired capture files.
We'll go ahead and burn our recording to DVD with Roxio Toast 11.
Step 2: Burn the Recording to DVD
Now that you've digitized your video, it's time to burn it to DVD. When you click the "Send to Toast" button, Roxio Toast will open with the DVD project type selected and your video already in the project window, as below.
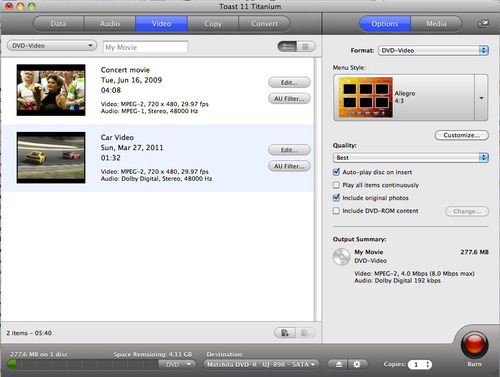
Burning to DVD with Toast (click to enlarge).
At right, you'll see options for personalizing your DVD, such as Menu Styles and whether your disc will start to play automatically on insertion. Click the Customize button to do things like change the Menu title of your DVD.
You can also add more videos to your DVD project using the Add button (the bar at the bottom will tell you how much space you have left on your disc, whether single or dual-layer). Finally, you can trim your videos and set the menu button title and thumbnail picture by clicking on the Edit button next to each video in the project window.
When you've got your disc set up the way you want it, click the Burn button at lower right and you're all done.