What do you do the first time you listen to a new Audio CD? Odds are you turn up the music, then sit down to peruse the pictures, read the liner notes, and review the credits on the jewel case. Maybe you read the lyrics as new songs play. It's a ritual that goes back to the days of vinyl record albums, and transcends musical genres. But sadly, it often doesn't extend to CD-Rs or DVD Music Discs, especially personal compilations, where no existing artwork or notes are readily available.
However, you've got a secret weapon in the war against the black magic marker: Toast 8 Titanium! Next time you make a party compilation disc, digital photo album, or DVD of your kid's birthday party, try making a printed jewel case cover. It's simple with the included Disc Cover RE label creator program. You can print three ways: to label templates from most major manufacturers, such as Avery and Neato; to printable discs with an appropriate printer; or even directly to disc using a LightScribe drive.
We recommend the latter two printing methods, since labels can sometimes get stuck in slot-loading drives like those in Macs and many cars. LightScribe is a new technology that etches labels right onto the reverse side of specially made discs, using the laser in your recorder. They have a cool holographic look, and come in several colors. Printers with direct CD/DVD print support are available from Canon, Epson and HP, among others, and LightScribe drives from companies like HP, Samsung, and Toshiba. For both LightScribe and direct disc printing, you'll need to buy special recordable media. Look for discs labeled "LightScribe" or "printable."
Using the Disc Cover Assistant
Getting started with Disc Cover is easy. Opening the program launches the Disc Cover Assistant, where you choose a disc type (music, photos, files&data, general or blank), and a design template, such as the acoustic design shown below. Templates include complete matching sets of disc labels, jewel case covers, tray inserts and spines, all sized to fit perfectly into standard plastic jewel boxes.
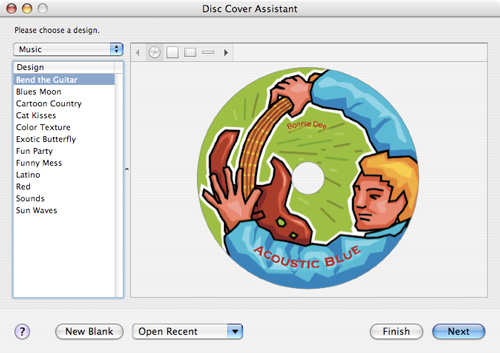
Choosing a disc template with Disc Cover RE.
Once you've selected your project type and template, you click Next, and import file, photo or music track names directly from sources like iTunes, iPhoto and Toast. You can also simply past your text in directly with the text tool, but if you use the import feature, the appropriate titles will be placed on all the jewel case parts for you automatically, like the CD Tray insert below.
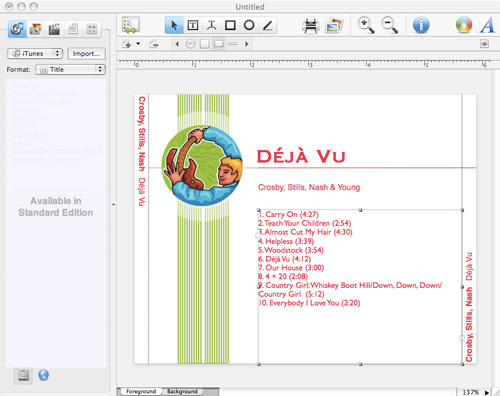
Editing a jewel case tray insert in Disc Cover.
Adding Your Own Graphic Elements
At this point you can proceed directly to print your labels and covers (see next section), but if you want to customize elements or add additional text and graphics, Disc Cover offers complete flexibility. You can import your own photos (such as album artwork scans), use one of the hundreds of backgrounds and clip art elements included with the program, change font sizes, styles and colors, and much more. A handy Circle Text tool lets you wrap text around your disc label.
When you import a photograph, you can crop, resize and reposition it, and even add a host of special effects tools like gradients and distortions. Have fun being creative with your pics, just be sure to keep important parts away from the hole in the CD label! If you're making a photo CD, try choosing one of your pictures for cover art.
For audio CDs, try the Web: it's full of pictures of celebrities, singers, and bands, including CD cover art. Control-clicking on just about any image on the Web lets you save it to your hard drive, typically as a JPEG file which can go straight into Disc Cover. What's more, you can find lyrics to a large majority of popular songs on the Web, often at an artist's own Web site, which you can cut and paste into your project. Just be aware that these images and lyrics might be copyrighted, and should not be downloaded for anything other than personal use within the copyright laws.
You can add, edit and subtract as many graphic elements as you wish, using the templates as handy starting points. You position them by dragging and dropping, and send them to foreground or background layers as desired. If you can envision it, you can produce it with Disc Cover.
Printing Options
Once you've got your labels and cover art designed, it's time to print! Now that your project is finished, it's time to print! If you are lucky enough to have one of the new printers that can print directly onto CDs, that's the best choice. There are printable media in silver, white and other colors. Just look for the word "printable" in the media name. For laser-etched LightScribe labels, you'll need LightScribe media, and a compatible drive. For booklets and tray inserts, any color inkjet printer and photo paper will do, but for best results and to save cutting time, try the special labels made for the task (available at any office supply outlet). Disc Cover has templates for most popular brands, just click on the "Select Format" button to choose.
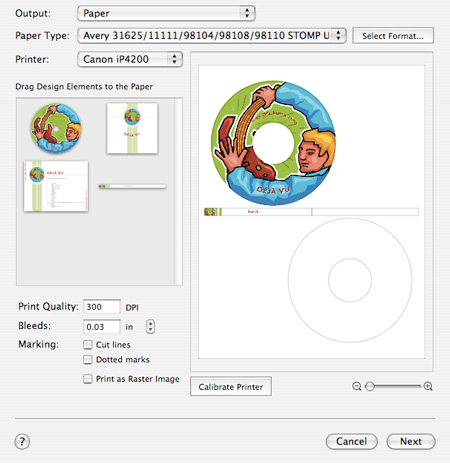
Disc Cover's Print dialog box reveals a wealth of options, including a huge selection of standard label templates from companies like Avery and Neato, as well as LightScribe and direct-to-disc printing.
To ensure exact page placement, do a test print on plain paper using the Calibrate Printer button at the bottom of the Print dialog. Once you've gotten the placement perfect for the first print, you can create future labels and covers over and over with the same template and positioning.
If you're using stick-on labels, be sure to position them precisely over the middle hole, and then squeeze any air bubbles out by pressing from the center outward. Blank silver CDs without any logo printing work best, printed lettering may show through your labels, or create unsightly ridges.
That's all there is to it. So next time you make a CD, there's no excuse for using magic markers! Your CD rack, your friends, and your customers deserve better. Making yourself look like an artist doesn't require any crown jewels, just well-designed ones.