Want your sound recordings and LP transfers to sound as good as the originals? Use Toast 10 Pro's SoundSoap™ SE application to remove all types of unwanted sounds from digital audio files: hiss, room noise, rumble, electrical hum, clicks and crackles.
You can clean up music you've digitized from your aging vinyl and tapes with Toast's CD Spin Doctor application. Or massage the audio tracks from your video recordings, eliminating wind and background noise to make your dialog loud and clear.
Virtually any type of background noise can be scrubbed out quickly and easily with SoundSoap, leaving you with clean, crisp audio that sounds like you remember it—or maybe even better!
Step-by-Step: Cleaning Audio Files with SoundSoap
1. Get Started
To begin, launch SoundSoap SE from your Application folder. Then open the file you want to clean up from the File menu, such as a recording made by CD Spin Doctor. The file can be in almost any standard digital audio or video format, including QuickTime, DV (camcorder format), AVI, WAV, AIFF, MP3, MP4 (AAC) and more.
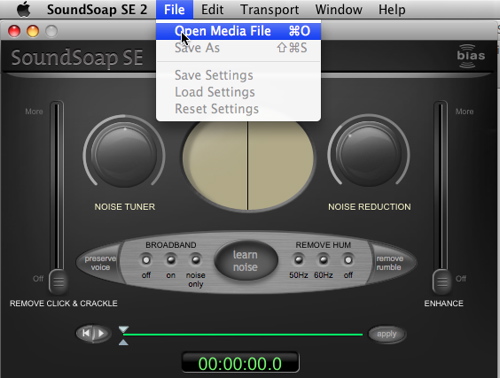
Choosing the audio or video file you want to clean.
2. Get a noise education
You're ready to start cleaning now, but first, take a moment to familiarize yourself with the different types of noise typical of sound recordings, since each one will be tackled by a different tool in SoundSoap.
The four major types are: Broadband Noise, such as tape hiss and air-conditioner noise; Hum, typically associated with faulty or ungrounded electrical circuits and power lines; Rumble, a low-frequency noise like that from a turntable motor; and Clicks & Crackles, which are commonly found in recordings made from scratched or dirty vinyl records.
To learn more about these noise types and how to identify them, see Chapter 3 of the SoundSoap 2.2 User Guide (downloadable here).
3. Remove Click & Crackle
In the SoundSoap window, you'll be working from left to right to clean up your recording. While the various tools can be applied in any order and combination, it's best to remove certain types of noise before others. Background noise before hum, for example. And clicks and crackles first of all, since they are usually easily identifiable as abrupt peaks in waveforms.
The big "Wash Window" in the middle is a visual representation of your sound file. Red represents noise, and blue represents the desired audio. In general, the bluer it gets, the better (although your ears are the true judge). You'll see the bands move and change as you play back your file and work the noise controls.
To begin, make sure the Broadband Noise filter is off using the button at middle left. Next, start playing your audio file using the controls at the bottom. Now gradually raise the "Remove Click & Crackle" slider just enough to reduce the clicks without affecting the rest of your recording. Run through the recording a couple times to make sure of your choice. Note that this tool mainly applies to LP and tape transfers. If you are editing a video soundtrack, you can probably skip Click & Crackle, unless there was some unusual background noise.
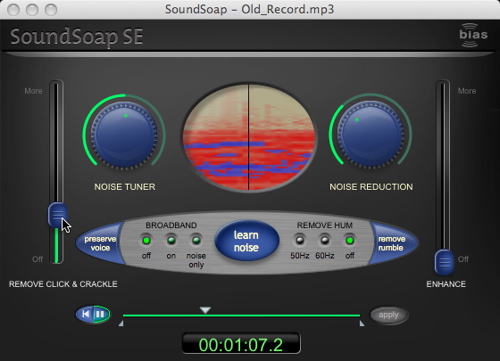
Adjusting the Click & Crackle slider.
4. Reduce Broadband Noise
Now let's move on to the broadband noise-reduction tool, something you'll probably want to apply to every sound file, whether from an LP or videotape. Broadband noise is the most common type of noise you'll find in videotapes, and cleaning it can make a huge difference to your sound quality. If you're recording outside on a windy day, in a moving car, or inside with a fan, refrigerator or air conditioner in the background, broadband noise reduction will help voices come to the fore and make your audio listenable.
First, find a location in the sound file that is silent except for the background, a couple seconds, if possible. This will often be at the beginning or end of an LP or tape transfer. Move the playback head to that point and pause. Then click the "Learn Noise" button in the center of the window and start playback. SoundSoap will analyze the broadband frequencies causing the noise, and clean them automatically.
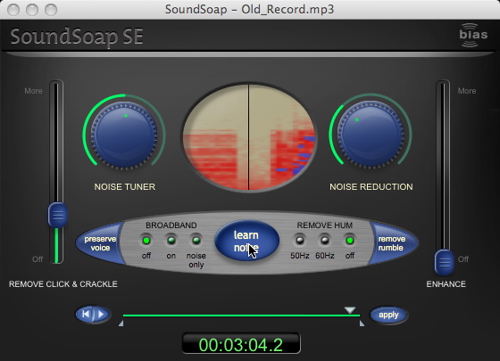
Clicking the "Learn Noise" button before turning on broadband noise reduction.
5. Adjust the Noise Tuner Knob
Now click the "noise only" button, and start playing your file from the beginning. If you hear anything BUT noise (voices or music), turn the Noise Tuner knob on the left slowly counterclockwise until you hear JUST the unwanted noise. This is to adjust the frequencies that noise reduction is applied to, to make sure it doesn't take away sounds you want along with the noise.

Clicking the "noise only" button to check noise tuning.
6. Adjust the Noise Reduction Knob
Next, adjust the Noise Reduction knob on the right. Turn the Broadband mode button to On and start playback again. This time, turn the Noise Reduction knob the minimum necessary to remove the background noise. If the material being cleaned is dialog, also click the Preserve Voice button at the left. This filter will automatically remove sounds outside of the range of human voices. Now you've finished cleaning broadband noise. Notice how the Wash Window, formerly mostly red, is now turning blue?
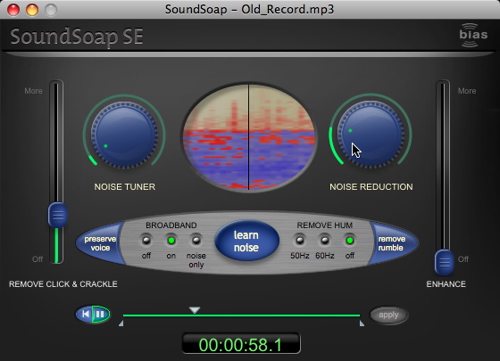
Adjusting the noise reduction level.
7. Remove Hum & Rumble
If you are cleaning a file digitized from an LP or tape and you know you have hum or rumble (not typically found in video), you can remove them with the buttons at lower left. Click the 50Hz or 60Hz buttons to remove hum (50Hz is for Europe, which has 50Hz power, while 60Hz is for the US and other 60Hz power countries), and the "Remove Rumble" button to remove turntable rumble. Be sure to listen to your recording after applying each tool, to make sure it has the desired effect. Finally, click the Apply button to save all your noise reduction settings thus far. (Don't worry, your original file will not be altered.)
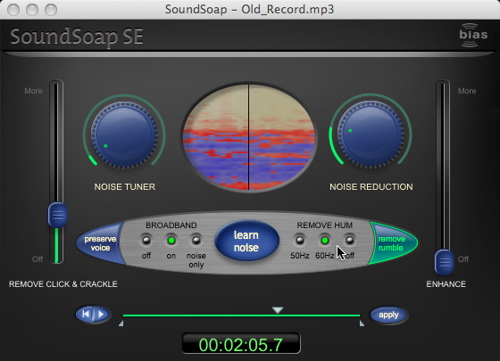
Clicking the Remove Rumble button.
8. Enhance your recording
You've now cleaned the noise out of your audio file, but SoundSoap has one more goodie for you, the Enhance feature. This slider at far right enhances the tones in degraded sources like LPs and tapes. It's great for music tracks that sound washed out. Start playing your cleaned file, and move the slider up and down until you find a pleasing balance. Now click Apply again, and choose Save As from the file menu to save your work to a new file, leaving your original untouched.
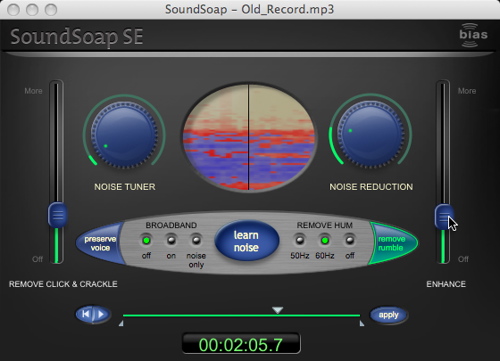
Adjusting the tone enhancement slider.
9. Use your cleaned file
Now that you're all done, you can use your sparkling clean audio file in your music or video project. Just import it into Toast, iTunes or iMovie as you would any other audio file. You'll be amazed at the difference!
10. Just for fun
Want to see what a cleaned sound file looks like, compared to the original? Open your pre- and post-SoundSoap files in Toast's CD Spin Doctor and check out the waveforms. You should be able to clearly see the difference, especially i areas of silence.