Want to make DVDs or Blu-ray discs of your home videos, send them to your iPhone, or upload them to YouTube? Unless you already have them on your hard disk, you'll likely need to start by capturing source video from your camcorder.
Toast 10 Titanium imports video direct from most AVCHD and DV camcorders, while Easy VHS to DVD for Mac digitizes video from analog camcorders and VCRs. In this tutorial, we'll show you how to capture digital video with Toast. For analog video, see our separate tutorial on capturing with Easy VHS to DVD.
AVCHD Camcorder Import
You can import video clips from your AVCHD camcorder in two ways. If you just want to archive your clips to disc so you can erase and reuse the storage in your camcorder, choose "AVCHD Archive" under the Video project tab. Then attach your camcorder to your Mac. With most AVCHD camcorders this means connecting it via a USB cable and turning it on in playback mode. (You may also need to make some selections on your camcorder screen. See your camcorder's manual for full instructions on how to put it in the right mode for communication with your Mac.)
Once your camcorder is connected properly, it will show in the project window, and Toast will tell you how much space it will take to burn to disc. You can choose CD, DVD or Blu-ray discs for archiving. Toast will span multiple discs if needed. Finally, click the Burn button, and your video will be captured to disc for use in your future projects.
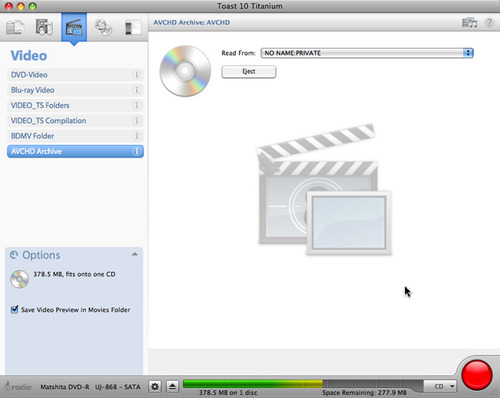
Burning an AVCHD Archive disc.
The other way to capture clips from your AVCHD camcorder is to import them directly into your video project. First, connect your camcorder as described above. Then choose DVD-Video or Blu-ray Video under the Video project tab, and open the Media Browser from the Window menu. Your camcorder will show as "AVCHD" in the Media Browser menu. Select the clips you'd like to import, and drag them to the project window. Now you're all set to create projects such as DVD and Blu-ray discs that can be played back in your set-top Blu-ray player.
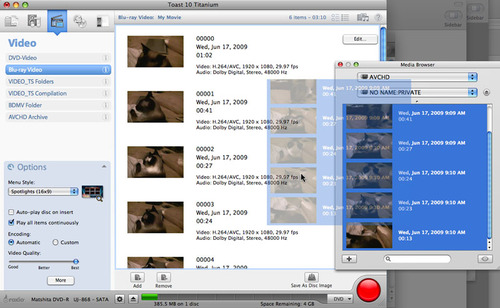
Importing AVCHD clips into a video project.
Similarly, if you'd like to convert your videos for playback on your iPhone or iPod, or upload them to YouTube, simply drag your AVCHD files from the Media Browser into the Convert>Video Files project window instead. For YouTube, choose the "MPEG-4 Player" device type in the Player setup dialog. The resulting MPEG-4 files can be uploaded directly to YouTube in your Web browser.
DV Camcorder Import
When importing from DV camcorders, use Toast's handy Plug & Burn feature, which lets you quickly create DVDs or disc images of your video clips for archiving or use in other projects. You can import an entire tape at once, or a portion of it. After importing, you can immediately start recording your disc, or add other video or slideshows from your hard disk before recording.
To import with Plug & Burn, start a new DVD-Video or Blu-ray Video project. If you will want to burn your disc immediately after capturing, also choose your DVD options at this time, such as menu styles and encoding quality, from the bottom left of the Toast window. Next, connect your DV camcorder as directed by the manufacturer (typically via FireWire) and set it to playback mode. In a few seconds, a camcorder icon will appear in the Content area.
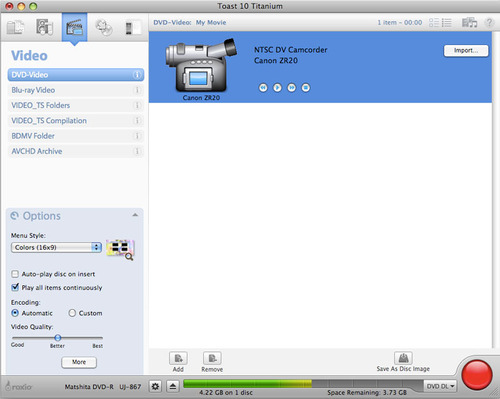
Connecting your DV camcorder.
Use the camera controls in the Toast window, or on your camcorder, to fast-forward or rewind to the point where you want to begin recording. Now, click the Import button. The Plug & Burn options dialog box will appear, where you can choose to record the entire tape, or a certain number of minutes. You can also give the clip a name, and rewind the tape if necessary.
Finally, you can select whether to import and then record immediately, or just import. Choose Import if you want to record more clips or add video from other sources to your project.
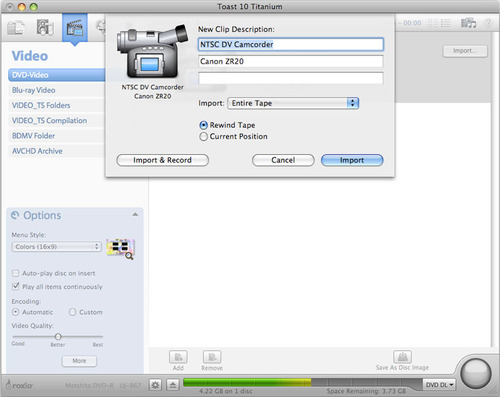
Choosing Plug & Burn options.
If you chose to record immediately, you'll also be prompted to insert a blank disc, and you can leave the project unattended until it's done, making it easy to archive your DV tapes to disc. If you chose to Import only, the finished clip will appear in the Toast project window, where you can trim it if needed, and use it in your video projects.
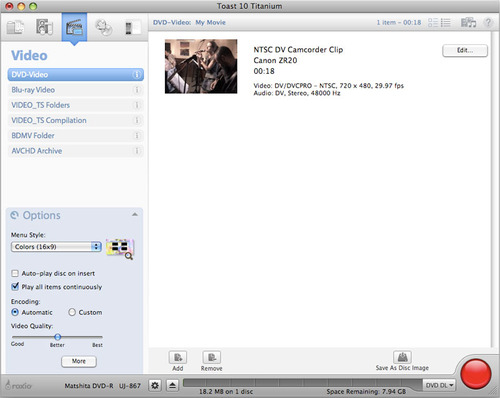
The finished clip, ready to use in Toast video projects