Toast 10 Titanium is the total Mac DVD solution, with loads of movie-making features that make it possible for anyone to create great DVDs quickly and easily, complete with titles and menu themes. You can transfer all your old videotapes to DVD, or import your home movies from your camcorder. You can even extract and reuse clips from other DVDs, and use Web videos, EyeTV and TiVo recordings! (If you have an HD camcorder and the Toast High-Def/Blu-ray Plug-in, see our separate article on making high-definition DVDs and Blu-ray discs here.)
Getting Started
So how do you get started making a DVD in Toast 10? It's really quite simple. First, determine where your source video and photos are coming from: direct from your camcorder (live or tape), from existing unencrypted DVDs, or from existing video and photo files on your hard disk, including iMovies. Import video from your camcorder with Toast, or organize your content files. You can use any QuickTime-supported video files, such as DV, AVI, MOV, HDV (1080i/720p), and MPEG-4. You can also use video files that QuickTime doesn't support natively, such as AVCHD, MPEG-2, DivX, EyeTV recorded shows, and TiVo transfers. Then launch Toast, and click on the Video tab at top left. Select "DVD-Video." (Also select NTSC or PAL under the Toast Preferences "Audio & Video" tab, depending on your DVD player format. North America and Japan are NTSC, most of Europe and Asia are PAL).
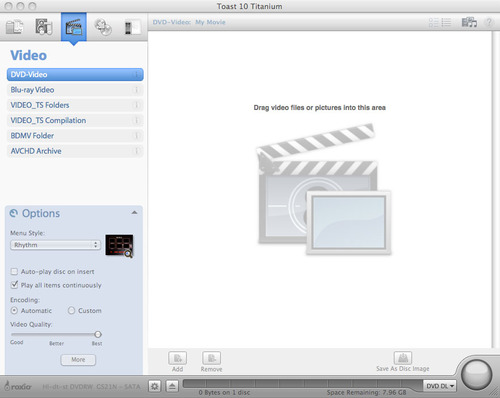
Toast's easy-to-use encoding presets let you prioritize recording speed or video quality (click to enlarge).
Also decide on encoding quality (bottom left). Choose Automatic, then "Best" quality unless speed is more important to you. The Toast encoder will automatically adjust the encoding rate to use all available space on a disc. A single-layer DVD holds 60 to 150 minutes of video depending on quality level, double that for dual-layer. Generally, the less video you put on the disc, the better the quality. For photo slideshows you can fit thousands of images on a DVD. (You can also have a mixture of slideshows and video clips.)
Finally, if you are making a disc that contains slideshows, you can choose to include the original full-quality photos on the disc as well. Click the "More" button at bottom left, then check the box to "Add original photos" under the Disc tab). This is a great feature for sharing photos with family and friends. Not only will they be able to view your video and photos, they can print the pictures too! The photos will be accessible when the disc is used on a computer, Mac or PC.
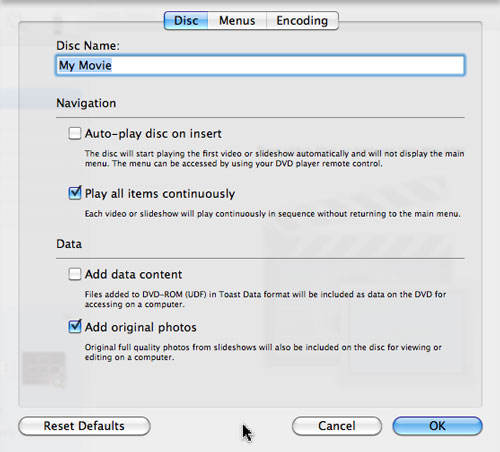
Toast video disc options include the ability to add full-resolution photos on a photo slideshow DVD.
Drag & Drop
Now that you've set up your basic project, you can start adding videos. To add content, simply drag your video clips, photos or iMovies into the content window. You can mix up DV files, movies copied from an MPEG4 (AVC) camcorder, video downloaded from the Internet (including DivX files), iMovies, EyeTV recordings, pictures from iPhoto or Photoshop, selections from other DVDs, and more. Use the Toast Media Browser to select clips, or drag in your files from the Finder. Photos dragged together, or in one folder, will become a single slideshow; photos dragged individually will become separate "slideshows."
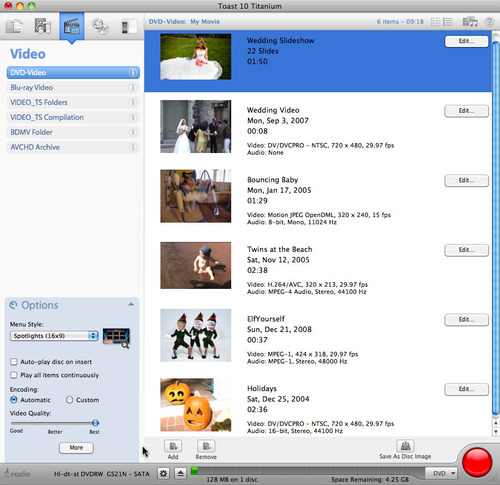
This DVD video project shows a few of the wide variety of source formats supported by Toast: Motion-JPEG clips from a digital camera, DV clips from a digital tape camcorder, H.264/AVC clips from a flash-based camcorder, an MPEG-1 animation downloaded from the Web, and a JPEG photo slideshow.
Organizing and Editing Your Content
With all the content added, it's time to organize it and think about what the resulting disc will look like.
First, put your content in the order in which you'd like it to appear on the disc, by dragging items up and down the content window. Note that each item in the content window will become a button in the DVD navigation menu, so if you want some videos to be combined into a single button, you'll need to merge them before dragging into Toast. You can splice clips together in QuickTime Pro, iMovie or another video editor.
Next, customize each item if desired, by clicking on the Edit button. For video, you can trim off extra frames at the beginning or ends of clips, set a particular frame to use as the button icon, and give a name to the clip, which will be used as a tag on the menu button. You can also split the clip into "chapters" of 1 to 10 minutes or automatically use chapters that have been set in iMovie, Final Cut or Toast's Plug & Burn utility. Chapters allow you to use the DVD player's remote control to jump forward and back in the video quickly.
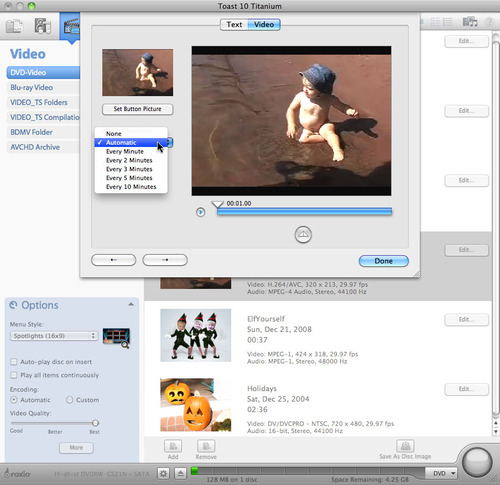
Toast lets you trim the beginning and ends of clips using sliders, and set chapter markers for easy navigation (click to enlarge).
For photo slideshows, clicking the edit button lets you add and remove pictures, change their order, set a duration for each slide to appear on screen, specify a name for the slideshow, and select one photo to use as the button icon. For a truly great slideshow with transitions, animation effects, audio tracks, titles and more, use Roxio PhotoShow (available at PhotoShow.com) to create and download the show, then drag the resulting movie into your DVD project.
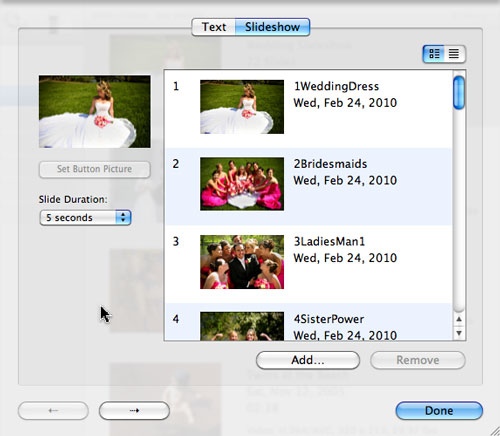
Toast makes it easy to rearrange, add and delete photos from your slideshows. You can also choose a photo for the menu button, and set slide duration.
Customizing DVD Menus and Styles
Toast 10 lets you choose from a number of different themes, or menu styles, for your DVDs. These themes incorporate background artwork, fonts, menu placement, border styles, and so on. To choose a theme, select it from the drop-down menu at the bottom left of the Video project window. Then click the "More" button to customize your disc further.
Options include changing the number of buttons you want to show in the main menu, and whether you want to include slide menus for photo slideshows. You can also decide whether you want the disc to auto-play when inserted, and whether it should play continuously or stop at the end of each chapter. Finally, as we mentioned earlier, you can opt to include data files or original photos on the disc that will be viewable only when inserted in a computer. This feature is really useful for adding full-resolution files to a photo slideshow for archiving or printing purposes.
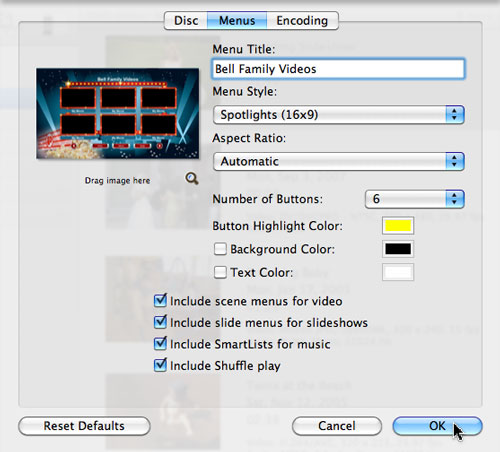
Choose one of the provided menu styles, or drag in your own background picture.
If you are a real pro, you can also customize DVD encoding parameters like video and audio bit rates and aspect ratio. More information on these can be found in the Toast user manual, but we advise sticking with the automatic settings for reliable results.
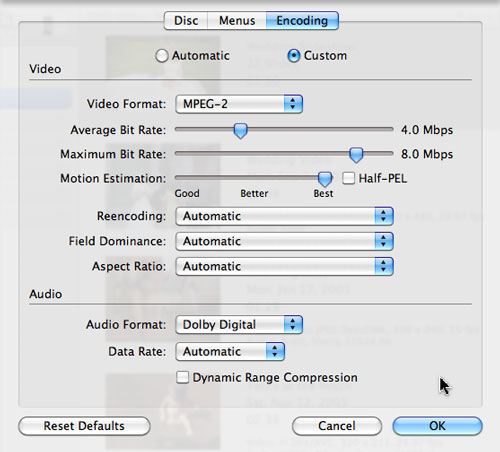
Toast provides full control over DVD encoding parameters for video pros.
Now that you've got everything perfect, be sure to save your project. That way, you can open it again later and add or tweak things easily.
Burning the Disc
Now it's time to burn! We recommend previewing your DVD by saving it as a Disc Image file (using the Disc Image button at bottom right), and playing it back just as you would a regular DVD (mount it on the Desktop from the Toast Utilities menu). This way you can try it out and make any needed tweaks. If you decide that the slide duration should be a little longer, the menus need rearranging, or a piece of video needs a little editing, you can make changes without wasting media. A disc image is also handy to have if you want to make extra copies of your disc later. You can burn the image without having to reencode the video.
To burn, simply click the record button and insert your blank media (single or dual-layer, as appropriate for your project). Toast will then encode and process your video before burning. If you want to make multiple copies, you can specify this in the burn dialog, and Toast will prompt you to keep inserting additional discs until all are done.
That's it! You've successfully made your first movie DVD with Toast 10! We bet you'll want to make many more.