Got older photos that need fixing up? Cell phone pics that are washed out and grey? Or just want to get creative with your images? It's time for PhotoSuite, part of the Creator 2010 and Creator 2010 Pro packages.
Most Creator owners have probably used PhotoSuite to perform common tasks like rotate and crop pictures for printing and remove red-eye. Perhaps you've even taken advantage of the handy AutoFix tool to correct exposure problems. But there's a whole new world of photo enhancement awaiting you with a little exploration of PhotoSuite's more advanced features. Tools like cloning, dust removal, special effects, smart edge detection and masking can make your pictures come alive.
Here's a quick tour of some of our favorite PhotoSuite tools, which are accessible by clicking one of the three tabs at the top left of the editing window, then choosing the appropriate task.
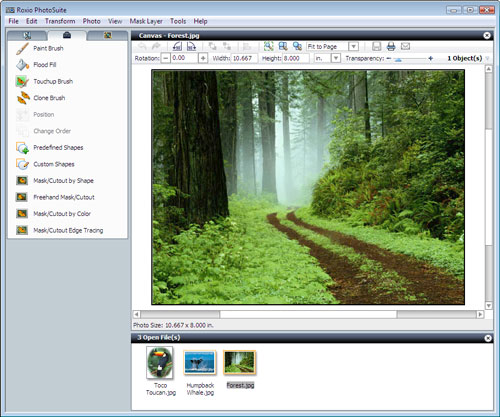
Masking & Cutouts
If there's one key area you should master, it's masking. Masking is the process of isolating and cutting out an area of a photo, which can then be used alone or in combination with other tools and photos to produce virtually any result you can imagine.
With masking, a person or object is typically separated from an uninteresting background, and then placed on a new background or used alone. The toucan in the photo below could be isolated using the Mask/Cutout Edge Tracing tool, or using the Mask/Cutout by Color tool. The first lets you trace the outline of an object with a series of clicks around it, while the second lets you select a relatively uniform background by clicking areas of like color around it. Cutout by Color works great for an object set against a blue sky or white wall, for example.
Here, we're using the Mask/Cutout by Shape tool (found under the Change Objects tab) to put a frame around our cutout subject, which will make a nice portrait for printing or use on a greeting card. The slider at the bottom of the tool window determines the amount of "feathering" of the frame edge. Here, we've used quite a bit of feathering to give it an old-fashioned look.
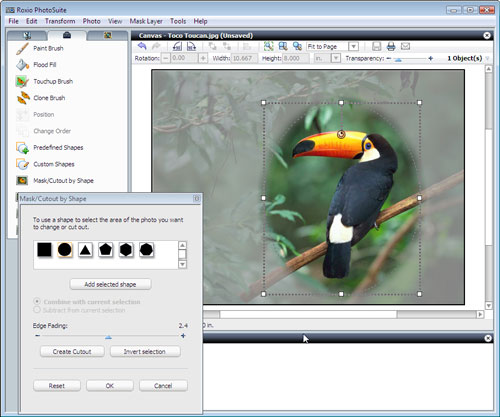
Using PhotoSuite's Mask/Cutout by Shape tool to create an oval frame.
Once you've got the mask the way you want it, simply click "Create Cutout" and choose to create a new object or save it to a file (depending on what you want to do with it). You can use the finished cutout in all sort of projects, from collages to calendars.
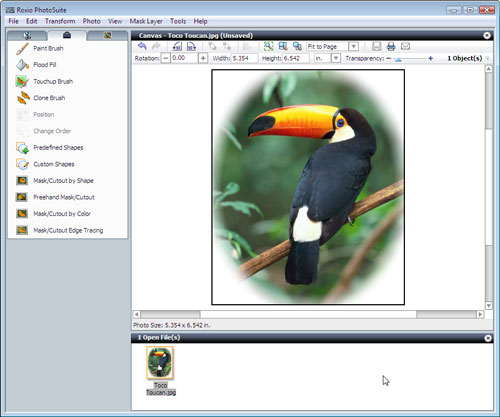
The finished cutout.
Cloning & Stamping
The Clone Brush is another handy tool under the Change Object tab that is surprisingly easy to use once you try it. With the Clone Brush you can copy (clone) a portion of a photo elsewhere in the image, using a variable-size brush to "paint" it on. Here, we're going to give this lonely humpback whale a companion.
To use the Clone Brush, you simply select the tool, then click in a corner of the object you want to clone to set the "start point." Then you brush it directly into the area where you want to duplicate it. As you brush, you'll see the object beginning to appear; simply keep brushing until you have as much of it cloned as you like. You can do this as many times as you want in one picture. So you could fill a night sky with cloned fireworks or stars, for example.
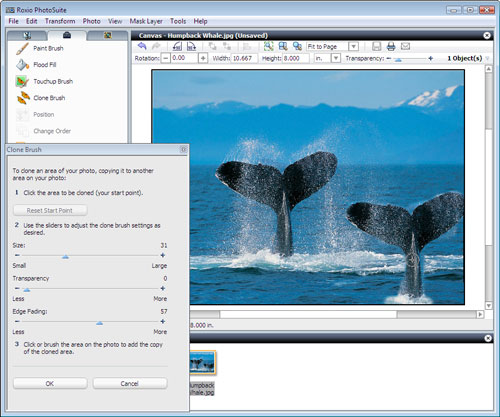
Using the Clone Brush to give this humpback whale a diving partner.
Special Effects & Clip Art
A myriad of special effects can be found under the Enhance menu. Here, we're starting with a tranquil forest scene, and would like to deepen its mystery.
Our starting forest scene.
Clicking on the Special Effects tool (under the Enhance tab) brings up dozens of possible effects, from color variations to painterly effects to warping. Here we've chosen to warm the colors in our image to give the desired feeling of being in an enchanted forest.
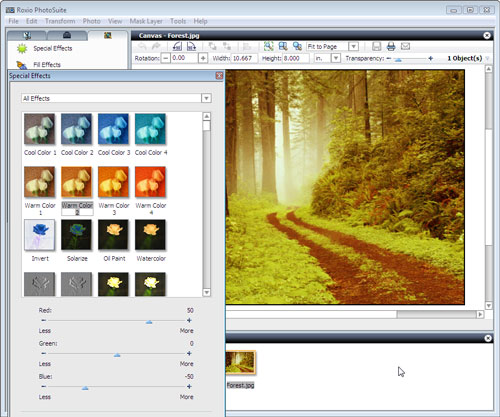
Using the Special Effects tool to warm the colors in an image.
In this alternate take, we've use the Charcoal Special Effect to give the scene an almost snowy look, then planted a snowman with a road sign taken from the built-in clip art collection, also accessible under the Enhance tab. We could then add text to the sign saying "Grandma's House" or "Santa's Workshop" with "Add or Edit Text" tool.
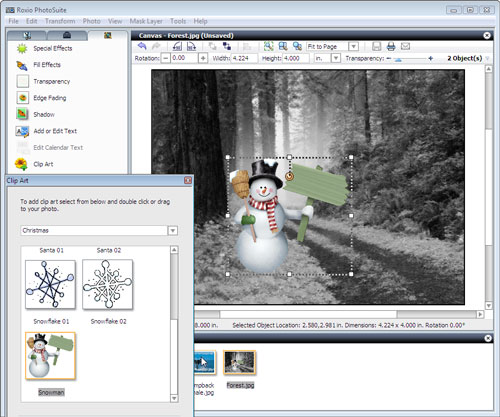
Creator and PhotoSuite come with a huge collection of clip art, like the snowman above.
Framing Your Masterpieces
Frames are great ways to enhance photos for greeting cards or other print projects, and PhotoSuite makes it a snap to add them. You simply select the Frames tool from under the Enhance tab, then select from the large number of options. The frame is automatically put around your photo. There's also a companion Mat tool, for the full framing effect.
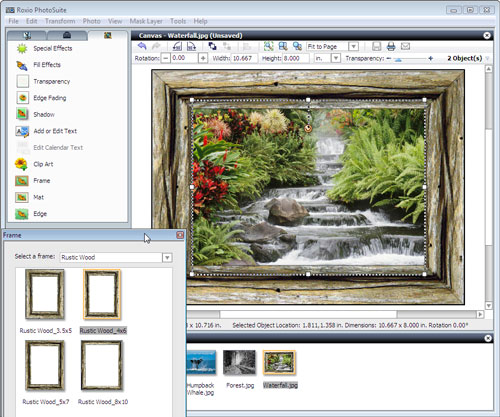
Applying a picture frame in PhotoSuite.
Removing Dust & Scratches
If you scan in a lot of old photos and slides, the Dust and Scratches tools, found under the Fix menu, will be your best friends. Each does just what it sounds like, removing dust or scratches from your photo automatically. You can control the degree of removal using sliders. More removal will necessarily soften your photo somewhat, so try to use the minimum necessary.
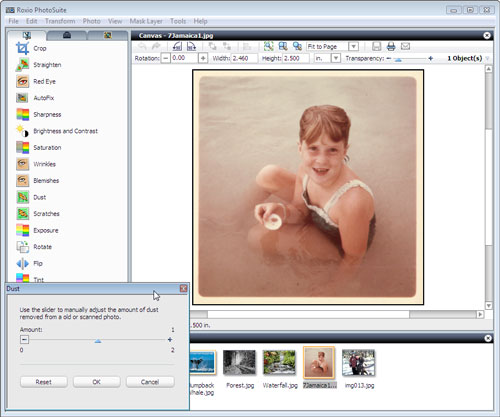
Using PhotoSuite's Dust removal tool.
Fixing Mobile Phone Photos
Finally, if you have a cameraphone, PhotoSuite's Mobile Photo Doctor tool is indispensible for correcting these often washed out or too-dark images.
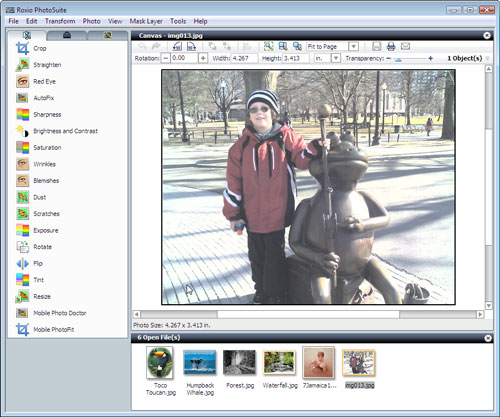
A photo taken with a Treo cameraphone before fixing in PhotoSuite.
One click on the Mobile Photo Doctor, and color and contrast are restored to this image.
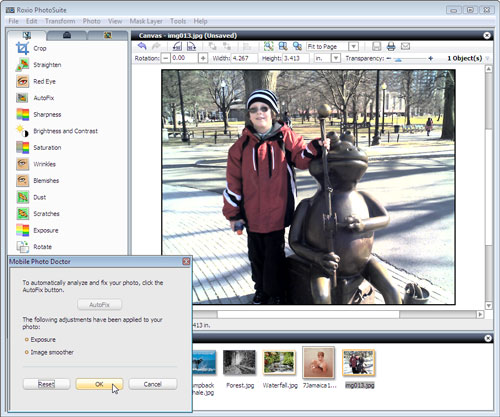
The picture after using PhotoSuite's Mobile Photo Doctor.