
Want to make a Holiday PhotoShow like this one? Then gather up your best photos, from holidays past and present, and go to PhotoShow.com to get started. In just a few minutes, you can create a fun and engaging keepsake of the season. Music, captions, and themed styles let you tell a story with your pictures.
The whole family can join in on picking photos and music, and adding captions, effects and stickers. You'll create new memories while you relive the old ones.
Play your new show on your big-screen TV for everyone to enjoy! Or put it on your Web site or blog (including Facebook and MySpace), email it to friends and relatives, transfer it to your iPod or smartphone, or burn a DVD. The sharing options are endless. Your show can also be as private or as public as you like. You control who you invite to view it.
Basic PhotoShows are free to create and share. With a Premium PhotoShow account you also get many added benefits, such as video clip support, hundreds more custom styles and artwork, and the ability to add your own MP3 tracks or use multiple music tracks in one show. Premium subscribers can also create PhotoShows offline with the downloadable desktop software, and burn their own DVDs.
So how does it all work? The best way to learn is simply to create a PhotoShow! Here, we'll go through the process of creating a Holiday PhotoShow on PhotoShow.com.
Getting Started with Roxio PhotoShow
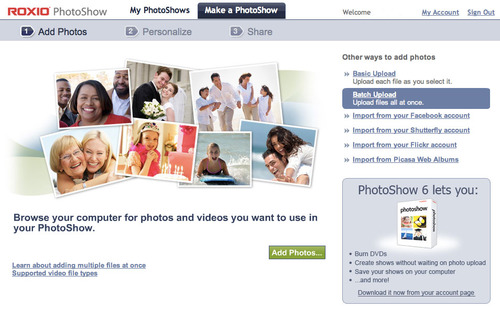
To begin your PhotoShow, go toPhotoShow.com and click the Sign In button at upper right, if you aren't signed in already. Or click Sign Up to create a new account. Now click the "Make a PhotoShow" button at the top, which brings you to the first step: adding your photos.
Click to enlarge.
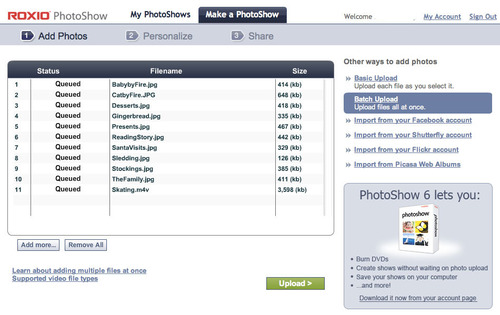
Next, click the Add Photos button so you can upload pictures from your hard drive. You can select as many files as you like at one time; just hold down the Control key (or Command key on the Mac) to select additional photos in the same folder. Click the Add more... button to add more photos from different locations. You can import photos from Facebook, Flickr, Picasa and Shutterfly, too (choose the account first from the list on the right). If you have a Premium account, you can also select video clips from your camcorder to upload. Once you've added all the photos for your show, your screen should look like this (notice the video at the bottom of the list):
Click to enlarge.
Finally, click the Upload button to send all your photos and videos to PhotoShow.com. You'll see a progress bar as each file uploads.
Customizing Your PhotoShow
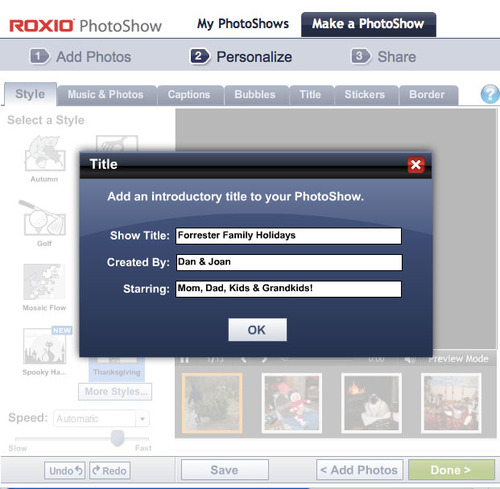
Now the fun begins! You'll be asked to enter a title for your PhotoShow, as well as a creator and "star(s)." These credits will be shown at both the beginning and end of your show. Be as whimsical or serious as you like, depending on the subject matter.
Click to enlarge.
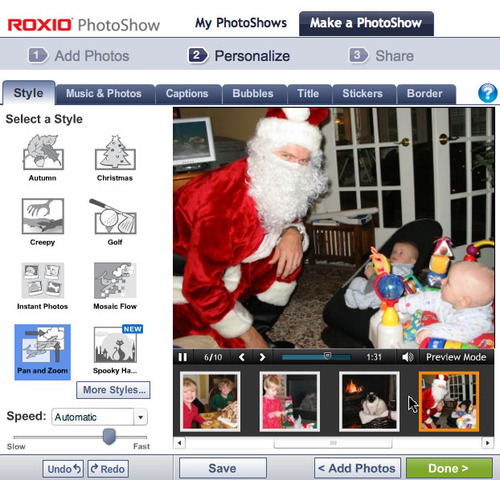
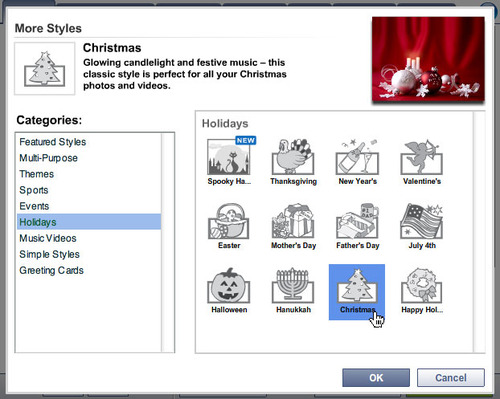
Next, pick the overall Style, or theme, for your PhotoShow. There are dozens to choose from. Click the More Styles button to browse the additional themes available to Premium members. You can also customize the timing for each slide, if desired, letting some slides stay onscreen longer than others, using the drop-down Speed menu and slider.
Click to enlarge.
Here, we've picked the Christmas style; other Premium holiday options include Thanksgiving, Hannukah, New Year's, Happy Holidays, and Winter. You can quickly preview your show with any number of styles to see what is best for you in the thumbnail at upper right.
Click to enlarge.
If you have any questions about PhotoShow features as you go, simply click the little question mark icon to open the Tips panel on the side, which provides context-sensitive help.

Click to enlarge.
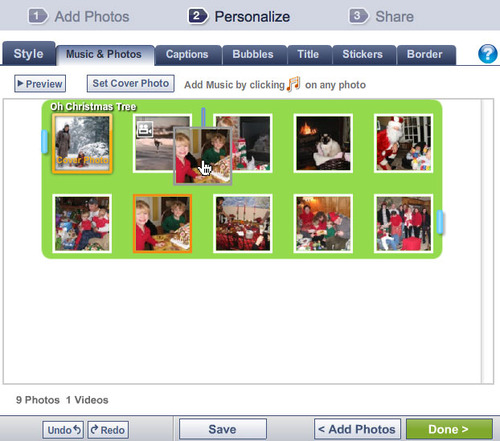
With the style picked, it's time to arrange our photos and add some background music (notice that we're simply following the tabs at the top from left to right -- although you can select tabs in any order). Under the Music & Photos tab, you can drag your photos around into any order, rotate them (using the popup icon at the lower left corner of each photo), delete photos, and add additional music tracks. Premium users can also upload their own MP3s.
First, we'll arrange the photos and videos in the order that we want them to appear by dragging them around. We've got two vintage items: one photo and one video, taken in the early 60s, that we want to show first, so we'll move them to the beginning, and also rearrange the rest of the slides.
Click to enlarge.
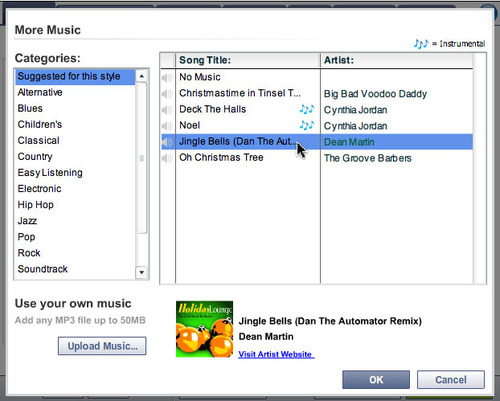
Next, we want to select a more upbeat music track for the contemporary portion of the show, so we'll slide over the blue handle at the end. The blue handles define the start and end of each music track. Now we can click the music icon in the top right corner of the third photo to pick a new track for the rest of the slides.

Click to enlarge.
The More Music window will open, where you can select other PhotoShow tracks, or upload your own if you have a Premium account. We've picked Jingle Bells as our second track below.
Click to enlarge.
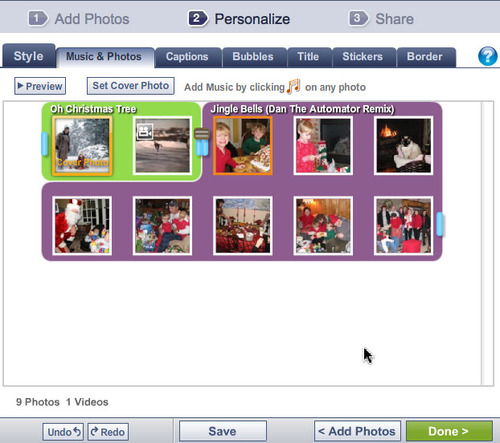
Now you can see how the show looks with two songs. Each is represented by a different color. You can drag the blue handle in the middle to change the crossover point of the two tracks. You can also add and remove photos at any time.
Click to enlarge.
Moving on down the line, we come to the Captions tab. Captions can be added in any size or width of text, in several different styles, and dragged into position anywhere on your image. This makes it easy to customize captions for each slide. Captions are where you can get really funny and creative, bringing your photos alive for your viewers. Simply click the Next button to add captions to each slide in your show.
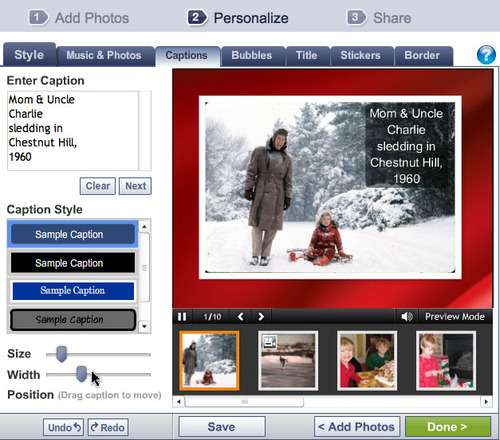
Click to enlarge.
New to PhotoShow.com this month is the ability to resize the editing window, so you can see more options at one time, and preview your show in full size in real time while you edit. Enlarge the picture below to see what a difference it makes!
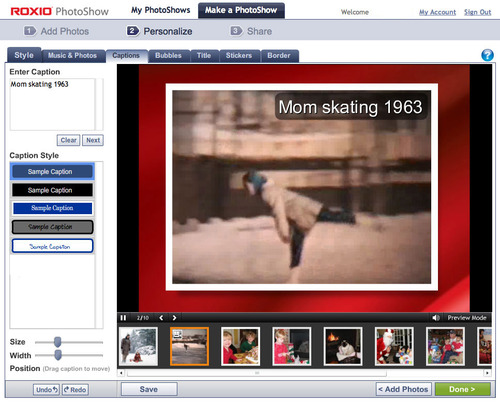
Click to enlarge.
The fun doesn't stop there: you can also add speech bubbles, more titles, stickers, and borders. Premium subscribers get more options for these. Here we've added a bubble to one of our slides.
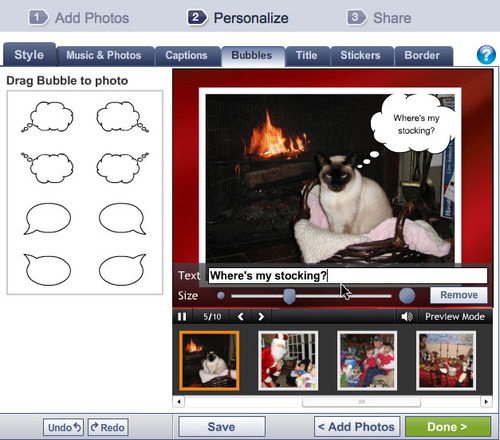
Click to enlarge.
And below we've added a couple stickers to another slide. Stickers are basically animated graphics, in tons of fun shapes and themes. You'll find everything from mistletoe and Santa's caps, to hopping Easter bunnies and flying Halloween witches in the sticker library.
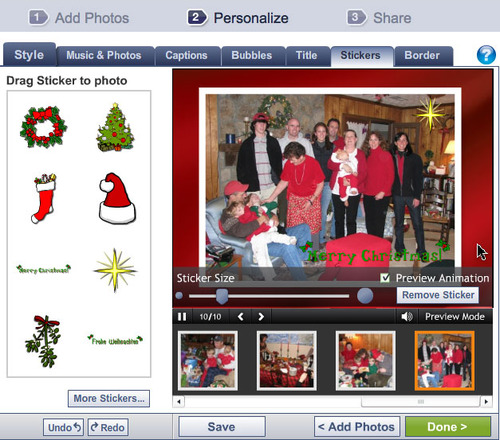
Click to enlarge.
Finally, borders are great for adding interest to your entire show. Here's an example of what borders look like, although we have not applied one to our final show. There are many other themes to choose from, as well as plain picture-frame styles.
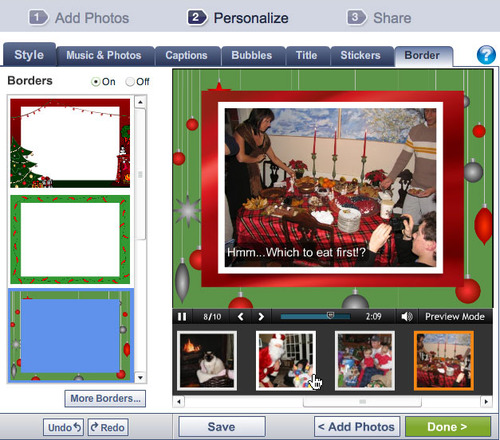
Click to enlarge.
Sharing Your Show
You can continue to play with your show and add or change elements. When you're finished, click the Preview button to check out the complete show.
Assuming everything is okay, click the Done button to start sharing! There are four basic sharing options: you can email a link to view your show to friends and family; post the show to your Web page or blog; or purchase your show on DVD. With a Premium account, you can also save your show to your hard drive in MP4 format, for viewing on your iPod or other portable player, and burn your own DVDs.
To transfer a show to your iPod or iPhone (with a Premium account), click the "Save as MP4 video" button at lower right. In a few minutes, you'll received an emailed link to download your MP4 show to your desktop. MP4s can be dragged and dropped right into iTunes for syncing with your iPod, or transferred to any other media player that supports MP4 video, including PSPs.

Click to enlarge.
Now, wasn't that fun and easy?