Want to be able to play your digital music on your home theater, but don't want the expense and hassle of a streaming set-top box or iPod dock? Try a Music DVD! This is simply a standard DVD, filled with music instead of video. It can play in any DVD player, and navigated from the comfort of your couch with your DVD remote, just like a video disc. Even better, it holds up to 50 hours of songs -- in high-quality Dolby Digital format!
Music DVDs are perfect for parties, too. You can include cover art (or any other photos you like) for each track, and tracks can be arranged in handy menus and playlists. You could create a 60's theme disc with pictures from the era that show on screen while the music plays. Or a disc for a family reunion with family photos and family favorite songs. In essence, a Music DVD is a music player that you or your guests can control with your TV remote. And just one disc can hold an entire music collection. (Both single and dual-layer DVDs are supported.)
To create a Music DVD with Toast 10, first choose the Music DVD project type under the Audio tab. Then drag in music files from your hard disk or the Toast Media Browser. Each folder or group of files you add at one time will appear as a playlist with its own button on the DVD menu.
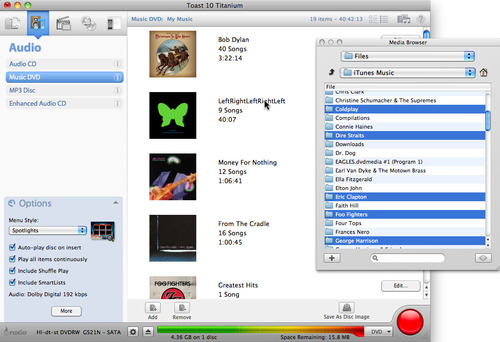
Dragging in music from the iTunes library via the Toast Media Browser.
Now that you have your music imported, click the Edit button for any playlist to: rearrange, add or remove songs in the list; add album artwork or photos; set the name and menu button image for the playlist; and set the length of the pause between tracks. To add album art or photos, simply drag and drop an image directly onto a track in the Edit window. If you don't add artwork to a particular track, the button graphic from the DVD menu will be displayed instead.
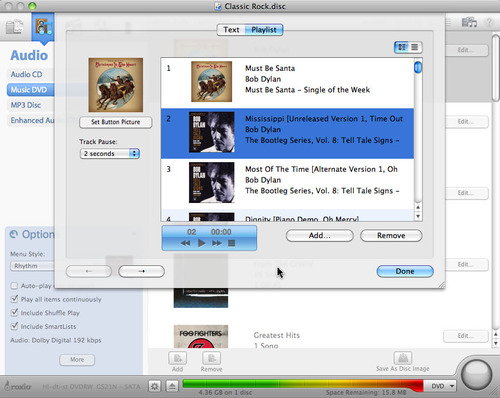
Editing a playlist.
Next, open the Options area at bottom left to select a DVD menu style (there are dozens of choices) and options such as "Include Shuffle Play," which adds a Shuffle Play button for each playlist on your DVD to play the tracks in random order.

Choosing DVD menu options.
Finally, click the burn button to record your disc. The bar at the bottom tells you how much space your music will take up. You can use dual-layer discs if you have too much for a single-layer DVD, for nearly 100 hours of music!
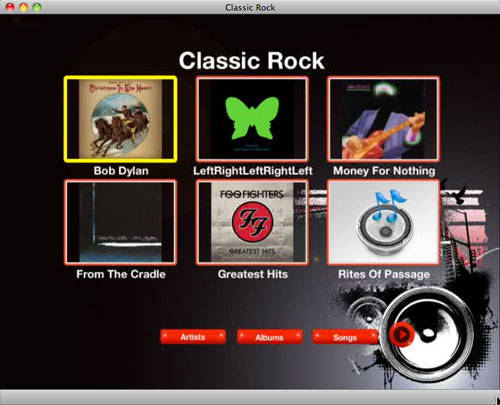
The finished DVD showing the Playlist menu. Note the Artists, Albums and Songs buttons at the bottom, so you can find any song easily.