Have you ever wanted to copy video or audio clips from a DVD to put on your iPad or use in other projects? Now you can! Roxio Toast 11 Titanium lets you select and extract just the video scenes (or parts of scenes) you want from your non-encrypted DVDs. You can then convert them and send them to iTunes in one step. You can even combine clips from various scenes on your DVD, selecting just the highlights you want, and eliminating the rest. Clip out a scene from that DVD of your sister's wedding and add it to a family movie disc, or extract the music from that movie or concert DVD and listen to it anywhere. Here's how:
1. Bring in Your DVD
Open Toast and click on the Convert tab, then select the Video Files project type. Add a non-encrypted DVD disc or DVD-Video folder (VIDEO_TS folder) to your project by dragging it into the Toast window from the media selector at right.
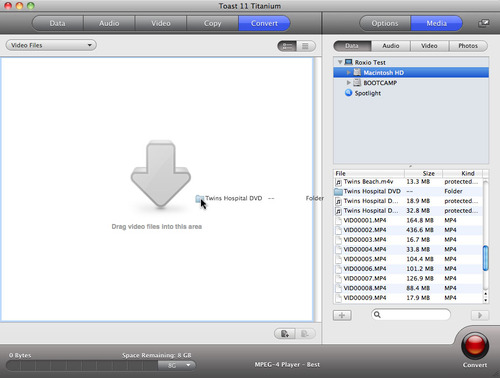
Dragging a Video_TS folder to the Toast project pane (click to enlarge).
2. Mark Clips to Extract
After you drag the video to the project pane, a window will open up showing the video with a timeline at the bottom.
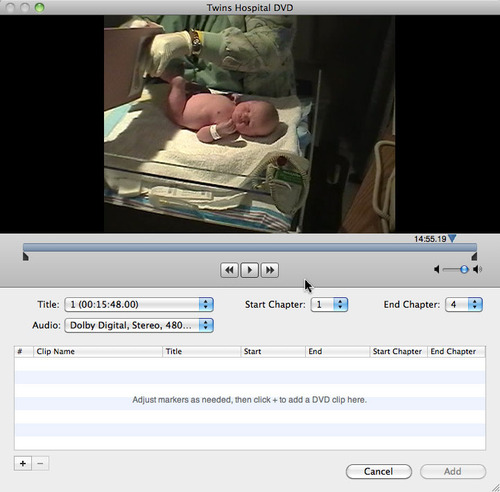
The Toast clip selection window (click to enlarge).
3. Select Your Clips
The clip selection window includes a pair of in/out markers on the far left and right of the timeline. Drag these to mark the beginning and ending points of the first clip you want to extract, then click the + button in the bottom left corner to add it to the list. Drag the markers again to select a second segment and click + again. Double-click the clip names to edit the titles if desired.
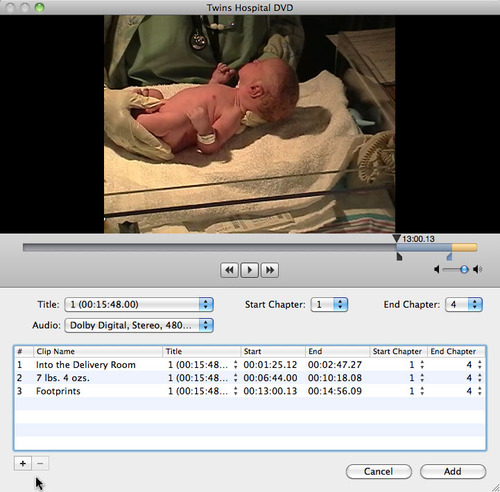
Selecting DVD clips in the Toast Video Editor (click to enlarge).
Keep adding clips in this manner until you are done, then click the Add button to extract them. The clips will now appear in the project window, where you can burn them to disc or export them in a myriad of formats for use in video projects or playback on your mobile device.
4. Convert & Export Your Clips
Now that you've extracted your clips, all that's left is to convert and export them. Click the big red Convert button at bottom right, and a dialog box will open where you can select output options.
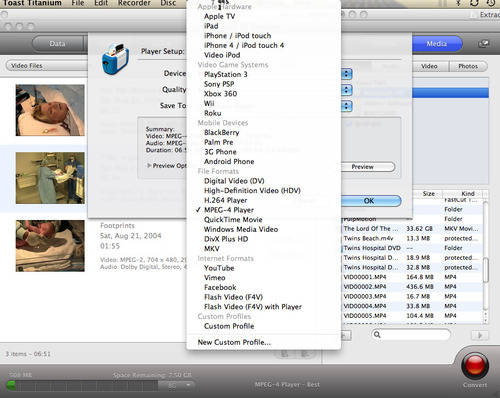
Video output conversion options (click to enlarge).
First choose the device or format you want to save to, such as iPhone or QuickTime movie. Then select a quality level (we recommend using the default options for your output device). Finally, choose a destination for your video, such as iTunes, your Movies folder, or the Desktop. Click the Convert button, and you're done!
Now enjoy your DVD clips on your iPad, iPhone or Apple TV, upload them to Facebook, or use them in your other video projects, including iMovies.
5. Extract & Convert Audio Clips Too!
To extract audio clips from a DVD, the process is exactly the same, except you choose the Audio Files project type at the very beginning. Then drag your DVD or Video_TS folder to the project pane, and the same clip selection window as for video will pop up. Follow step 3, then click the Add button to add your audio clips to the project pane.
Here you can add track information and apply audio effects if desired. Finally, click the Convert button to burn or output your audio files.
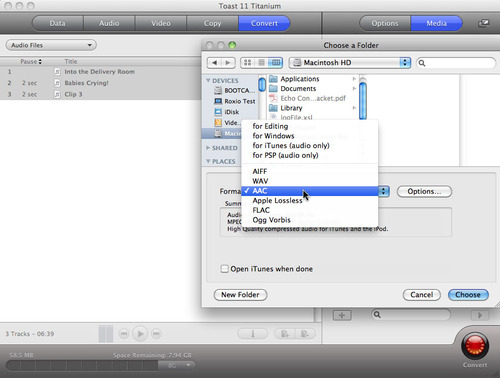
Audio output conversion options (click to enlarge).
Now enjoy your audio clips on your iPod, upload them to the Web, or use them as slideshow soundtracks!