Want your iPhone, iPod and Apple TV video to snap, crackle and pop? Then Crunch it first!
Converting a movie, TV show or home video into a format that will look good on your iPod or iPhone is a fine art, as is creating top-quality streaming files for Apple TV. The compression process needs to be tuned for each type of video source and playback device, which can involve a bewildering array of technical parameters. But you don't need to be a digital video guru to get your home movies onto your iPod, or your DVDs onto your Apple TV. All you need is Roxio Crunch for Mac.
Roxio Crunch reduces the entire process to three easy steps, and does all the heavy lifting for you. You simply choose the video source files to convert (in nearly any format), select output presets optimized for your device, then go! Multiple video files can be processed in one batch, making it simple to move entire movie libraries to your new Apple TV, iPhone or iPod Touch.
You can even take unencrypted DVDs and Video_TS folders and select just the movie tracks you want to convert (skipping the extra features and foreign languages), which can save huge amounts of valuable drive space. After converting, Crunch drops your videos right into iTunes for automatic synchronization to your device. Here's how to do it:
Getting Started with Crunch
Roxio Crunch can convert most common types of digital video files for use on your Apple TV, video iPod, or iPhone, including:
* DVD-Video discs created with Toast, iDVD, or DVD Studio Pro
* Commercial DVD-Video discs that are not copy-protected or
encrypted
* DVD-Video image files or VIDEO_TS folders from your hard disk
* Native QuickTime video formats, such as DV, AVI, MOV, and MPEG-4
* Other non-QuickTime video formats, such as MPEG-2 and DivX
The basic process is very simple. Just choose a video type from the source drawer on the left, drag your file(s) to the content window on the right, then click the red Convert button at bottom right. You will then be presented with a Player Setup dialog. You can drag as many video files as you like, to perform a batch conversion.
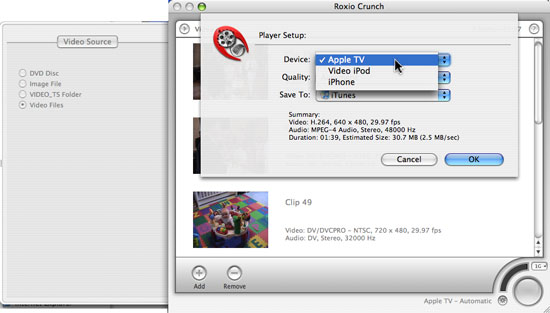
Crunch conversion options.
The easiest way to use Crunch is to select your device (Apple TV, iPod or iPhone), along with the Automatic quality setting and output to iTunes. Those three settings will do everything automagically for you. If you want to be sure of top quality output, you can choose the Highest setting, or select Custom to set your own compression parameters. The Automatic setting will balance quality and file size, depending on the output device.
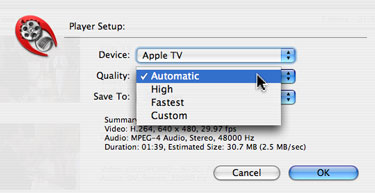
Output quality level selection.
Customizing Quality Levels
While most users will be happy with the automatic presets, advanced users can delve into Crunch's custom compression options. Separate options are available for video and music. Available parameters will depend on your output device (you can choose image sizes from 160x120 all the way up to 1920x1080 for Apple TV, for example, but only up to 320x240 for iPod).
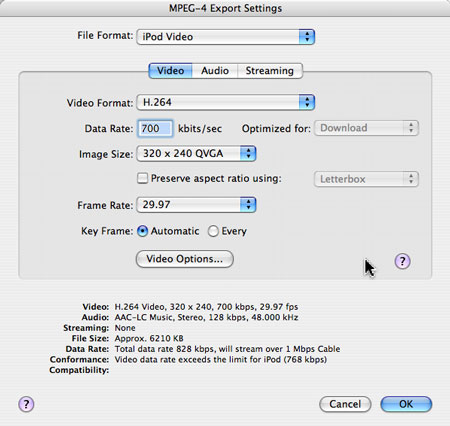
Customizing Crunch compression options.
Crunching DVDs & Image Files
Converting DVDs, Video_TS folders and Disc Image files gives you the added option of selecting particular video tracks to compress. This is a big advantage when converting DVDs with lots of extras like trailers, director's cuts, foreign languages, and extra scenes. Omitting the extras conserves scarce disk space on your iPod or iPhone. By default, the main video and audio are included, as in the following Video_TS folder. Pressing the Options... button brings up a track selector.
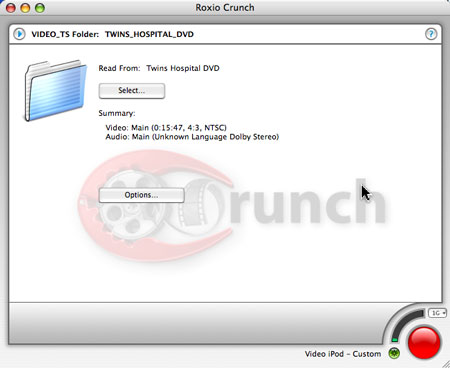
Converting a DVD Video_TS folder.
In the track selector, first click the Video drop-down menu. Choose All to include all videos, or main to include the single longest running video. Custom lets you select individual videos. Under the Audio menu, the primary audio is automatically selected for each video. If you select Custom as your Video choice, you can choose a different audio option for each video, such as a director's annotation or foreign language. Note that videos converted for portable players can only have one audio track and do not contain subtitles or menus. Multi-channel audio tracks will also be downsampled to two channels.

Selecting DVD video and audio tracks.
Sending Videos to Your Player
If you selected iTunes as your destination, your videos can be automatically or manually synched to your device from there. If you saved your compressed videos elsewhere, you can drag and drop them into iTunes, or transfer them to other players that support MPEG-4 or H.264 video, such as the Sony PSP and many new smartphones.
We hope this article shows how easy it is to take all your videos to go, or even to convert an entire video library for viewing on your new iPhone or Apple TV. Now it's Crunch time!