Early converts to digital camcorders likely have a pile of MiniDV tapes chronicling everything from weddings to birthday parties. MiniDV was state of the art from about 1995-2005, when high-definition cameras and AVCHD started taking over. But if you think since MiniDV is digital, the tapes will last forever, you'd be wrong.
First, you can only transfer these tapes to your computer if you still have a working MiniDV camera and a PC with an IEEE 1394 (FireWire) port. Otherwise you'll have to pay big bucks to a specialized service bureau with DV equipment.
Second, very few devices support playback of the DV video format. Tapes can be played in the camera or in a MiniDV tape player, and AVI DV files can be played on your PC. You'll need to convert them for your tablet, streaming box, website, DVD player, and most other devices.
Finally, all tapes degrade with time, not just analog ones. Even if all you do is transfer the raw DV files (which are large, about 10GB per hour) to hard drive or Blu-ray data disc for archiving, you'll be in much better shape than leaving them on tape. You'll no longer need a working DV camera or FireWire-equipped PC.
With Roxio Creator 2012, you can transfer and convert your MiniDV tapes before they degrade or become obsolete. Creator imports direct from most MiniDV camcorders, lets you trim and split clips, and converts them for most playback devices, including DVD players, iPads, Android devices and YouTube. Here's how:
DV Camcorder Import
When importing from DV camcorders, you have two options. First, Creator's handy Plug & Burn utility imports and burns MiniDV tapes direct to DVDs or disc images. This option is great for archiving large numbers of tapes. (You can use the DVDs as video sources later for other projects.) You can import an entire tape at once, or a portion of it. Second, Roxio Media Import lets you import clips that you can save to your hard drive and use in any video project.
To import with Plug & Burn, choose it from the Video & Movies tab on the Roxio Home Screen. In the first screen, you choose DVD options, such as menu styles and disc title, and insert a blank disc. Next, connect your DV camcorder as directed by the manufacturer (typically via FireWire) and set it to playback (VCR) mode. In a few seconds, a camcorder icon will appear in the Content area.
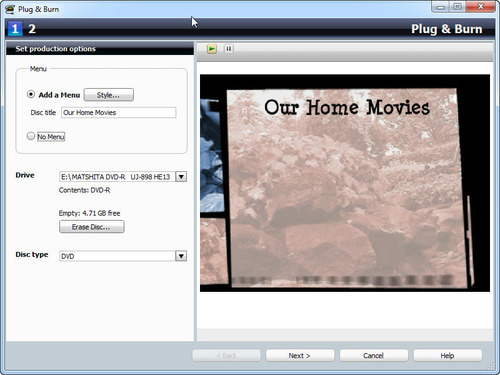
Choosing DVD options in the Plug & Burn utility (click to enlarge).
Next, use the camera controls in the Plug & Burn window, or on your camcorder, to fast-forward or rewind to the point where you want to begin recording. Then click to Capture either a portion or the entire tape. You can also give the clip a name, and choose to include automatic scene breaks.
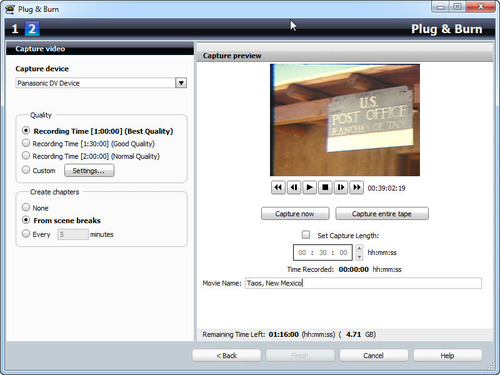
Archiving DV clips direct to DVD with Plug & Burn (click to enlarge).
Plug & Burn is handy for quick DVD transfers, but for more flexibility, such as when you want to burn clips from multiple sources on one disc, or when you want to convert for other devices like tablets, streaming boxes or websites, use Roxio Media Import. To open the Media Import utility, choose Capture Video from the Video-Movies tab on the Creator 2012 Home screen. Next, connect your DV camcorder, and select it from the drop-down menu at top left. Also select whether you want to capture in AVI DV mode, or MPEG2. MPEG2 is the format used by DVDs; AVI DV mode is the native camera format, and optimal quality. For archival purposes, or if you want to convert to other formats like MPEG4, it's best to import in AVI DV mode. Blu-ray data discs can hold up to 50GB, or about 5 hours of native AVI DV files.
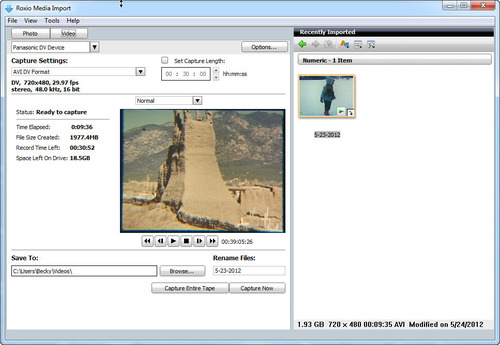
Capturing DV clips with Roxio Media Import (click to enlarge).
Use the camera controls in the window, or on your camcorder, to fast-forward or rewind to the point where you want to begin recording. You can set a fixed length for your capture, capture the entire tape, or use the controls to stop and start the recording in real time. You will see a preview of your capture in the window while it is recording to disk. You can also rename your clips as desired. Finished clips will appear on the right.
Editing and Converting DV Clips
Once you've finished importing your clips, you can edit them with Creator's full-featured VideoWave application, where you can combine them with clips from other sources, add transitions, titles and special effects, and incorporate audio soundtracks. Learn more in our video tutorial on editing with VideoWave.
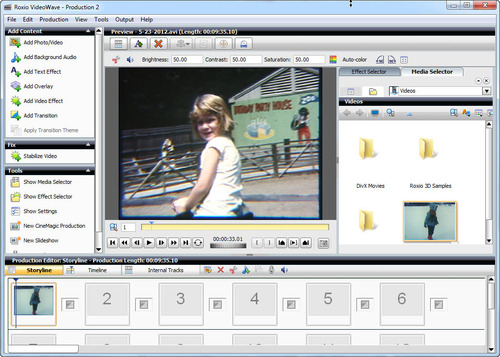
Editing a DV video clip in VideoWave (click to enlarge).
Finally, to view your DV clips on other devices, such as an iPad, open the Copy & Convert utility from the Video-Movies tab on the Creator 2012 Home screen. Here you can easily convert multiple clips at once to popular device formats. Learn how in our video tutorial. Soon you'll be enjoying your old DV movies on your iPad or Android device!
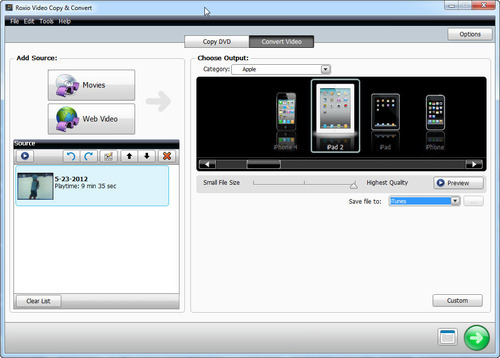
Converting DV clips for iPad with Roxio Video Copy & Convert (click to enlarge).