This holiday season, show off some of those great photos you've taken with your digital camera by using them in creative print projects like greeting cards, calendars, posters, gift tags and invitations. Not only will your friends and relatives treasure their personalized gifts, you and your family will enjoy making these fun projects. You'll also save money over store-bought cards and tags! All you need is Creator 2009 and a color printer. Here's how to get started.
Creating a Greeting Card
To create your own unique cards for holidays, birthdays, graduations, and other special occasions, choose the Photo tab on the Roxio Home screen, then double-click on "Create Projects." You'll be presented with a list of possible project types and templates for each.
Select Cards, then browse through the various styles for the one that fits your occasion. The cards can also be used as party invitations. All are fully customizable with your own pictures, text, background artwork, font styles, and more.
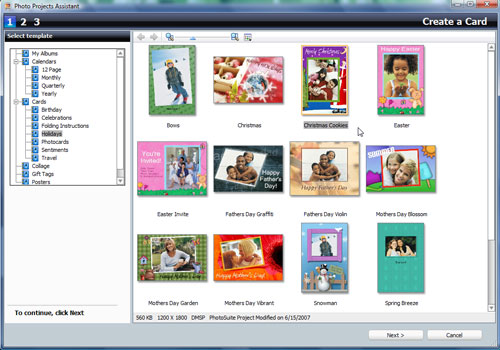
Choosing a card style in Creator's Photo Project Assistant.
When you've made your selection, click the Next button to got to Step 2 and personalize your card.
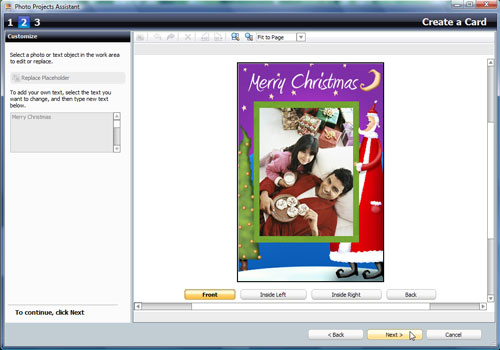
Editing a greeting card.
Now comes the fun part! Double-click the photo on your card, then replaced the picture on this holiday card with your own (a baby Santa in our example). You can also replace the background artwork with another photo if you like.
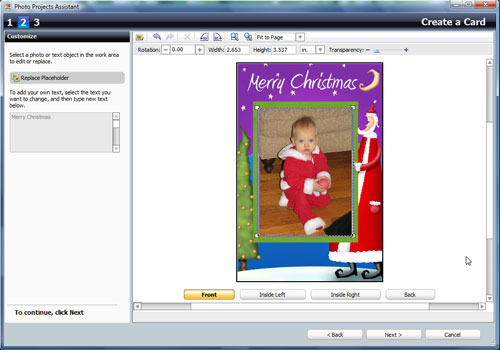
Customizing the front of the card with your own picture and text.
Next, customize the inside of the card. Click on the "Inside Right" button to view the text placeholder, select it, and then type your own text in the box at left. We changed the text color to red to match the holiday theme. That's all we did to this card. You can also change the font size and style using the tools at the top, or customize the inside left and back of the card with additional photos and text.

Customizing the inside of the card.
Printing Your Card
Now it's time to print! First, however, be sure to save your card project, in case you want to print more copies later. Then click the Print button. (You may also want to email the card to some recipients, click the Email button for that.)
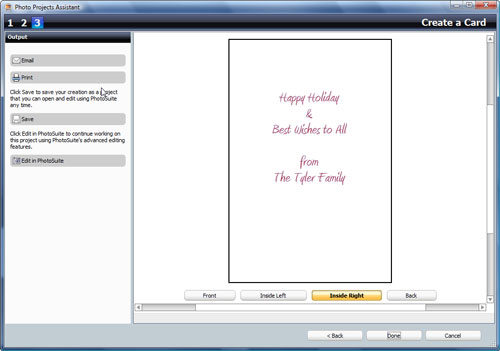
Printing and saving your finished card.
In the Print Settings box, examine your card to be sure it's positioned properly on the page, then select the printer you want to use, and the number of copies. Now press the Print button to print the first side of the paper. (We recommend high quality photo card stock, which you can find in most big office supply stores.) Next, turn the paper over and reinsert it into your printer in the proper direction, and print the inside of the card. Do a single test page first to be sure you have the orientation correct and that the card folds properly. Finally, use a paper cutter (or ruler and x-acto knife) to trim the edges of your cards. Enjoy!
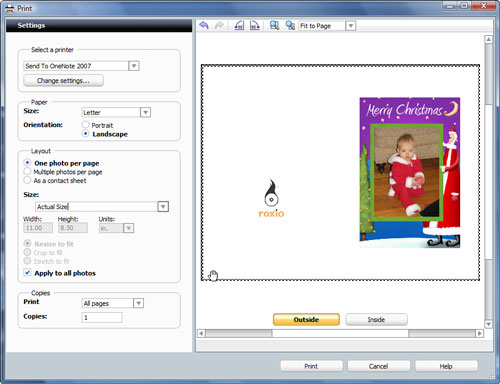
Customizing the print settings.
Creating a Photo Calendar
While making your own greeting cards is quick and easy, if you really want to impress people, give them a customized calendar that they can use every day. To start, open the Photo Project Assistant again, and select Calendars instead of Cards. Choose the template that comes closest to your ideal, and click Next.
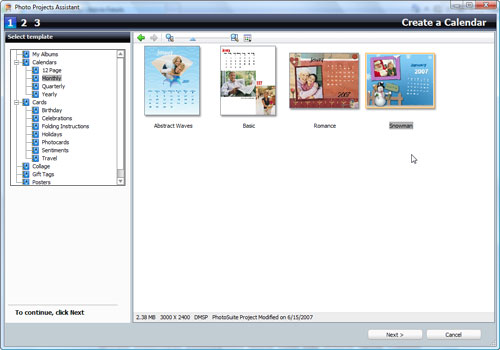
Choosing a calendar template.
Now replace the various calendar placeholders with your own pictures and text, as you did with the greeting cards. Also choose a start date for your calendar. Again, you can customize any of the page elements, and change fonts, styles and colors. Finally, save and print your project, and let the compliments roll in!
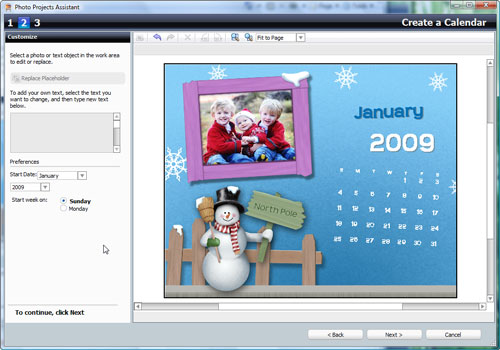
Customizing your calendar project.