This summer, share your travels with your friends and family just when they are most interested: while you are still on the road! Roxio PhotoShow makes it a snap to create photo and video slideshows from your laptop or even your smartphone (iPhone, BlackBerry or Windows Mobile). You can create dynamic multimedia slideshows with music, special effects and animation in minutes.
The sharing options are endless, too. Invite friends and family to watch your shows on your personal Roxio Web page, embed your shows on your blog or on other sites like Facebook and MySpace, burn your shows to a DVD, even podcast your favorites and watch them on your mobile device of choice! Your shows can be as private or as public as you like.
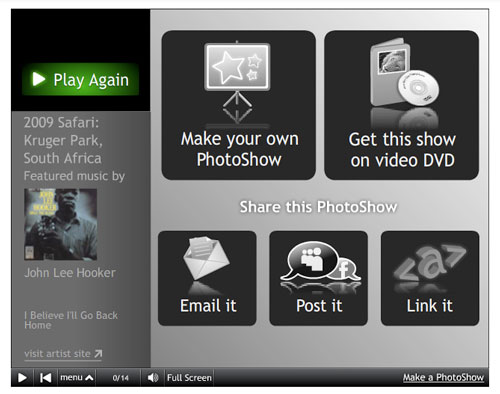
Basic PhotoShows are free to create and share. However, a Premium PhotoShow account brings many benefits like video support, hundreds more custom styles, music and artwork, and the ability to create PhotoShows offline, using the matching desktop software.
So how does it all work? The best way to learn is simply to create a PhotoShow! Here, we'll go through the process on PhotoShow.com.
Getting Started with Roxio PhotoShow
To begin your PhotoShow, simply click the button labeled "Start Your PhotoShow Now," which brings you to the first step: adding your photos.
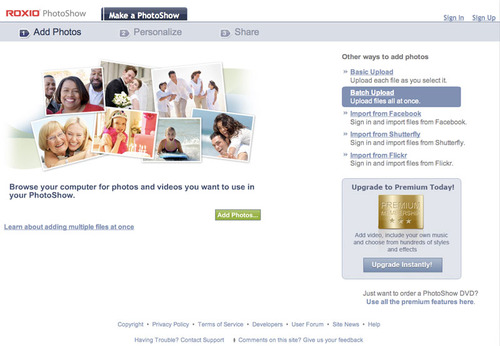
At this point, click the Sign In button at upper right, if you aren't signed in already. Or click Sign Up to create a new account. Now click the Add Photos button so you can upload your pictures. You can select as many files as you like at one time; just hold down the Control key (or Command key on the Mac) to select additional photos in the same folder.
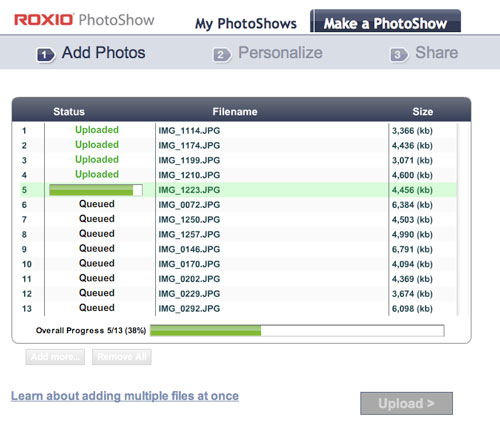
Continue adding photos until you have everything you need. You can import photos from Facebook, Flickr, and Shutterfly, too. If you have a Premium account, you can also select video clips from your camcorder to upload.
Customizing Your PhotoShow
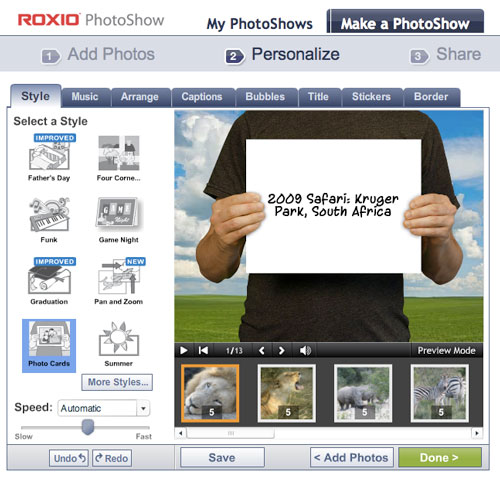
Now the fun begins! You'll be asked to enter a title for your PhotoShow, as well as a creator and "star(s)." These credits will be shown at both the beginning and end of your show. Be as whimsical or serious as you like, depending on the subject matter. Then default PhotoShow styles will be applied, and you'll see a preview of your PhotoShow. At this point, you pick an overall Style for your show, such as Father's Day, Graduation, Summer, and more. Here, we've picked Photo Cards, a fun theme that works well with many types of photos.
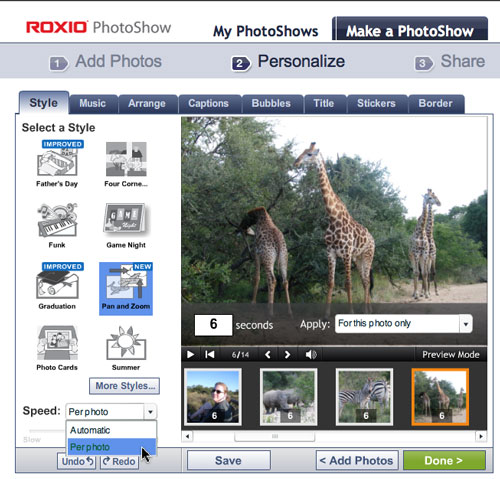
Another excellent general-purpose style is Pan & Zoom, also known as the "Ken Burns" style, which he used to great effect in his Civil War series. You can quickly preview your show with any number of styles to see what is best for you. You can also customize the timing for each slide, if desired, letting some slides stay onscreen longer than others.
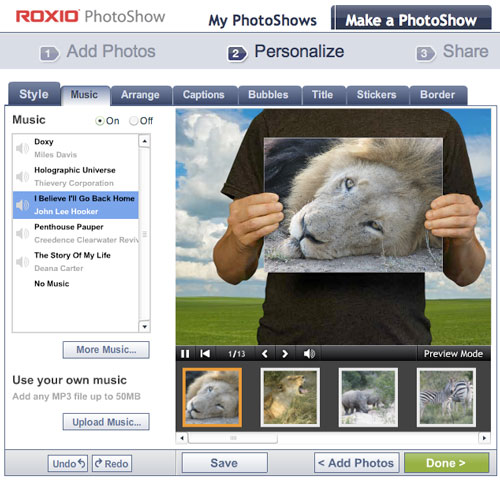
With the basic style down, it's time to add some background music (notice that we're simply following the tabs at the top from left to right -- although you can select tabs in any order). We chose a free track from John Lee Hooker, but with a Premium account, you can also choose any DRM-free MP3 track from your own music collection.
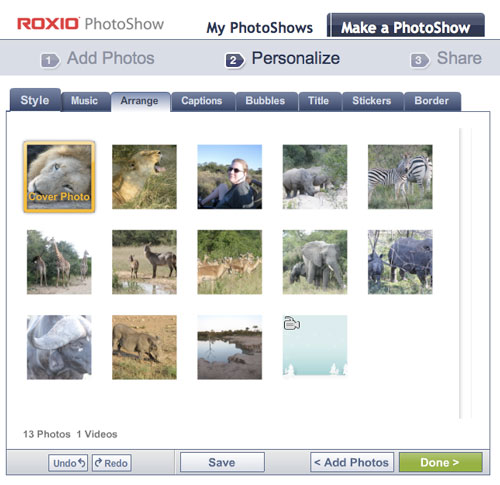
Next, we'll arrange the photos and videos in the order that we want them to appear by dragging them around. Note the camcorder icon on the last thumbnail. This signifies a video clip.
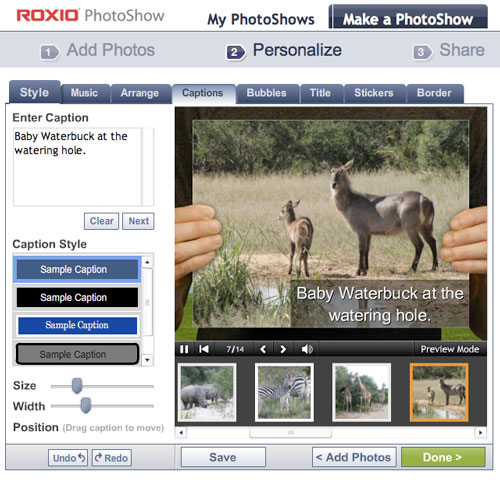
Moving on down the line, we come to the Captions tab. Captions can be added in any style or size of text, and positioned independently anywhere on your image. This makes it easy to customize captions for each slide. Captions are where you can get really funny and creative, bringing your photos alive for your viewers.
The fun doesn't stop there: you can also add speech bubbles, more titles, stickers, and borders. Stickers are basically animated graphics, in tons of fun shapes and themes. You'll find everything from hopping Easter bunnies to scary pumpkins in the sticker library.
Sharing Your Show
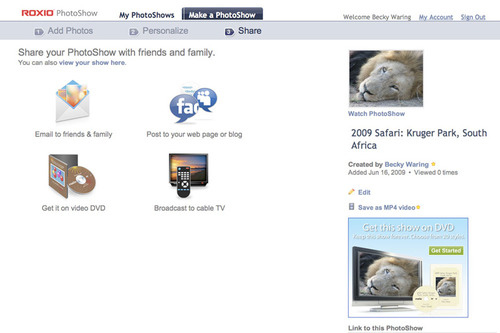
You can continue to play with your show and add or change elements. But we're finished, so we'll click the Done button and start sharing! There are four basic sharing options: you can email a link to view your show to friends and family; post the show to your Web page or blog; purchase your show on DVD; and even broadcast it to cable TV with certain providers. With a Premium account, you can also save your show to your hard drive in MP4 format, for viewing on your iPod or other portable player.
When your recipients click the link in the PhotoShow email, they'll be brought to the PhotoShow site to view the show. If they don't already have an account, they'll be prompted to create one, since an account is needed to preserve the privacy of your shows. At that point viewers can also do things like buy photo prints or a DVD of the show, or download it for viewing on a portable media player, depending on whether they have a standard or Premium account.
We hope that's given you a taste of how easy it easy to make a PhotoShow! You can also upload photos directly from your iPhone with the PhotoShow iPhone app, or use the PhotoShow Uploaders on BlackBerry and Windows Mobile phones. It's never been easier to share your adventures securely and privately.
